이 안내서에는 최근 변경 사항이 더 있습니다. 최신 비검증 버전으로 전환하십시오.
소개
This guide will walk you through removing the keyboard. The keyboard may need to be removed if it is damaged, or simply for easy access to clean.
필요한 것
-
-
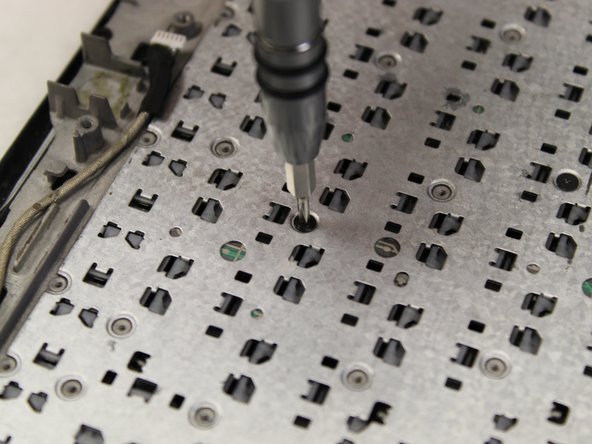
Remove the 12 5mm Phillips #00 screws.
-
Use a plastic opening tool to gently pry open the back panel.
-
Gently lift up the back panel, exposing the internals of the laptop.
-
-
-
Remove the motherboard connector cables by gently lifting the black latch that clamps them in place with a spudger or simply pull the connector from the port.
-
-
-
-
The 30 1mm PH000 screws holding the keyboard in place will be distributed all over the back.
-
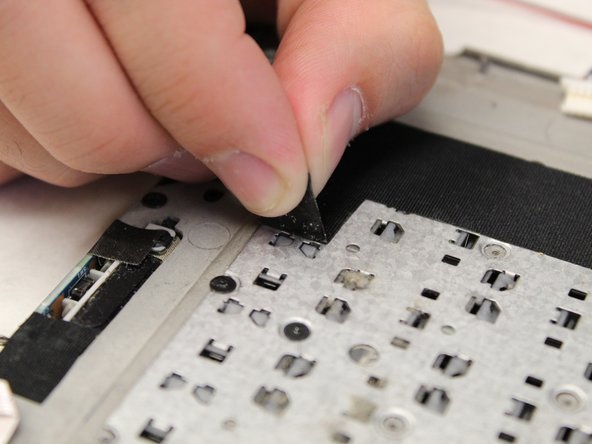
You will need to gently pry up the black tape to expose the remaining screws.
-


To reassemble your device, follow these instructions in reverse order.
To reassemble your device, follow these instructions in reverse order.
다른 한 분이 해당 안내서를 완성하였습니다.
팀

Washington State, Team S1-G4, Hope Fall 2018 Washington State, Team S1-G4, Hope Fall 2018 회원
WSU-HOPE-F18S1G4
3 회원들
안내서 6개 작성하였습니다