주요 콘텐츠로 건너뛰기

Acer Chromebook CB5-132T-C8ZW Motherboard Replacement

필요한 것

  1. Acer Chromebook CB5-132T-C8ZW Motherboard Replacement, Battery: 1 단계, 이미지 1/1
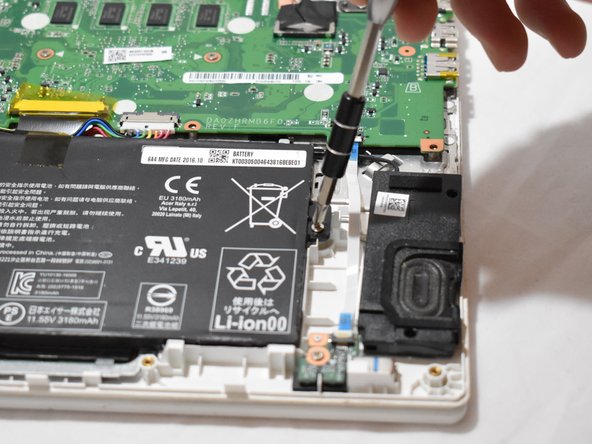
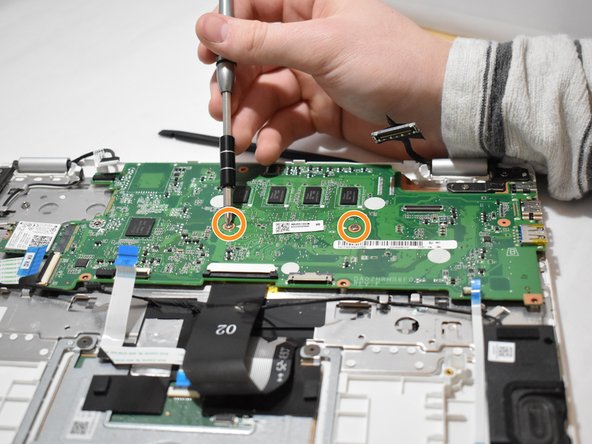
    • Remove eleven 7.2 mm screws from the bottom of the Chromebook using a JIS #1 screwdriver.

  2. Acer Chromebook CB5-132T-C8ZW Motherboard Replacement: 2 단계, 이미지 1/2 Acer Chromebook CB5-132T-C8ZW Motherboard Replacement: 2 단계, 이미지 2/2
    • Insert and slightly twist a plastic opening tool to separate and remove the backing of the Chromebook from the body.

    • Do not immediately remove the back from the laptop. The power strip keeps the backing attached to the rest of the laptop. Gently lift backing from the power button side and set next to the body of the laptop.

  3. Acer Chromebook CB5-132T-C8ZW Motherboard Replacement: 3 단계, 이미지 1/2 Acer Chromebook CB5-132T-C8ZW Motherboard Replacement: 3 단계, 이미지 2/2
    • Remove two 4.6 mm JIS # screws at each end of the battery.

  4. Acer Chromebook CB5-132T-C8ZW Motherboard Replacement: 4 단계, 이미지 1/3 Acer Chromebook CB5-132T-C8ZW Motherboard Replacement: 4 단계, 이미지 2/3 Acer Chromebook CB5-132T-C8ZW Motherboard Replacement: 4 단계, 이미지 3/3
    • Carefully pull out the ribbon cable attached to the motherboard that runs wires to the battery.

    • Remove the battery.

  5. Acer Chromebook CB5-132T-C8ZW Motherboard Replacement, Motherboard: 5 단계, 이미지 1/3 Acer Chromebook CB5-132T-C8ZW Motherboard Replacement, Motherboard: 5 단계, 이미지 2/3 Acer Chromebook CB5-132T-C8ZW Motherboard Replacement, Motherboard: 5 단계, 이미지 3/3
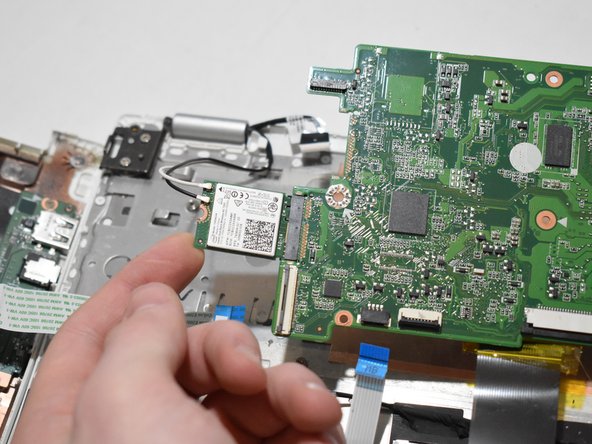
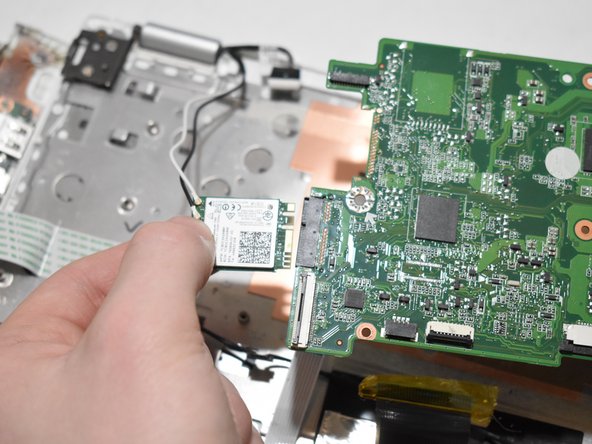
    • Remove the six tabs connected to the motherboard.

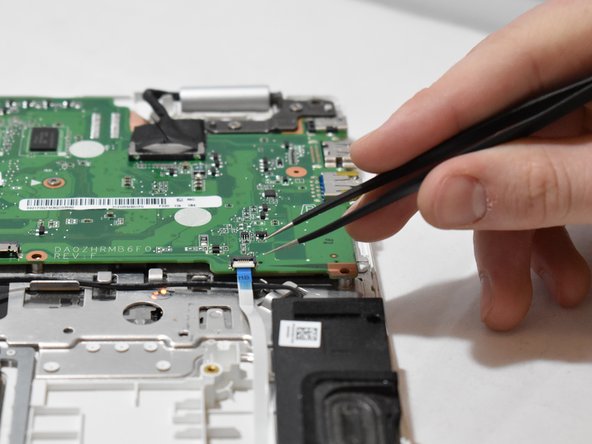
    • Flip up the white tabs on the connectors, and pull out blue connective strips.

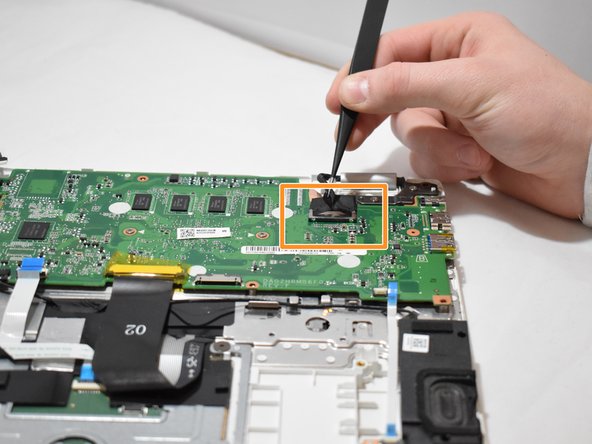
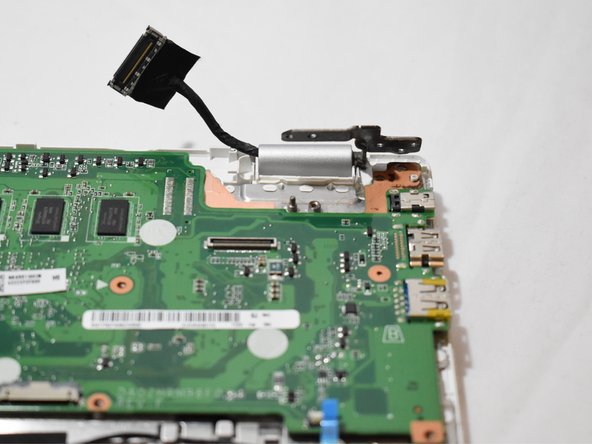
    • Pull up on the black connector on top right corner of the motherboard.

  6. Acer Chromebook CB5-132T-C8ZW Motherboard Replacement: 6 단계, 이미지 1/2 Acer Chromebook CB5-132T-C8ZW Motherboard Replacement: 6 단계, 이미지 2/2
    • Remove one 2.8mm JIS #1 screw from one end of the motherboard.

    • Remove two 2.2mm JIS #1 screws from the middle of the motherboard.

  7. Acer Chromebook CB5-132T-C8ZW Motherboard Replacement: 7 단계, 이미지 1/2 Acer Chromebook CB5-132T-C8ZW Motherboard Replacement: 7 단계, 이미지 2/2
    • Remove two 4.7mm JIS #1 screws from the black tab on the top right corner of the motherboard.

    • Flip the black tab up.

  8. Acer Chromebook CB5-132T-C8ZW Motherboard Replacement: 8 단계, 이미지 1/3 Acer Chromebook CB5-132T-C8ZW Motherboard Replacement: 8 단계, 이미지 2/3 Acer Chromebook CB5-132T-C8ZW Motherboard Replacement: 8 단계, 이미지 3/3
    • Lift the motherboard up from the laptop using a spudger tool.

    • Disconnect the chip attached to the right side of the motherboard.

결론

To reassemble your device, follow these instructions in reverse order.

다른 한 분이 해당 안내서를 완성하였습니다.

Lauren Reichenbach

회원 가입일: 01/13/20

580 평판

안내서 4개 작성하였습니다

댓글 0개

댓글 쓰기

조회 통계:

24 시간 전: 0

7일 전: 1

30일 전: 7

전체 시간: 393