주요 콘텐츠로 건너뛰기

Acer Spin 5 SP515-51GN-807G Motherboard Replacement

필요한 것

  1. Acer Spin 5 SP515-51GN-807G Motherboard Replacement, Back Cover: 1 단계, 이미지 1/1
    • Remove the eleven 6.5 mm screws that secure the back case using a Phillips #1 screwdriver.

  2. Acer Spin 5 SP515-51GN-807G Motherboard Replacement: 2 단계, 이미지 1/3 Acer Spin 5 SP515-51GN-807G Motherboard Replacement: 2 단계, 이미지 2/3 Acer Spin 5 SP515-51GN-807G Motherboard Replacement: 2 단계, 이미지 3/3
    • Use a plastic opening tool to gently pry open the back cover.

  3. Acer Spin 5 SP515-51GN-807G Motherboard Replacement: 3 단계, 이미지 1/1
    • Gently remove the back cover from the device.

  4. Acer Spin 5 SP515-51GN-807G Motherboard Replacement, Battery: 4 단계, 이미지 1/3 Acer Spin 5 SP515-51GN-807G Motherboard Replacement, Battery: 4 단계, 이미지 2/3 Acer Spin 5 SP515-51GN-807G Motherboard Replacement, Battery: 4 단계, 이미지 3/3
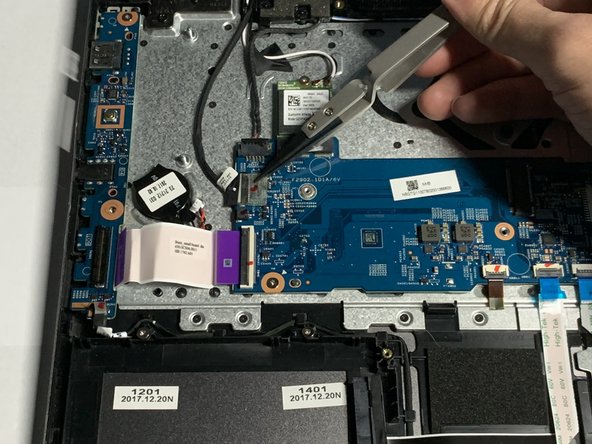
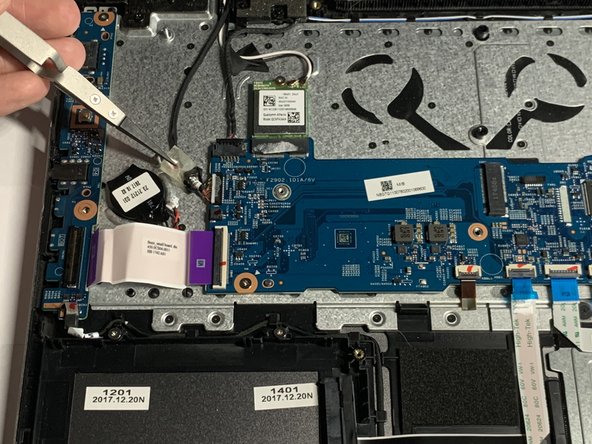
    • Using tweezers, remove the piece of black tape over the battery cable connector.

  5. Acer Spin 5 SP515-51GN-807G Motherboard Replacement: 5 단계, 이미지 1/3 Acer Spin 5 SP515-51GN-807G Motherboard Replacement: 5 단계, 이미지 2/3 Acer Spin 5 SP515-51GN-807G Motherboard Replacement: 5 단계, 이미지 3/3
    • Remove the piece of black tape that covers the battery.

  6. Acer Spin 5 SP515-51GN-807G Motherboard Replacement: 6 단계, 이미지 1/2 Acer Spin 5 SP515-51GN-807G Motherboard Replacement: 6 단계, 이미지 2/2
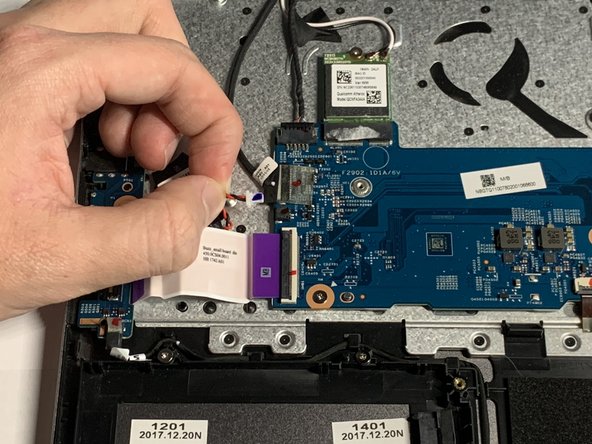
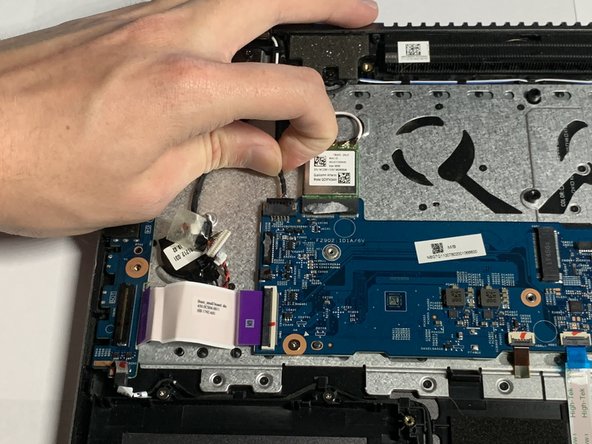
    • Grip the battery cable on both sides with your fingertips and gently pull it away from the port.

    • If needed, use the plastic opening tool to remove the cord from its port.

  7. Acer Spin 5 SP515-51GN-807G Motherboard Replacement: 7 단계, 이미지 1/3 Acer Spin 5 SP515-51GN-807G Motherboard Replacement: 7 단계, 이미지 2/3 Acer Spin 5 SP515-51GN-807G Motherboard Replacement: 7 단계, 이미지 3/3
    • Remove the two 3.5 mm screws that secure the battery using a Phillips #00 screwdriver (PH00 bit).

  8. Acer Spin 5 SP515-51GN-807G Motherboard Replacement: 8 단계, 이미지 1/2 Acer Spin 5 SP515-51GN-807G Motherboard Replacement: 8 단계, 이미지 2/2
    • Carefully place your fingers under the plastic lip where the screws were removed.

    • Lift upwards to remove the battery.

    • Do not bend or puncture the lithium ion battery as it poses a fire hazard.

  9. Acer Spin 5 SP515-51GN-807G Motherboard Replacement, Fan: 9 단계, 이미지 1/3 Acer Spin 5 SP515-51GN-807G Motherboard Replacement, Fan: 9 단계, 이미지 2/3 Acer Spin 5 SP515-51GN-807G Motherboard Replacement, Fan: 9 단계, 이미지 3/3
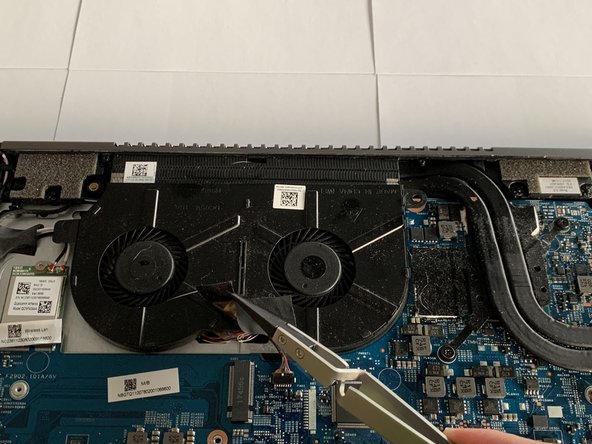
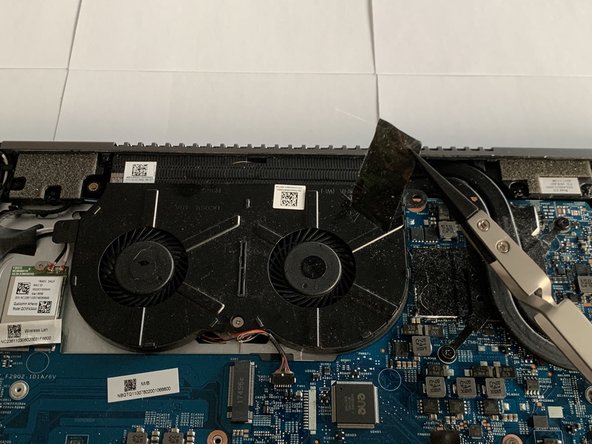
    • Remove the piece of tape covering the fan screw using a pair of tweezers.

    • This can also be done using your fingernail.

  10. Acer Spin 5 SP515-51GN-807G Motherboard Replacement: 10 단계, 이미지 1/3 Acer Spin 5 SP515-51GN-807G Motherboard Replacement: 10 단계, 이미지 2/3 Acer Spin 5 SP515-51GN-807G Motherboard Replacement: 10 단계, 이미지 3/3
    • Grip the cord that connects the fan to the motherboard and gently pull out to disconnect the cable from the connector.

  11. Acer Spin 5 SP515-51GN-807G Motherboard Replacement: 11 단계, 이미지 1/2 Acer Spin 5 SP515-51GN-807G Motherboard Replacement: 11 단계, 이미지 2/2
    • Remove the 3.5 mm screw connecting the fan to the computer using a Phillips #00 screwdriver (PH00 bit).

  12. Acer Spin 5 SP515-51GN-807G Motherboard Replacement: 12 단계, 이미지 1/2 Acer Spin 5 SP515-51GN-807G Motherboard Replacement: 12 단계, 이미지 2/2
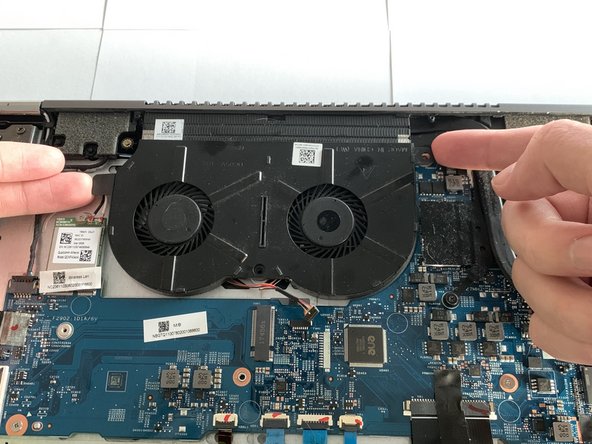
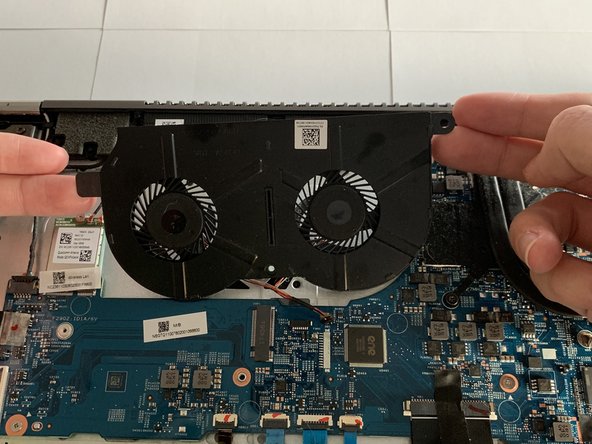
    • Grip the fan with your fingers by the edges and lift up to remove the fan.

  13. Acer Spin 5 SP515-51GN-807G Motherboard Replacement, Motherboard: 13 단계, 이미지 1/3 Acer Spin 5 SP515-51GN-807G Motherboard Replacement, Motherboard: 13 단계, 이미지 2/3 Acer Spin 5 SP515-51GN-807G Motherboard Replacement, Motherboard: 13 단계, 이미지 3/3
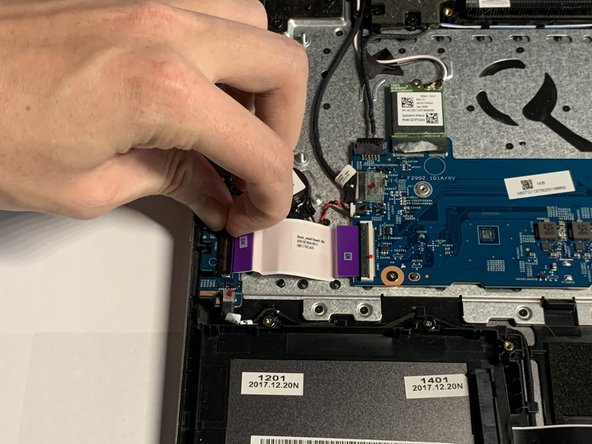
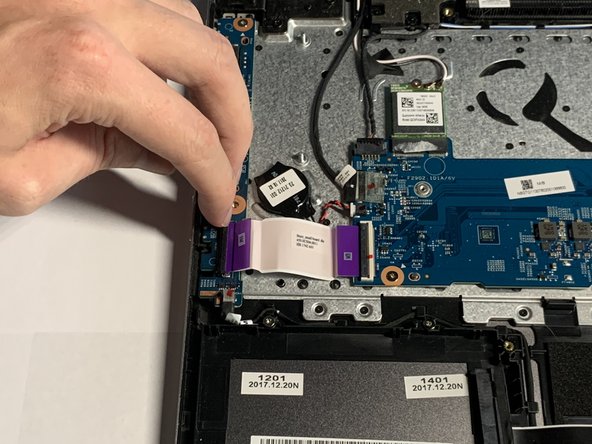
    • Place your fingernail underneath the locking tab of the ZIF connector holding the interconnect cable on the USB/Side Port board.

    • Lift the black clamp upwards to release the cable.

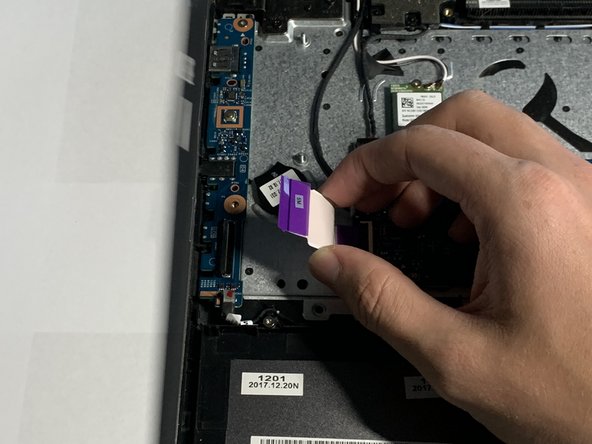
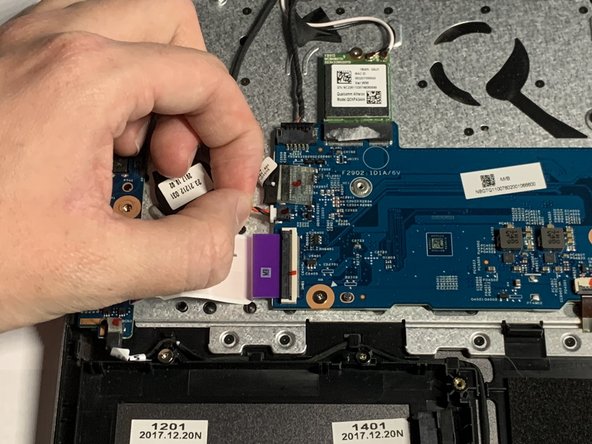
  14. Acer Spin 5 SP515-51GN-807G Motherboard Replacement: 14 단계, 이미지 1/2 Acer Spin 5 SP515-51GN-807G Motherboard Replacement: 14 단계, 이미지 2/2
    • Pull the USB/Side Port Board cable away from the port.

  15. Acer Spin 5 SP515-51GN-807G Motherboard Replacement: 15 단계, 이미지 1/3 Acer Spin 5 SP515-51GN-807G Motherboard Replacement: 15 단계, 이미지 2/3 Acer Spin 5 SP515-51GN-807G Motherboard Replacement: 15 단계, 이미지 3/3
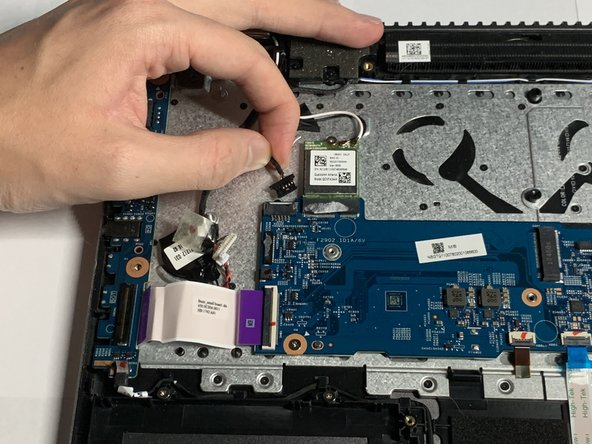
    • Firmly grasp the cable that connects the speakers to the motherboard.

    • Gently pull the cable away from the motherboard.

  16. Acer Spin 5 SP515-51GN-807G Motherboard Replacement: 16 단계, 이미지 1/3 Acer Spin 5 SP515-51GN-807G Motherboard Replacement: 16 단계, 이미지 2/3 Acer Spin 5 SP515-51GN-807G Motherboard Replacement: 16 단계, 이미지 3/3
    • Peel back the tape covering the cable port.

    • This step can be completed using either your fingernails or a set of tweezers.

  17. Acer Spin 5 SP515-51GN-807G Motherboard Replacement: 17 단계, 이미지 1/2 Acer Spin 5 SP515-51GN-807G Motherboard Replacement: 17 단계, 이미지 2/2
    • Firmly grasp the cable.

    • Gently pull the cable away from the motherboard.

  18. Acer Spin 5 SP515-51GN-807G Motherboard Replacement: 18 단계, 이미지 1/3 Acer Spin 5 SP515-51GN-807G Motherboard Replacement: 18 단계, 이미지 2/3 Acer Spin 5 SP515-51GN-807G Motherboard Replacement: 18 단계, 이미지 3/3
    • Firmly grasp the cable.

    • Gently pull the cable away from the motherboard.

  19. Acer Spin 5 SP515-51GN-807G Motherboard Replacement: 19 단계, 이미지 1/2 Acer Spin 5 SP515-51GN-807G Motherboard Replacement: 19 단계, 이미지 2/2
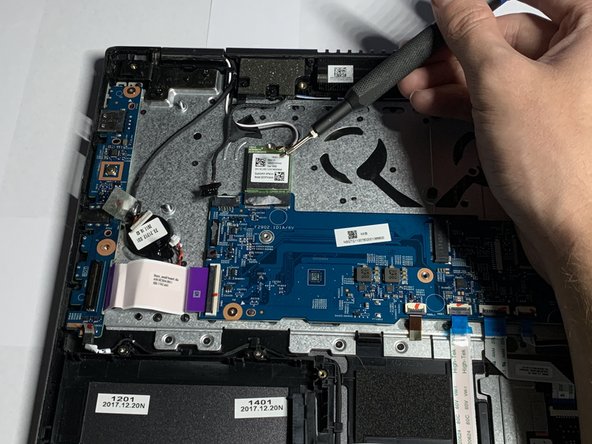
    • Remove the one 3.5mm screw that secures the wireless card using a Phillips #00 screwdriver (PH00 bit).

  20. Acer Spin 5 SP515-51GN-807G Motherboard Replacement: 20 단계, 이미지 1/2 Acer Spin 5 SP515-51GN-807G Motherboard Replacement: 20 단계, 이미지 2/2
    • Gently pull the wireless card away from the motherboard.

  21. Acer Spin 5 SP515-51GN-807G Motherboard Replacement: 21 단계, 이미지 1/3 Acer Spin 5 SP515-51GN-807G Motherboard Replacement: 21 단계, 이미지 2/3 Acer Spin 5 SP515-51GN-807G Motherboard Replacement: 21 단계, 이미지 3/3
    • Place your fingernail underneath the black tab which secures the cable in the ZIF connector.

    • Lift the black tab upwards to release the cable.

    • Gently pull the cable away from the motherboard.

  22. Acer Spin 5 SP515-51GN-807G Motherboard Replacement: 22 단계, 이미지 1/3 Acer Spin 5 SP515-51GN-807G Motherboard Replacement: 22 단계, 이미지 2/3 Acer Spin 5 SP515-51GN-807G Motherboard Replacement: 22 단계, 이미지 3/3
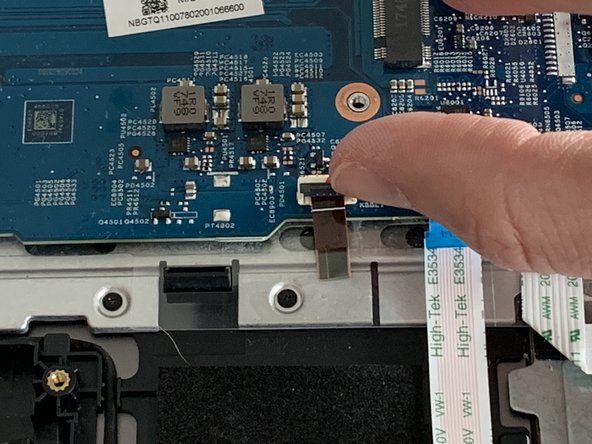
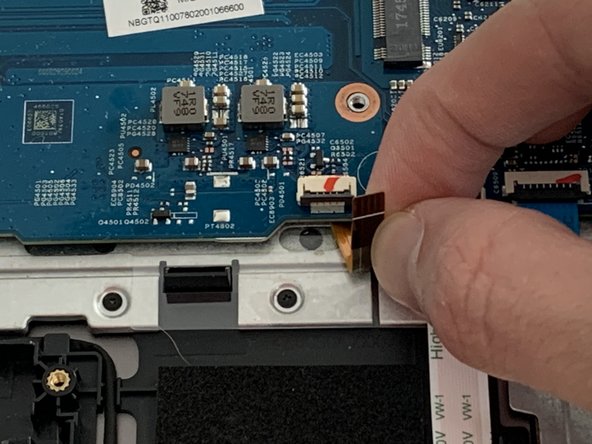
    • Place your fingernail underneath the black tab which secures the cable in the ZIF connector.

    • Lift the black tab upwards to release the cable.

    • Gently pull the cable away from the motherboard.

  23. Acer Spin 5 SP515-51GN-807G Motherboard Replacement: 23 단계, 이미지 1/3 Acer Spin 5 SP515-51GN-807G Motherboard Replacement: 23 단계, 이미지 2/3 Acer Spin 5 SP515-51GN-807G Motherboard Replacement: 23 단계, 이미지 3/3
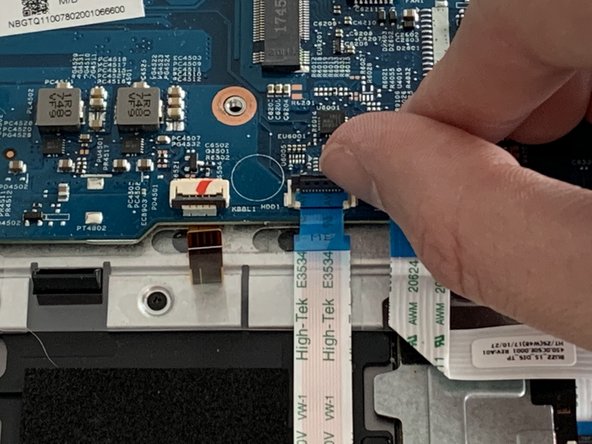
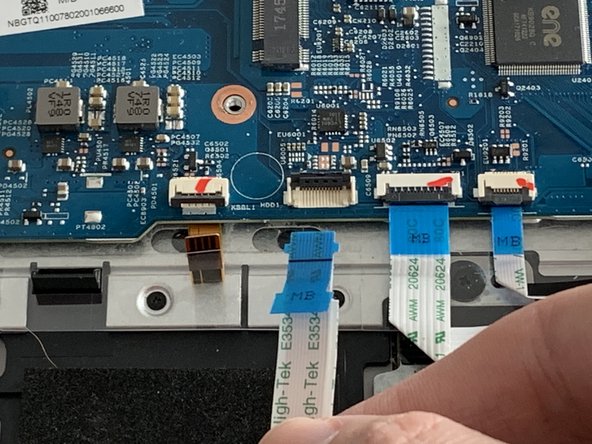
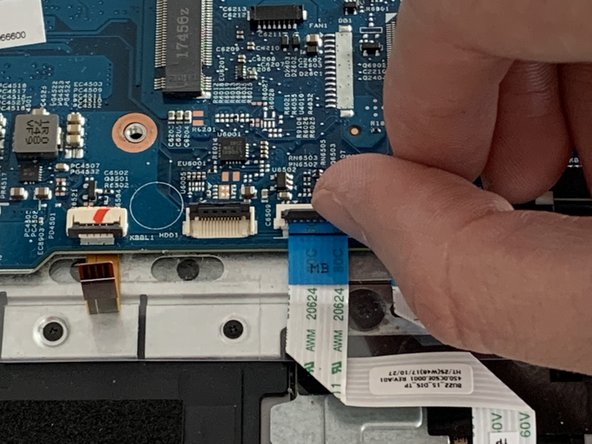
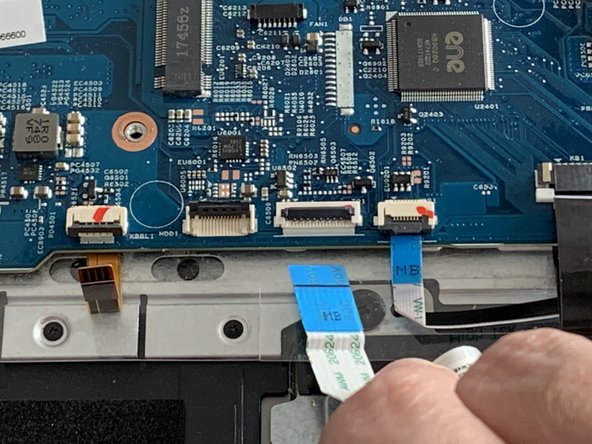
    • Place your fingernail underneath the black clamp which secures the cable.

    • Lift the black clamp upwards to release the cable.

    • Gently pull the cable away from the motherboard.

  24. Acer Spin 5 SP515-51GN-807G Motherboard Replacement: 24 단계, 이미지 1/3 Acer Spin 5 SP515-51GN-807G Motherboard Replacement: 24 단계, 이미지 2/3 Acer Spin 5 SP515-51GN-807G Motherboard Replacement: 24 단계, 이미지 3/3
    • Place your fingernail underneath the black clamp which secures the cable.

    • Lift the black clamp upwards to release the cable.

    • Gently pull the cable away from the motherboard.

  25. Acer Spin 5 SP515-51GN-807G Motherboard Replacement: 25 단계, 이미지 1/3 Acer Spin 5 SP515-51GN-807G Motherboard Replacement: 25 단계, 이미지 2/3 Acer Spin 5 SP515-51GN-807G Motherboard Replacement: 25 단계, 이미지 3/3
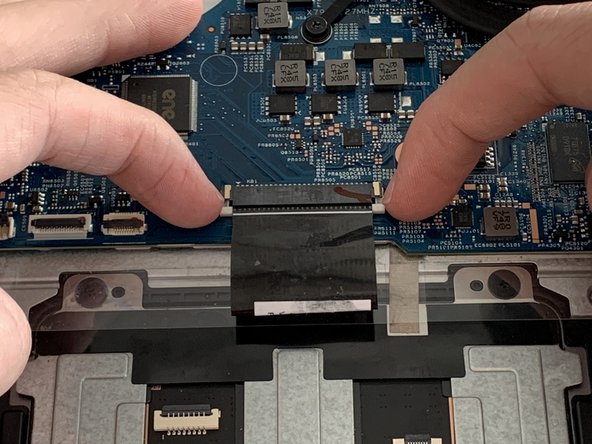
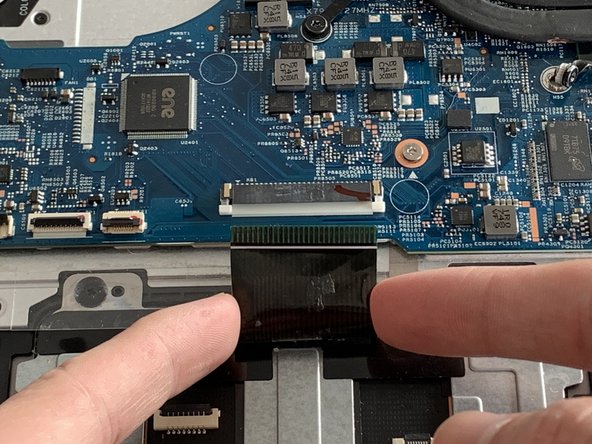
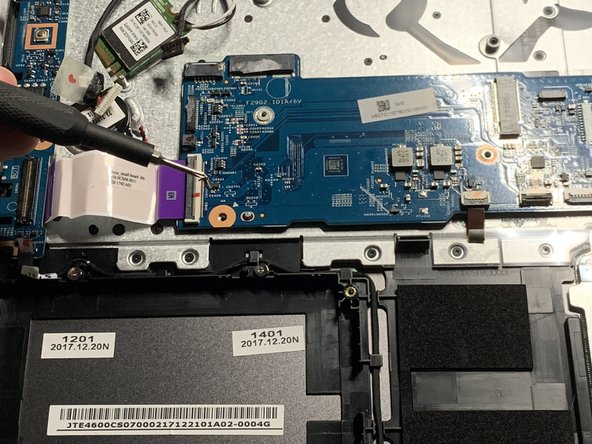
    • Grip the two white clamps on each side of the cable with your fingernails and pull away from the motherboard to release the cable.

    • Gently pull the cable away from the motherboard.

  26. Acer Spin 5 SP515-51GN-807G Motherboard Replacement: 26 단계, 이미지 1/3 Acer Spin 5 SP515-51GN-807G Motherboard Replacement: 26 단계, 이미지 2/3 Acer Spin 5 SP515-51GN-807G Motherboard Replacement: 26 단계, 이미지 3/3
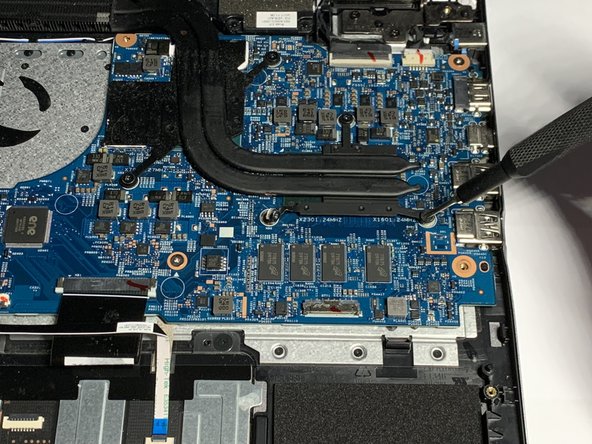
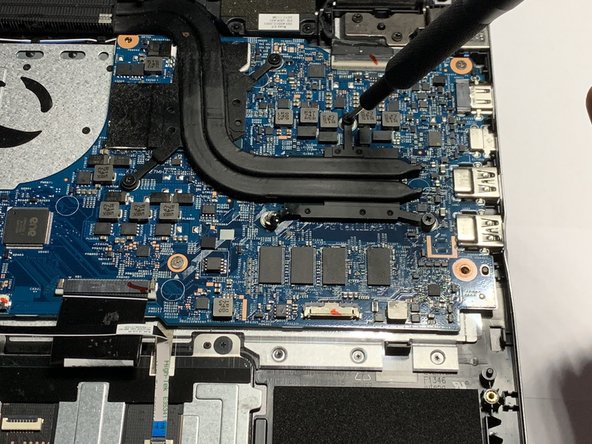
    • Remove the three 3.5mm screws that secure the heatsink using a Phillips #00 screwdriver (PH00 bit).

  27. Acer Spin 5 SP515-51GN-807G Motherboard Replacement: 27 단계, 이미지 1/2 Acer Spin 5 SP515-51GN-807G Motherboard Replacement: 27 단계, 이미지 2/2
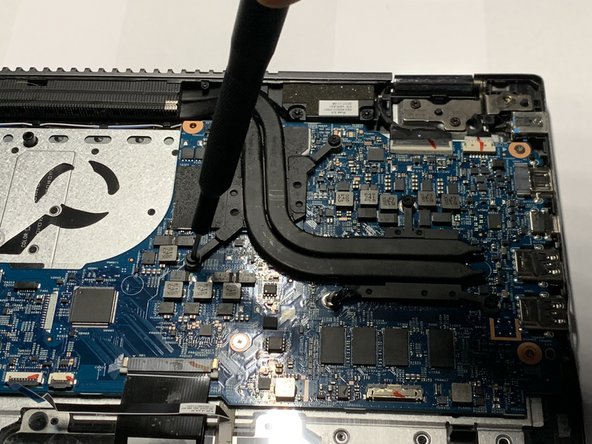
    • Remove the two 3.5mm screws that secure the heatsink using a Phillips #00 screwdriver (PH00 bit).

  28. Acer Spin 5 SP515-51GN-807G Motherboard Replacement: 28 단계, 이미지 1/3 Acer Spin 5 SP515-51GN-807G Motherboard Replacement: 28 단계, 이미지 2/3 Acer Spin 5 SP515-51GN-807G Motherboard Replacement: 28 단계, 이미지 3/3
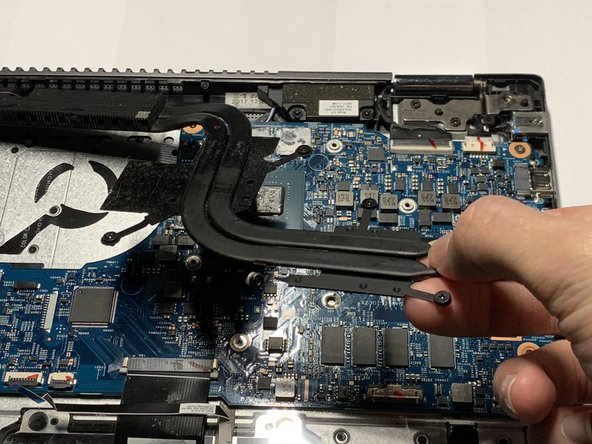
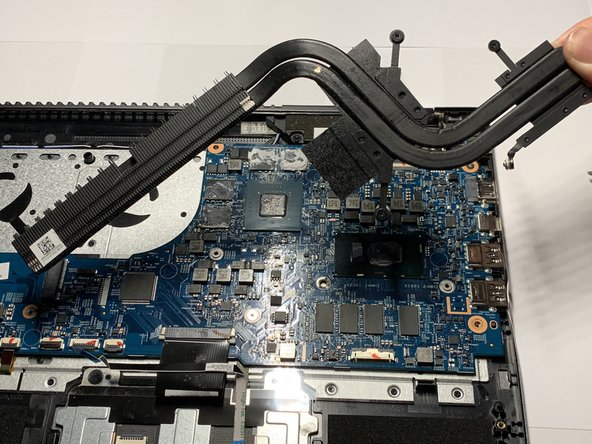
    • Lift the heat-sink unit upwards and remove it from motherboard.

    • Do not power on your laptop with the heat-sink unit removed as this will cause heat damage to your processor.

    • When removing a heat-sink unit from the processor (CPU), follow the steps on Applying Thermal Paste before reinstalling the heat-sink and powering on the device.

  29. Acer Spin 5 SP515-51GN-807G Motherboard Replacement: 29 단계, 이미지 1/3 Acer Spin 5 SP515-51GN-807G Motherboard Replacement: 29 단계, 이미지 2/3 Acer Spin 5 SP515-51GN-807G Motherboard Replacement: 29 단계, 이미지 3/3
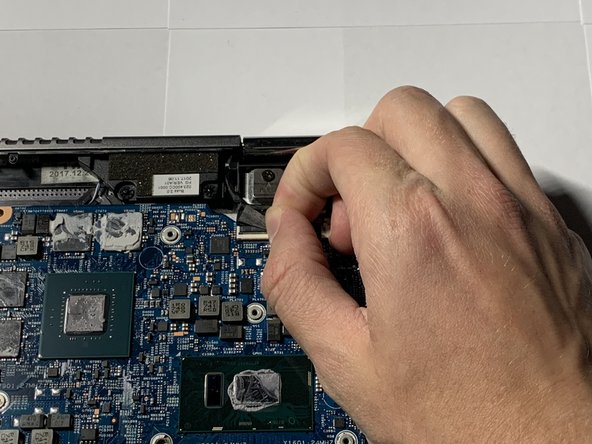
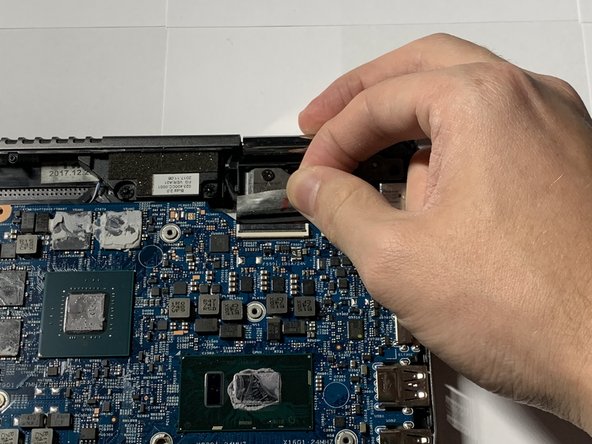
    • Peel back the tape covering the port.

  30. Acer Spin 5 SP515-51GN-807G Motherboard Replacement: 30 단계, 이미지 1/3 Acer Spin 5 SP515-51GN-807G Motherboard Replacement: 30 단계, 이미지 2/3 Acer Spin 5 SP515-51GN-807G Motherboard Replacement: 30 단계, 이미지 3/3
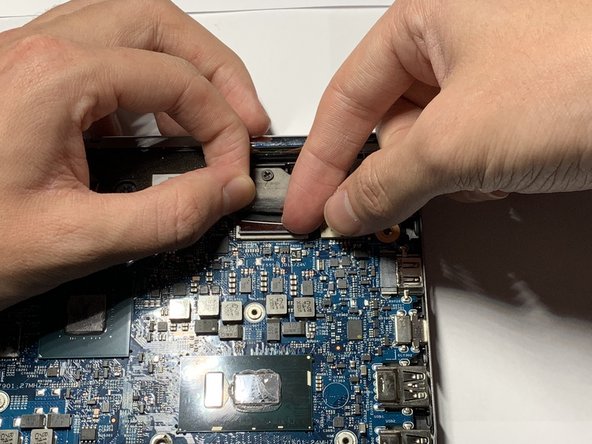
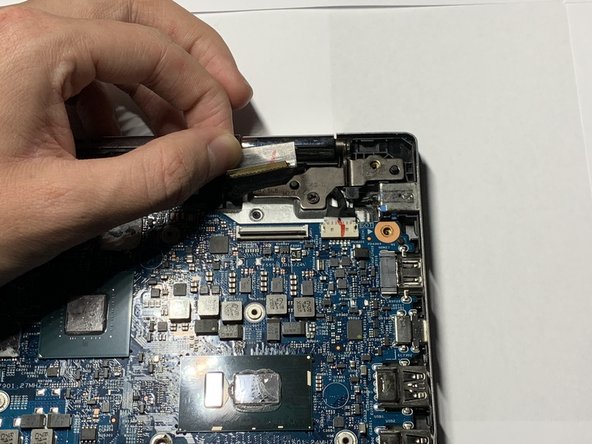
    • Place your fingernail underneath the black clamp that secures the cable to the ZIF connector.

    • Lift the black clamp upwards to release the cable.

    • Pull the cable away from the motherboard.

  31. Acer Spin 5 SP515-51GN-807G Motherboard Replacement: 31 단계, 이미지 1/3 Acer Spin 5 SP515-51GN-807G Motherboard Replacement: 31 단계, 이미지 2/3 Acer Spin 5 SP515-51GN-807G Motherboard Replacement: 31 단계, 이미지 3/3
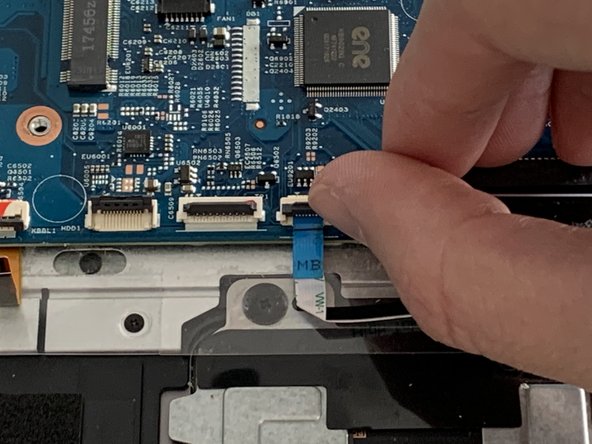
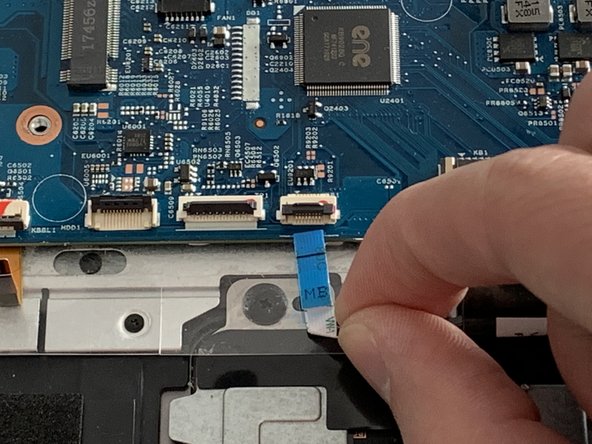
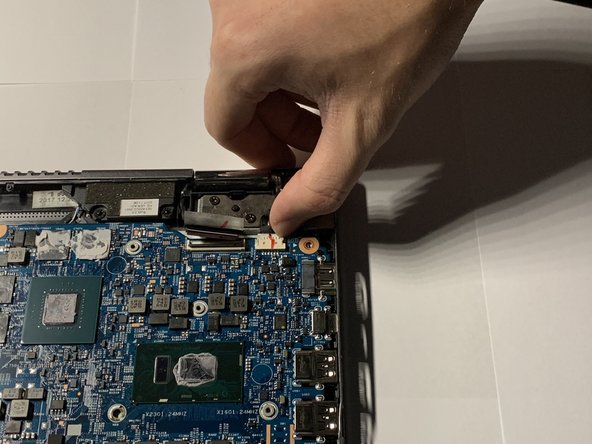
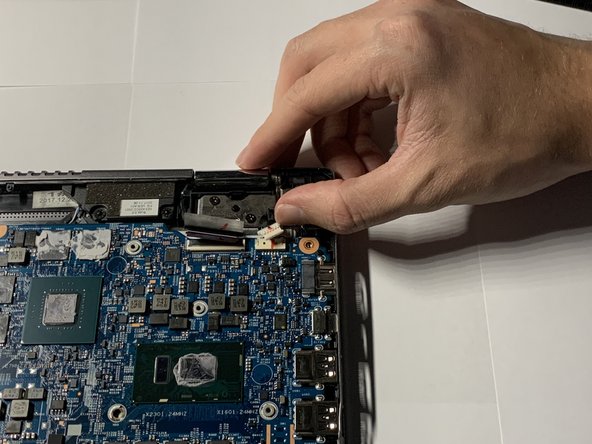
    • Grip the cable on either side with your fingertips and gently pull away from the port.

    • If needed, use the plastic opening tool to remove the cord from its port.

  32. Acer Spin 5 SP515-51GN-807G Motherboard Replacement: 32 단계, 이미지 1/3 Acer Spin 5 SP515-51GN-807G Motherboard Replacement: 32 단계, 이미지 2/3 Acer Spin 5 SP515-51GN-807G Motherboard Replacement: 32 단계, 이미지 3/3
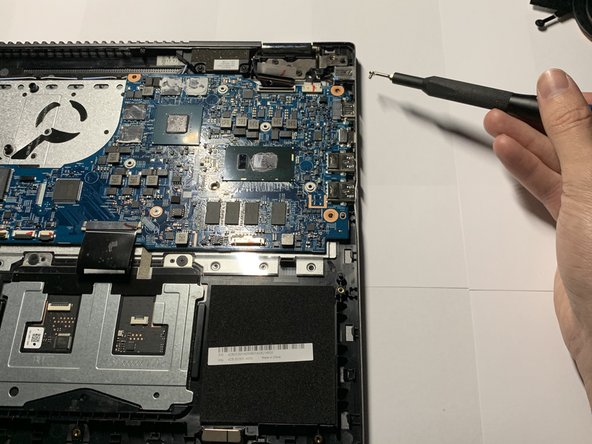
    • Remove the six 3.5mm screws that secure the motherboard to the laptop using a Phillips #00 screwdriver (PH00 bit).

  33. Acer Spin 5 SP515-51GN-807G Motherboard Replacement: 33 단계, 이미지 1/2 Acer Spin 5 SP515-51GN-807G Motherboard Replacement: 33 단계, 이미지 2/2
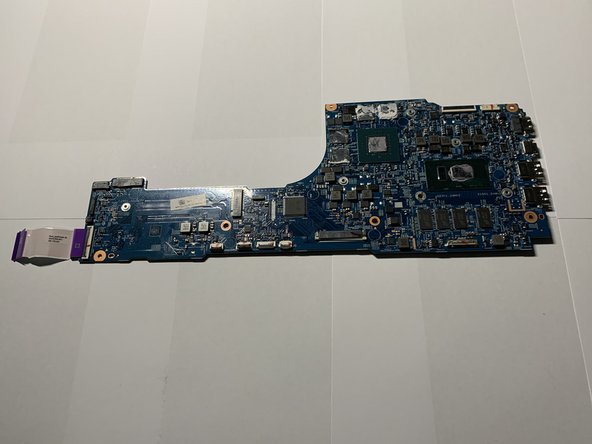
    • Remove the motherboard from the laptop.

결론

To reassemble your device, follow these instructions in reverse order.

다른 한 분이 해당 안내서를 완성하였습니다.

James Wasielewski

회원 가입일: 01/24/20

1,042 평판

안내서 6개 작성하였습니다

댓글 0개

댓글 쓰기

조회 통계:

24 시간 전: 0

7일 전: 3

30일 전: 12

전체 시간: 1,039