소개
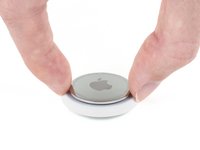
이 안내서를 따라서 Apple AirTag 배터리를 교체하세요.
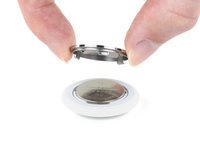
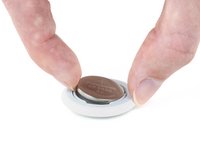
AirTag는 CR2032 코인 셀 배터리 하나를 사용합니다.
필요한 것


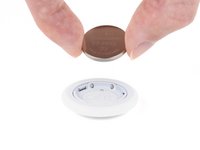
기기를 재조립하려면, 이 지침들을 역순으로 따르세요.
기기를 재조립하려면, 이 지침들을 역순으로 따르세요.
다른 22명이 해당 안내서를 완성하였습니다.
다음 번역가들에게 특별히 감사 드립니다:
100%


이 번역인들은 저희가 세상을 수리하는 데 도움을 주고 있어요! 기여하시겠습니까?
번역 시작하기 ›

댓글 6개
Bjr. Plus d’un an après l’achat de l’AirTag, impossible de l’ouvrir. Quand je presse avec 2 doigts, il ne se passe rien (le couvercle ne s’enfonce pas). Et le couvercle a l’air bloqué (grippé). J’hésite à utiliser une pince pour le tourner. Mon AirTag est resté depuis son achat dans une poche étanche de mon sac à dos. Il ne sonne plus quand je déplace ce dernier mais sonne si je le localise. Cdlt.
Eugénie, excusez mon français. Essayez de saisir l'AirTag des deux côtés avec quelque chose qui a de l'adhérence, comme du silicone. Appuyez ensuite vers le bas et tournez. Assurez-vous de tourner dans le bon sens. Bonne chance!
Well done! One thing to add is that the replacement battery must not have a bitterant coating as they are problematic with the AirTags.
Removing the bitterant with some isopropyl (rubbing) alcohol works if you aren’t able to find unflavored batteries near by.