주요 콘텐츠로 건너뛰기

Amazon Echo Show 8 2nd Generation Camera Replacement

필요한 것

  1. Amazon Echo Show 8 2nd Generation Camera Replacement, Rear Case: 1 단계, 이미지 1/3 Amazon Echo Show 8 2nd Generation Camera Replacement, Rear Case: 1 단계, 이미지 2/3 Amazon Echo Show 8 2nd Generation Camera Replacement, Rear Case: 1 단계, 이미지 3/3
    • Flip the device so that the rubber foot is facing up.

    • Insert a Jimmy between the rubber foot and chassis, then slide it around the perimeter until the rubber foot releases.

    • The adhesive that holds the rubber mat on may require some force to sever.

    • Remove the rubber foot.

  2. Amazon Echo Show 8 2nd Generation Camera Replacement: 2 단계, 이미지 1/3 Amazon Echo Show 8 2nd Generation Camera Replacement: 2 단계, 이미지 2/3 Amazon Echo Show 8 2nd Generation Camera Replacement: 2 단계, 이미지 3/3
    • Use a T6 Torx screwdriver to remove the five 4.5 mm screws from the base of the device.

  3. Amazon Echo Show 8 2nd Generation Camera Replacement: 3 단계, 이미지 1/3 Amazon Echo Show 8 2nd Generation Camera Replacement: 3 단계, 이미지 2/3 Amazon Echo Show 8 2nd Generation Camera Replacement: 3 단계, 이미지 3/3
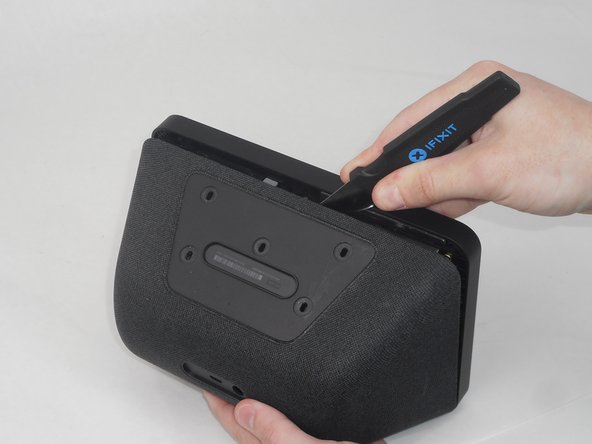
    • Insert a Jimmy in the gap between the front and rear case.

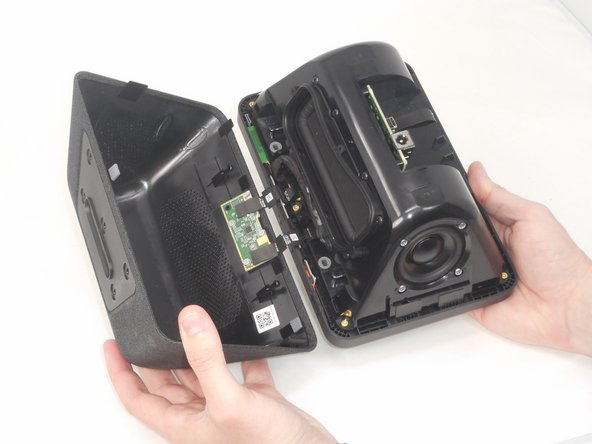
    • Work the Jimmy around the perimeter to gently detach the rear case from the front case.

    • Separate the rear case from the front case.

    • There are 2 thin ribbon cables connecting the microphone board to the back cover. Take care not to tear or strain them as you separate the cases.

  4. Amazon Echo Show 8 2nd Generation Camera Replacement: 4 단계, 이미지 1/3 Amazon Echo Show 8 2nd Generation Camera Replacement: 4 단계, 이미지 2/3 Amazon Echo Show 8 2nd Generation Camera Replacement: 4 단계, 이미지 3/3
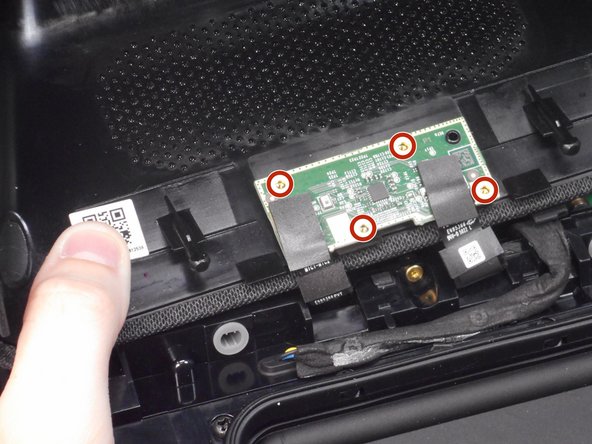
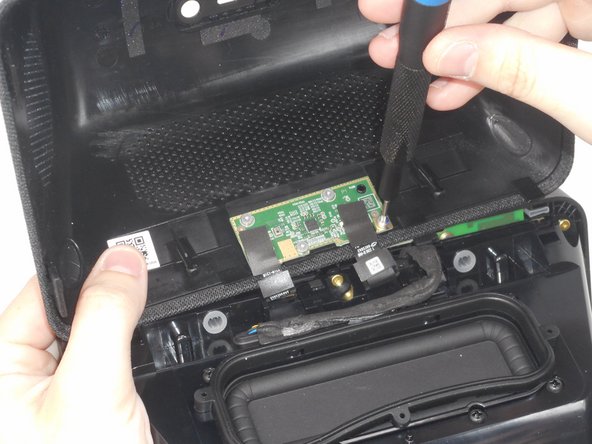
    • Use a T6 Torx screwdriver to remove the four 5.25 mm screws that secure the microphone board to the rear case.

  5. Amazon Echo Show 8 2nd Generation Camera Replacement, Camera: 5 단계, 이미지 1/3 Amazon Echo Show 8 2nd Generation Camera Replacement, Camera: 5 단계, 이미지 2/3 Amazon Echo Show 8 2nd Generation Camera Replacement, Camera: 5 단계, 이미지 3/3
    • Use a T6 Torx screwdriver to remove the six 7.6 mm screws that secure the speaker housing to the screen assembly.

    • There is a screw that is not pictured in the center of the bottom two screws.

  6. Amazon Echo Show 8 2nd Generation Camera Replacement: 6 단계, 이미지 1/3 Amazon Echo Show 8 2nd Generation Camera Replacement: 6 단계, 이미지 2/3 Amazon Echo Show 8 2nd Generation Camera Replacement: 6 단계, 이미지 3/3
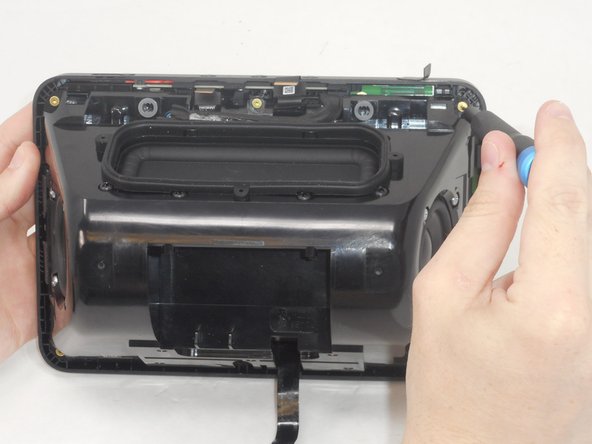
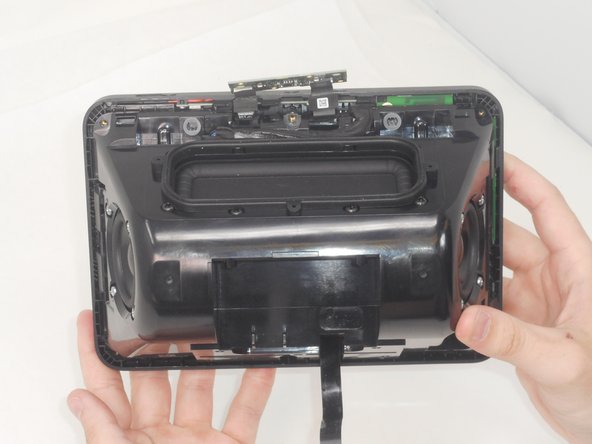
    • Gently separate the speaker housing from the display assembly and set the device on a flat surface.

    • There is a cable connecting the speaker housing to the display assembly. Take care not to pull on it while separating the two parts.

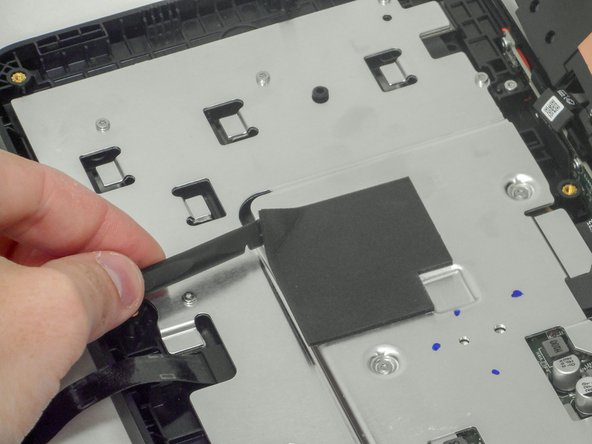
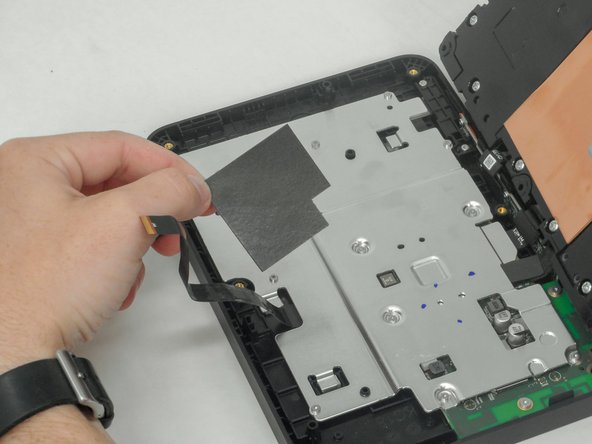
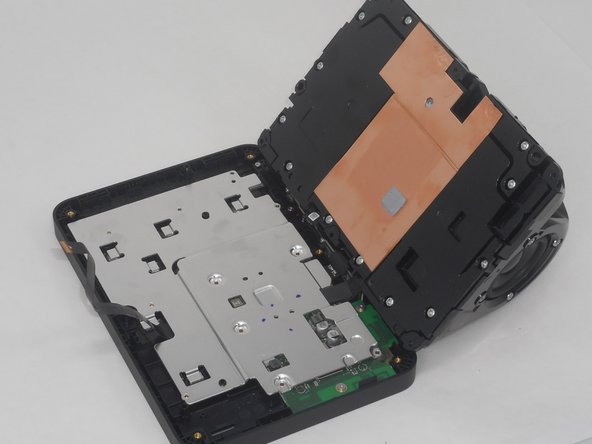
    • Use a plastic spudger to pry up and remove the foam mat at the center of the silver bracket.

  7. Amazon Echo Show 8 2nd Generation Camera Replacement: 7 단계, 이미지 1/2 Amazon Echo Show 8 2nd Generation Camera Replacement: 7 단계, 이미지 2/2
    • Use a T6 Torx screwdriver to remove the eleven 6 mm screws that secure the silver bracket.

  8. Amazon Echo Show 8 2nd Generation Camera Replacement: 8 단계, 이미지 1/3 Amazon Echo Show 8 2nd Generation Camera Replacement: 8 단계, 이미지 2/3 Amazon Echo Show 8 2nd Generation Camera Replacement: 8 단계, 이미지 3/3
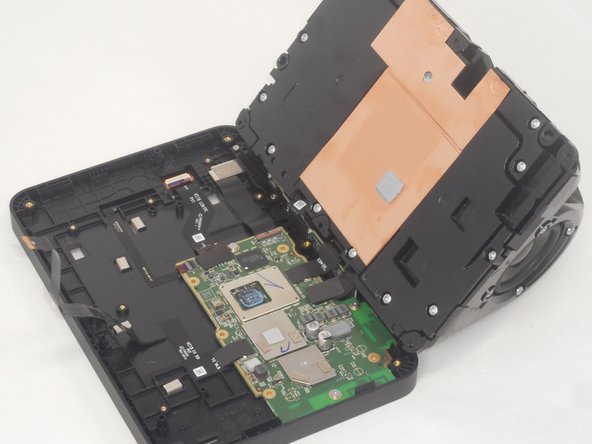
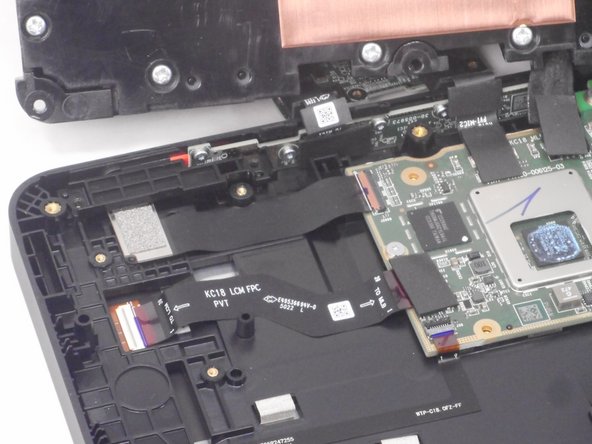
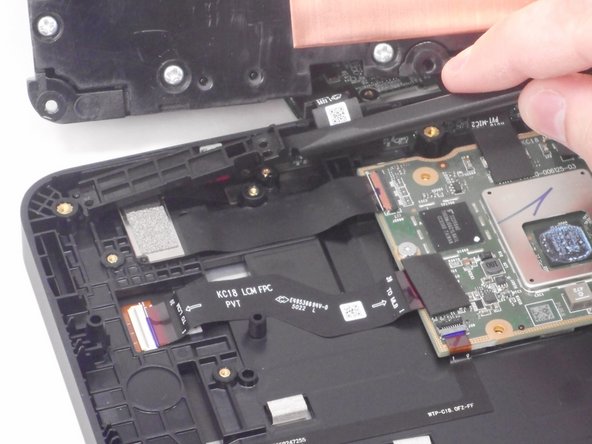
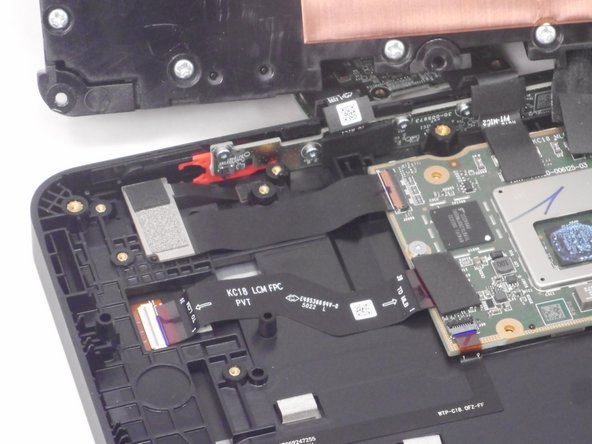
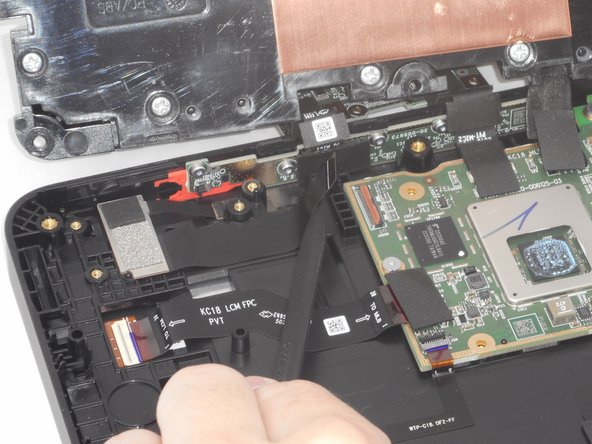
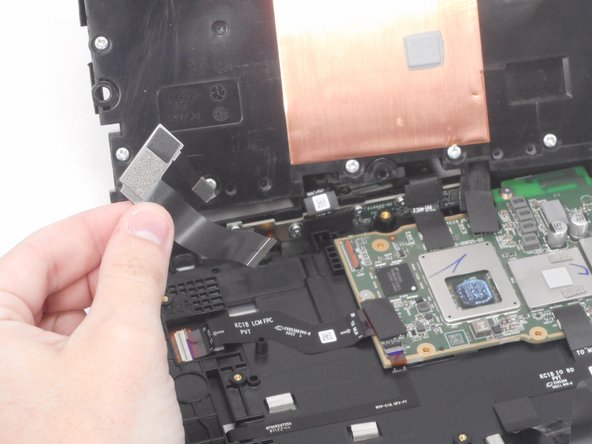
    • Use a plastic spudger to lift up the remove the silver bracket.

    • The camera is located to the left of the mother board.

  9. Amazon Echo Show 8 2nd Generation Camera Replacement: 9 단계, 이미지 1/3 Amazon Echo Show 8 2nd Generation Camera Replacement: 9 단계, 이미지 2/3 Amazon Echo Show 8 2nd Generation Camera Replacement: 9 단계, 이미지 3/3
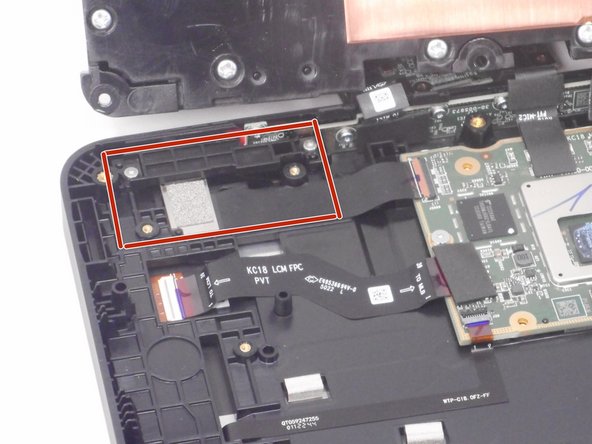
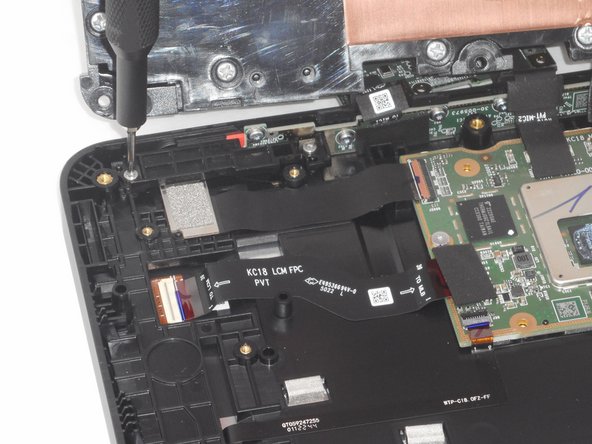
    • Use a T6 Torx screwdriver to remove the two 6 mm screws that secure the camera retention plate.

  10. Amazon Echo Show 8 2nd Generation Camera Replacement: 10 단계, 이미지 1/3 Amazon Echo Show 8 2nd Generation Camera Replacement: 10 단계, 이미지 2/3 Amazon Echo Show 8 2nd Generation Camera Replacement: 10 단계, 이미지 3/3
    • Use a spudger to slightly lift the camera retention plate.

    • Lift the camera retention plate up and out of the chassis.

  11. Amazon Echo Show 8 2nd Generation Camera Replacement: 11 단계, 이미지 1/2 Amazon Echo Show 8 2nd Generation Camera Replacement: 11 단계, 이미지 2/2
    • Use the pointed end of a spudger to flip up the camera ribbon cable ZIF locking flap.

    • Pull the ribbon cable directly out of its socket.

  12. Amazon Echo Show 8 2nd Generation Camera Replacement: 12 단계, 이미지 1/2 Amazon Echo Show 8 2nd Generation Camera Replacement: 12 단계, 이미지 2/2
    • Lift up the camera gently, and use the pointed end of the spudger to gently remove the thin black ribbon cable.

    • The thin tab holding is held down with adhesive. Be gentle when removing it to prevent tearing it.

결론

To reassemble your device, follow these instructions in reverse order.

Brian Le

회원 가입일: 02/14/24

675 평판

안내서 4개 작성하였습니다

University of Memphis, Team 1-3, Sneed Spring 2024 University of Memphis, Team 1-3, Sneed Spring 2024 회원

UM-SNEED-S24S1G3

3 회원들

안내서 6개 작성하였습니다

댓글 0개

댓글 쓰기

조회 통계:

24 시간 전: 0

7일 전: 0

30일 전: 7

전체 시간: 68