소개
If your Amazon Fire HD 8 12th Gen is losing charge faster than usual, taking a long while to recharge, or not charging at all, you may have a faulty battery. This can be used to remove and replace your battery with a new and fully functional battery.
The battery of the Amazon Fire HD 8 12th generation has 13-hour life span before needing recharging. It has a 4750 mAh Lithium Polymer Battery. This battery is the source of all your power and capabilities of the device. If the battery is not working then the device is not working. The battery of your device should be lasting around 13 hours depending on how you use your device. The time it should take to fully charge your battery should be 5 hours.
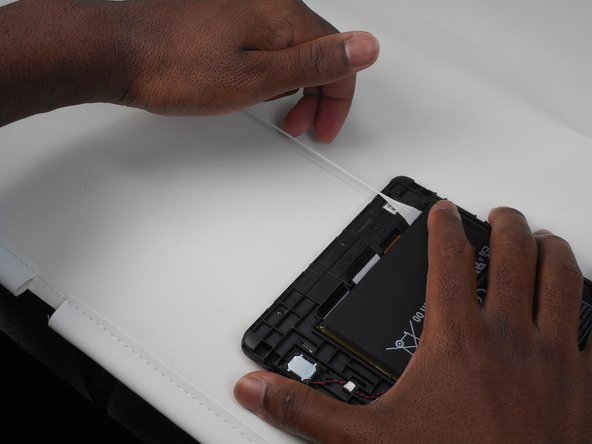
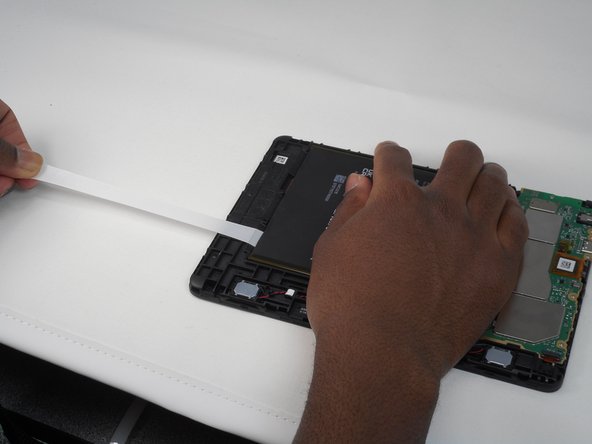
Before beginning this guide make sure your device is turned off, not hooked up to any power source, and make sure to unhook the battery from the motherboard. For this guide you will need spludgers, opening picks, and some adhesive to keep the new battery in place. You will need to remove the back casing to get to the battery. Once you’ve reached the battery, start pulling on the adhesive tape just sticking out from under the battery. Slowly and gently pull the adhesive up until it is fully out. Now the battery is ready for extraction and replacement.
필요한 것
-
1 단계 Buttons
주의: 1-2 단계들은 진행 중으로 표시된 안내서에서 제공되었습니다.
-
Put picks around the corner and move them along the edge to pry the case off.
-
Once there is separation between the case and the screen, place a pick in between the screen and on the corner of the back case.
-
-


To reassemble your device, follow these instructions in reverse order. Make sure you have applied new adhesive for the new battery placement to ensure it stays in place.
To reassemble your device, follow these instructions in reverse order. Make sure you have applied new adhesive for the new battery placement to ensure it stays in place.

팀

University of Memphis, Team 1-1, Sneed Fall 2023 University of Memphis, Team 1-1, Sneed Fall 2023 회원
UM-SNEED-F23S1G1
4 회원들
안내서 7개 작성하였습니다