주요 콘텐츠로 건너뛰기

Asus Q505UA-BI5T7 Speaker Replacement

필요한 것

  1. Asus Q505UA-BI5T7 Speaker Replacement, Back Cover: 1 단계, 이미지 1/2 Asus Q505UA-BI5T7 Speaker Replacement, Back Cover: 1 단계, 이미지 2/2
    • Flip the device over so that the back cover is facing you.

    • Ensure that the device is turned off.

    • Remove the two 10 mm Philips #1 screws from the top two corners of the back cover of the laptop.

    • Remove the remaining eight 8 mm Philips #1 screws remaining in the back cover of the laptop.

  2. Asus Q505UA-BI5T7 Speaker Replacement: 2 단계, 이미지 1/3 Asus Q505UA-BI5T7 Speaker Replacement: 2 단계, 이미지 2/3 Asus Q505UA-BI5T7 Speaker Replacement: 2 단계, 이미지 3/3
    • Use the plastic opening tool to gently pry the back cover of the laptop up. Slide the tool slowly along the edges of the back cover to pop it out of the clips holding the cover in place.

  3. Asus Q505UA-BI5T7 Speaker Replacement: 3 단계, 이미지 1/1
    • Gently remove the cover and lift it off of the back of the device.

  4. Asus Q505UA-BI5T7 Speaker Replacement, Speaker: 4 단계, 이미지 1/1
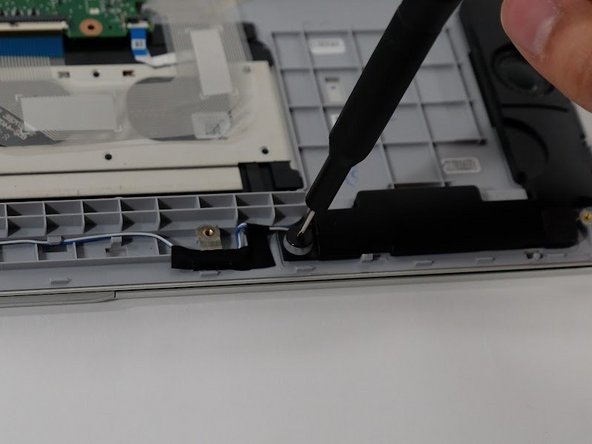
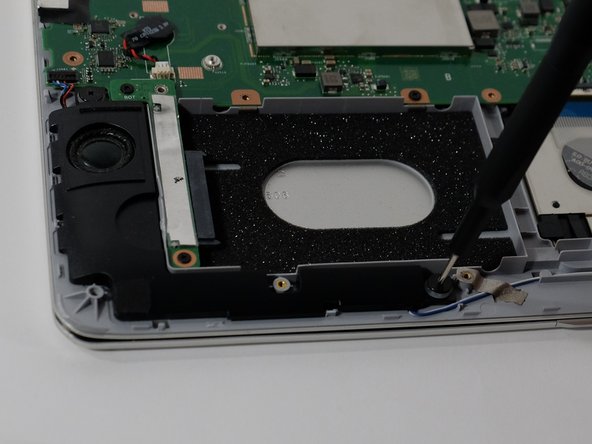
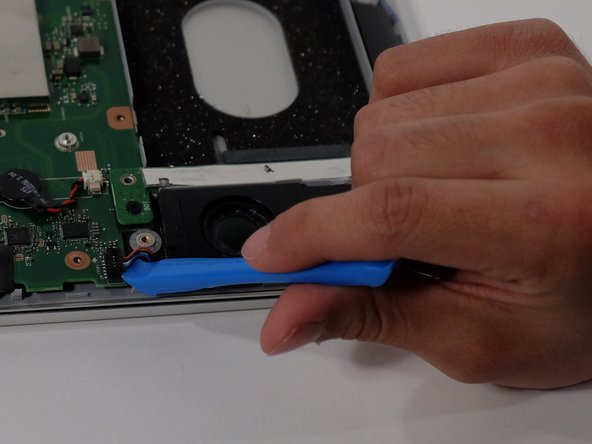
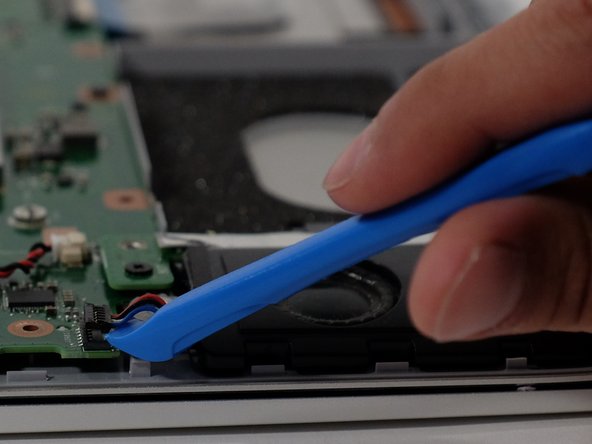
    • These are the two device speakers. Locate the right speaker by the battery, and continue to the next step.

  5. Asus Q505UA-BI5T7 Speaker Replacement: 5 단계, 이미지 1/2 Asus Q505UA-BI5T7 Speaker Replacement: 5 단계, 이미지 2/2
    • After locating the right speaker, use a Phillips #1 screwdriver to remove both 5 mm screws from either side of the speaker.

  6. Asus Q505UA-BI5T7 Speaker Replacement: 6 단계, 이미지 1/2 Asus Q505UA-BI5T7 Speaker Replacement: 6 단계, 이미지 2/2
    • After locating the left speaker by the hard drive, use a Phillips #1 screwdriver to remove both 5 mm screws from either side of the speaker.

  7. Asus Q505UA-BI5T7 Speaker Replacement: 7 단계, 이미지 1/3 Asus Q505UA-BI5T7 Speaker Replacement: 7 단계, 이미지 2/3 Asus Q505UA-BI5T7 Speaker Replacement: 7 단계, 이미지 3/3
    • Using the blue ifixit Opening Tool, gently pry the connection panel from its place.

  8. Asus Q505UA-BI5T7 Speaker Replacement: 8 단계, 이미지 1/1
    • Gently remove the speakers, small attaching adhesive strips should pull out easily.

결론

To reassemble your device, follow these instructions in reverse order.

Cooper Madison-Dawson

회원 가입일: 10/02/23

217 평판

안내서 2개 작성하였습니다

댓글 0개

댓글 쓰기

조회 통계:

24 시간 전: 0

7일 전: 1

30일 전: 1

전체 시간: 28