주요 콘텐츠로 건너뛰기

Asus Vivobook Q301LA-BHI5T02 Fan and Heatsink Replacement

필요한 것

  1. Asus Vivobook Q301LA-BHI5T02 Fan and Heatsink Replacement, Back Cover: 1 단계, 이미지 1/1
    • Make sure the computer is turned off.

    • Flip the device over so that the back cover is facing you.

  2. Asus Vivobook Q301LA-BHI5T02 Fan and Heatsink Replacement: 2 단계, 이미지 1/2 Asus Vivobook Q301LA-BHI5T02 Fan and Heatsink Replacement: 2 단계, 이미지 2/2
    • Remove the four 5mm Phillips #1 screws from the top of the laptop.

    • Remove the two 6mm Phillips #1 screws from the sides of the laptop.

    • Remove the four 2mm Phillips #1 screws from the bottom of the laptop.

  3. Asus Vivobook Q301LA-BHI5T02 Fan and Heatsink Replacement: 3 단계, 이미지 1/3 Asus Vivobook Q301LA-BHI5T02 Fan and Heatsink Replacement: 3 단계, 이미지 2/3 Asus Vivobook Q301LA-BHI5T02 Fan and Heatsink Replacement: 3 단계, 이미지 3/3
    • Use a plastic opening tool to gently pry the bottom of the laptop up. Slowly slide it along the edges, twisting it every so often to pop the bottom of the laptop out of the clips holding it in place.

  4. Asus Vivobook Q301LA-BHI5T02 Fan and Heatsink Replacement: 4 단계, 이미지 1/1
    • Lift off the cover and remove the back cover from the device.

  5. Asus Vivobook Q301LA-BHI5T02 Fan and Heatsink Replacement, Fan and Heatsink: 5 단계, 이미지 1/3 Asus Vivobook Q301LA-BHI5T02 Fan and Heatsink Replacement, Fan and Heatsink: 5 단계, 이미지 2/3 Asus Vivobook Q301LA-BHI5T02 Fan and Heatsink Replacement, Fan and Heatsink: 5 단계, 이미지 3/3
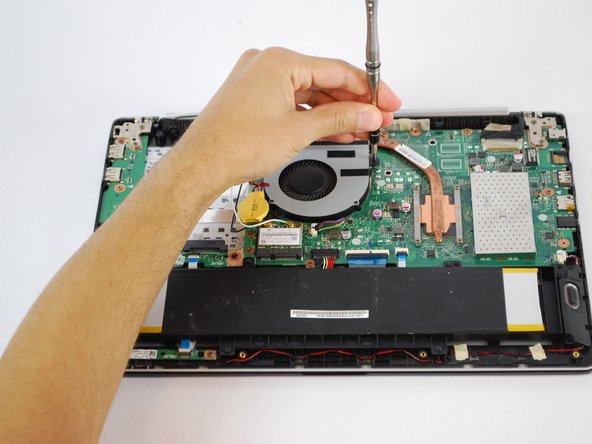
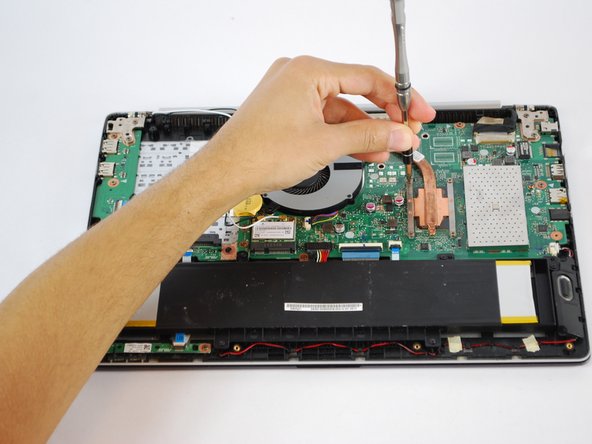
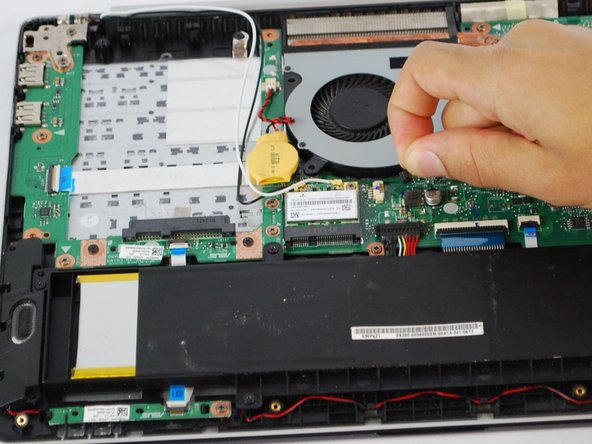
    • Using a Phillips #1 Screwdriver remove the three 3 mm black screws and four 2 mm copper screws holding the fan and heat sink in place.

  6. Asus Vivobook Q301LA-BHI5T02 Fan and Heatsink Replacement: 6 단계, 이미지 1/2 Asus Vivobook Q301LA-BHI5T02 Fan and Heatsink Replacement: 6 단계, 이미지 2/2
    • Remove the wire connecting the fan to the motherboard.

  7. Asus Vivobook Q301LA-BHI5T02 Fan and Heatsink Replacement: 7 단계, 이미지 1/2 Asus Vivobook Q301LA-BHI5T02 Fan and Heatsink Replacement: 7 단계, 이미지 2/2
    • Gently remove the fan and heat sink from the motherboard.

    • On reassembly, be sure to clean the CPU and heat sink and reapply thermal compound to the CPU. Follow this guide to learn how.

결론

To reassemble your device, follow these instructions in reverse order.

Royce Gunter

회원 가입일: 10/02/17

101 평판

안내서 1개 작성함

USF Tampa, Team S10-G3, Thompson Fall 2017 USF Tampa, Team S10-G3, Thompson Fall 2017 회원

USFT-THOMPSON-F17S10G3

4 회원들

안내서 6개 작성하였습니다

댓글 0개

댓글 쓰기

조회 통계:

24 시간 전: 0

7일 전: 0

30일 전: 9

전체 시간: 560