주요 콘텐츠로 건너뛰기

Asus Zenbook UX303L Keyboard Replacement

필요한 것

  1. Asus Zenbook UX303L Keyboard Replacement, Keyboard: 1 단계, 이미지 1/1
    • Make sure the device is turned off and disconnected from the battery charger.

  2. Asus Zenbook UX303L Keyboard Replacement: 2 단계, 이미지 1/3 Asus Zenbook UX303L Keyboard Replacement: 2 단계, 이미지 2/3 Asus Zenbook UX303L Keyboard Replacement: 2 단계, 이미지 3/3
    • Remove all the nine screws from the bottom of the device using a T5 screwdriver.

    • Carefully remove the bottom cover.

  3. Asus Zenbook UX303L Keyboard Replacement: 3 단계, 이미지 1/2 Asus Zenbook UX303L Keyboard Replacement: 3 단계, 이미지 2/2
    • Remove the LVDS cable next to the cooling fan.

  4. Asus Zenbook UX303L Keyboard Replacement: 4 단계, 이미지 1/3 Asus Zenbook UX303L Keyboard Replacement: 4 단계, 이미지 2/3 Asus Zenbook UX303L Keyboard Replacement: 4 단계, 이미지 3/3
    • Remove the three screws from the hinges using a PH-1 screwdriver.

    • Open the device at a 90 degree angle to free the hinges.

  5. Asus Zenbook UX303L Keyboard Replacement: 5 단계, 이미지 1/3 Asus Zenbook UX303L Keyboard Replacement: 5 단계, 이미지 2/3 Asus Zenbook UX303L Keyboard Replacement: 5 단계, 이미지 3/3
    • Remove the screw attaching the cooling fan to the motherboard by using a PH-1 screwdriver.

    • Disconnect the wire attaching the cooling fan to the motherboard.

    • Gently lift and pull out the cooling fan.

  6. Asus Zenbook UX303L Keyboard Replacement: 6 단계, 이미지 1/2 Asus Zenbook UX303L Keyboard Replacement: 6 단계, 이미지 2/2
    • Remove the four screws attached to the black covered copper bar next to the cooling fan using a PH-1 screwdriver.

    • Gently lift and remove the copper bar.

  7. Asus Zenbook UX303L Keyboard Replacement: 7 단계, 이미지 1/1
    • Remove the five screws from the battery pack using a PH-1 screwdriver.

  8. Asus Zenbook UX303L Keyboard Replacement: 8 단계, 이미지 1/3 Asus Zenbook UX303L Keyboard Replacement: 8 단계, 이미지 2/3 Asus Zenbook UX303L Keyboard Replacement: 8 단계, 이미지 3/3
    • Unhook the black, red, and white switch using the tweezers.

    • Detach the positive and negative red, white, yellow, and black switch.

    • Unhook the black and white coiled wire.

    • Lift and remove the battery pack.

  9. Asus Zenbook UX303L Keyboard Replacement: 9 단계, 이미지 1/3 Asus Zenbook UX303L Keyboard Replacement: 9 단계, 이미지 2/3 Asus Zenbook UX303L Keyboard Replacement: 9 단계, 이미지 3/3
    • Remove the three screws attaching the drive to the motherboard using a PH-1 screwdriver.

    • Gently lift and pull out the drive.

  10. Asus Zenbook UX303L Keyboard Replacement: 10 단계, 이미지 1/2 Asus Zenbook UX303L Keyboard Replacement: 10 단계, 이미지 2/2
    • Remove the silver tape to free the fourth screw attaching the motherboard.

    • Remove the four screws attaching the motherboard using a PH-1 screwdriver.

  11. Asus Zenbook UX303L Keyboard Replacement: 11 단계, 이미지 1/2 Asus Zenbook UX303L Keyboard Replacement: 11 단계, 이미지 2/2
    • Detach the four wires connected to the motherboard using tweezers.

    • Gently lift up and pull out the motherboard.

  12. Asus Zenbook UX303L Keyboard Replacement: 12 단계, 이미지 1/3 Asus Zenbook UX303L Keyboard Replacement: 12 단계, 이미지 2/3 Asus Zenbook UX303L Keyboard Replacement: 12 단계, 이미지 3/3
    • Remove the small piece of the motherboard on the lower left hand corner by removing the four screws using a PH-1 screwdriver.

    • Detach the black and red coiled wire from the motherboard using tweezers.

    • Gently lift and remove the small piece of the motherboard.

  13. Asus Zenbook UX303L Keyboard Replacement: 13 단계, 이미지 1/2 Asus Zenbook UX303L Keyboard Replacement: 13 단계, 이미지 2/2
    • Place the plastic opening tool under the corners of the keyboard and use it to detach the keyboard all around.

    • Gently lift and remove the keyboard from its place.

결론

To reassemble your device, follow these instructions in reverse order.

다른 7명이 해당 안내서를 완성하였습니다.

Bianka Castaneda

회원 가입일: 10/13/15

469 평판

안내서 2개 작성하였습니다

Sam Houston State, Team 1-3, Blackburne Fall 2015 Sam Houston State, Team 1-3, Blackburne Fall 2015 회원

SHSU-BLACKBURNE-F15S1G3

3 회원들

안내서 4개 작성하였습니다

댓글 8개

Please tell me where did you buy the keyboard replace, I am looking for it in order to do the replacement for an UX303L (with spanish or english layout with big enter key). Thanks.

Pm - 답글

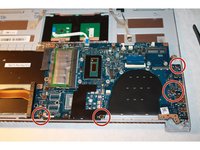
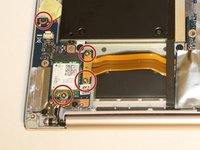
Step 2: There are screws under the rubber pads (at least on the UX303L).

Peter Sutton - 답글

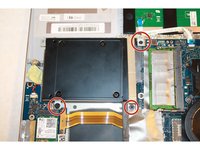
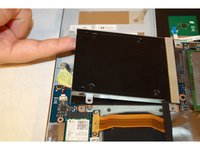
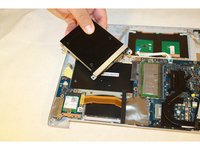
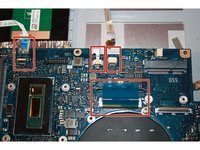
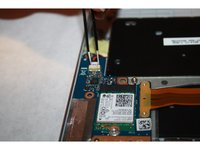
Step 9: Its removing the hard drive/SSD not RAM.

Peter Sutton - 답글

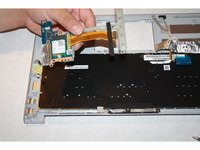
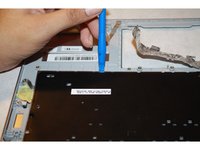
Step 13: Please show me how to remove the keyboard out. It will break some plastic to pull the keyboard out.

Thanks,

Quang

Quang Nguyen - 답글

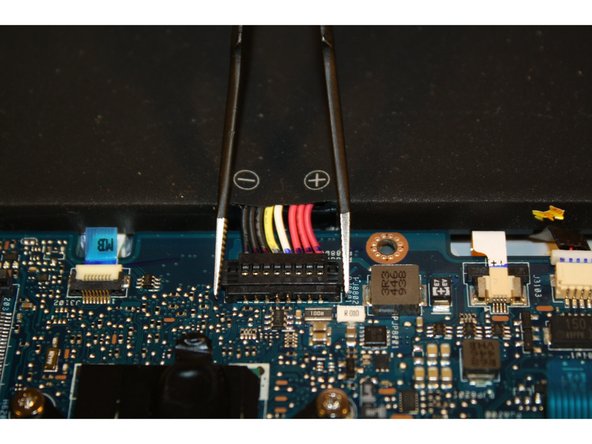
Battery pack should be removed first (at least before step 3) in order to avoid possible power surge

Andrey Arkhipov - 답글

댓글 쓰기

조회 통계:

24 시간 전: 5

7일 전: 23

30일 전: 67

전체 시간: 20,615