주요 콘텐츠로 건너뛰기

Black and Decker LI4000 Trigger/Switch Board Replacement

필요한 것

  1. Black and Decker LI4000 Trigger/Switch Board Replacement, Outer Casing: 1 단계, 이미지 1/3 Black and Decker LI4000 Trigger/Switch Board Replacement, Outer Casing: 1 단계, 이미지 2/3 Black and Decker LI4000 Trigger/Switch Board Replacement, Outer Casing: 1 단계, 이미지 3/3
    • Remove the stickers found on the bottom and sides of the LI4000, using a spudger.

  2. Black and Decker LI4000 Trigger/Switch Board Replacement: 2 단계, 이미지 1/1
    • Remove all six of the 12-mm long case screws with a Philips #1 Screwdriver. These screws can be found on the side of the LI4000 with the "Warning" sticker.

  3. Black and Decker LI4000 Trigger/Switch Board Replacement: 3 단계, 이미지 1/2 Black and Decker LI4000 Trigger/Switch Board Replacement: 3 단계, 이미지 2/2
    • Remove the two screws that are 4-mm Hexagonal #2.5. These are very small case screws that can be found underneath the two stickers from Step 1.

  4. Black and Decker LI4000 Trigger/Switch Board Replacement: 4 단계, 이미지 1/2 Black and Decker LI4000 Trigger/Switch Board Replacement: 4 단계, 이미지 2/2
    • When working with electronics, it's important to choose a tool that's ESD-safe to avoid accidental damage to the device. The metal spudger is great when you need serious prying power, but the regular black nylon spudger or a plastic opening tool should be used whenever possible.

    • Pry on the seam as shown with a Spudger, in order to get the top casing loose.

    • Pull the two sides apart while making sure the side that you are removing is the one with all of the case screw holes.

    • It is good practice to remove the top connection of the battery as shown in the third image, as this will be the first step to replacing any of the components for this screwdriver.

  5. Black and Decker LI4000 Trigger/Switch Board Replacement, Trigger/Switch Board: 5 단계, 이미지 1/2 Black and Decker LI4000 Trigger/Switch Board Replacement, Trigger/Switch Board: 5 단계, 이미지 2/2
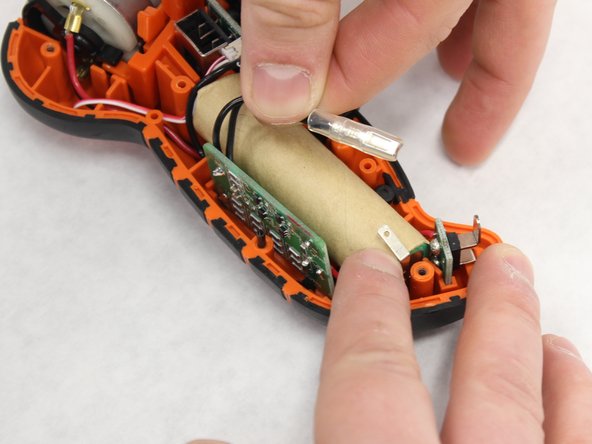
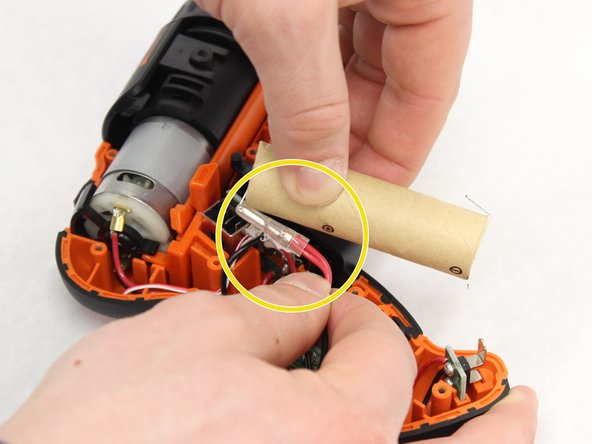
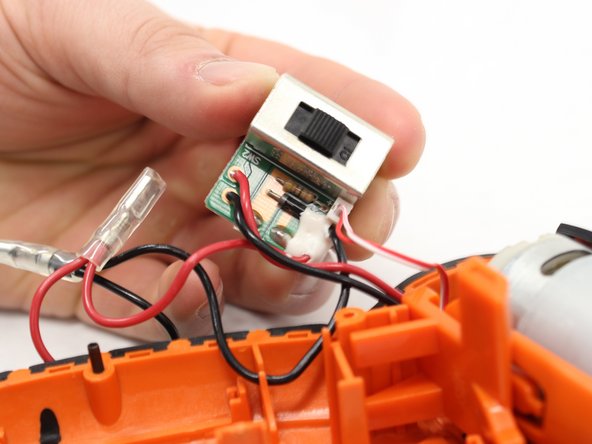
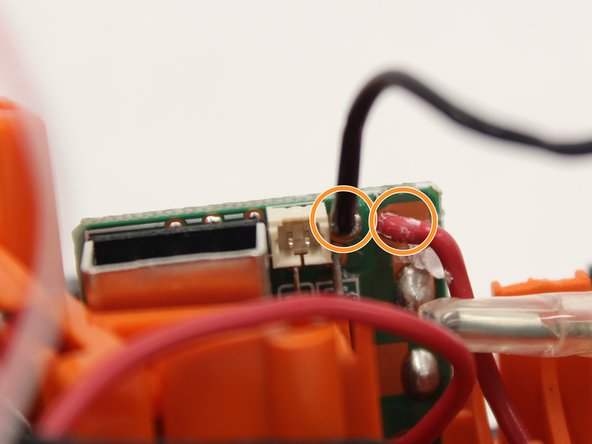
    • Locate the negative terminal of the battery.

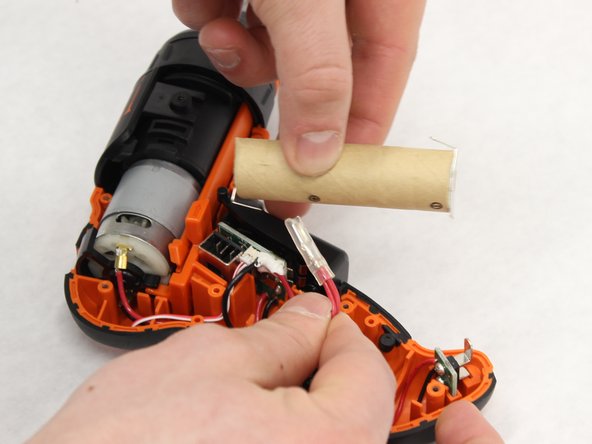
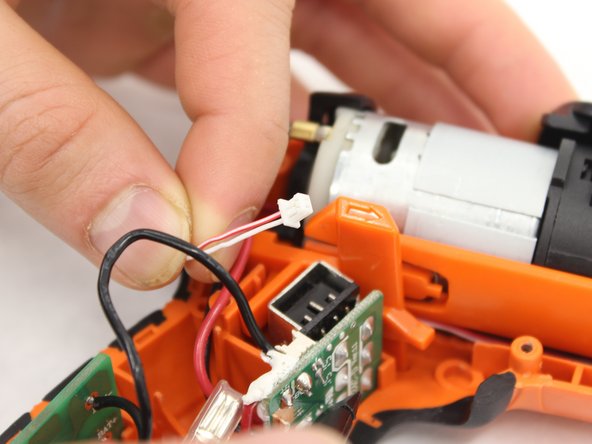
    • Remove the negative (black) wire by pulling back gently.

  6. Black and Decker LI4000 Trigger/Switch Board Replacement: 6 단계, 이미지 1/3 Black and Decker LI4000 Trigger/Switch Board Replacement: 6 단계, 이미지 2/3 Black and Decker LI4000 Trigger/Switch Board Replacement: 6 단계, 이미지 3/3
    • Gently pull up on the end of the battery closest to the negative terminal. Pulling the battery up should reveal the positive (red) wire located on the opposite end of the battery.

    • To free battery, gently pull back on the positive (red) wire.

  7. Black and Decker LI4000 Trigger/Switch Board Replacement: 7 단계, 이미지 1/3 Black and Decker LI4000 Trigger/Switch Board Replacement: 7 단계, 이미지 2/3 Black and Decker LI4000 Trigger/Switch Board Replacement: 7 단계, 이미지 3/3
    • Set battery aside in a safe place.

    • Locate the trigger/switch board located directly behind the trigger.

    • Gently pull the trigger directly up from it's seated position on the screwdriver.

    • The trigger should be freed from the casing.

  8. Black and Decker LI4000 Trigger/Switch Board Replacement: 8 단계, 이미지 1/2 Black and Decker LI4000 Trigger/Switch Board Replacement: 8 단계, 이미지 2/2
    • Inspect the trigger contacts located on the backside of the trigger for any corrosion or damage.

    • Inspect the trigger contacts located on the board for any corrosion or damage.

    • If replacing the trigger/switch board due to faulty trigger, you should inspect trigger contacts listed above to be sure there are no discontinuities or debris prohibiting full contact between the trigger and board contacts. It may be possible to fix this issue without replacing the board. If so, stop here reassemble in reverse order.

  9. Black and Decker LI4000 Trigger/Switch Board Replacement: 9 단계, 이미지 1/2 Black and Decker LI4000 Trigger/Switch Board Replacement: 9 단계, 이미지 2/2
    • Be sure to inspect trigger contacts before moving on to this step.

    • To remove the trigger/switch board, gently pull the board directly up - away from casing.

  10. Black and Decker LI4000 Trigger/Switch Board Replacement: 10 단계, 이미지 1/2 Black and Decker LI4000 Trigger/Switch Board Replacement: 10 단계, 이미지 2/2
    • Locate the plug wire with red and white wires leading the trigger/switch board.

    • Remove the plug wire from the trigger/switch board by gently pulling back on wire.

  11. Black and Decker LI4000 Trigger/Switch Board Replacement: 11 단계, 이미지 1/3 Black and Decker LI4000 Trigger/Switch Board Replacement: 11 단계, 이미지 2/3 Black and Decker LI4000 Trigger/Switch Board Replacement: 11 단계, 이미지 3/3
    • The white adhesive will need to be removed with a plastic spudger.

    • Gently scrape away all of the white adhesive until wires are fully exposed on the trigger/switch board.

  12. Black and Decker LI4000 Trigger/Switch Board Replacement: 12 단계, 이미지 1/1
    • To replace trigger/switch board, use a soldering iron to remove the four soldering joints shown.

    • iFixit has a quick tutorial on soldering here

결론

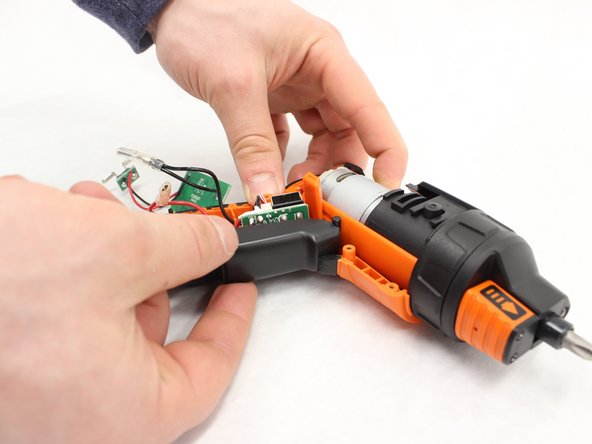
To reassemble your device, follow these instructions in reverse order.

Nigel Leitzell

회원 가입일: 02/11/16

463 평판

안내서 3개 작성하였습니다

IUPUI, Team 2-3, Baechle Spring 2016 IUPUI, Team 2-3, Baechle Spring 2016 회원

IUPUI-BAECHLE-S16S2G3

3 회원들

안내서 8개 작성하였습니다

댓글 0개

댓글 쓰기

조회 통계:

24 시간 전: 0

7일 전: 0

30일 전: 0

전체 시간: 362