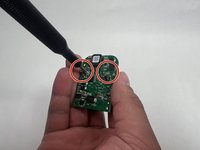
주요 콘텐츠로 건너뛰기

Blink Video Doorbell Lens Replacement

필요한 것

  1. Blink Video Doorbell Lens Replacement, Battery: 1 단계, 이미지 3개 중 1개 Blink Video Doorbell Lens Replacement, Battery: 1 단계, 이미지 3개 중 2개 Blink Video Doorbell Lens Replacement, Battery: 1 단계, 이미지 3개 중 3개
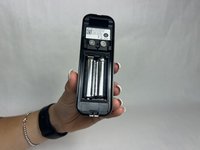
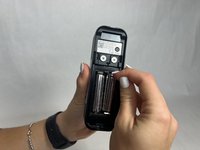
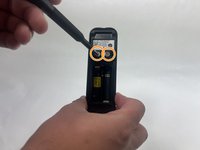
    • Push the opening key into the small opening with the two gray buttons on the bottom of the device.

    • The device will click off the mount.

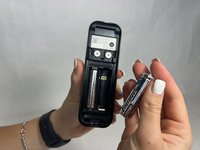
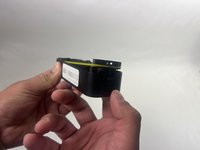
    • Push the device up from the mount and slide it off.

  2. Blink Video Doorbell Lens Replacement: 2 단계, 이미지 3개 중 1개 Blink Video Doorbell Lens Replacement: 2 단계, 이미지 3개 중 2개 Blink Video Doorbell Lens Replacement: 2 단계, 이미지 3개 중 3개
    • Use your finger to slide the gray tab, located near the bottom of the device, upwards.

    • Remove the battery cover.

  3. Blink Video Doorbell Lens Replacement: 3 단계, 이미지 3개 중 1개 Blink Video Doorbell Lens Replacement: 3 단계, 이미지 3개 중 2개 Blink Video Doorbell Lens Replacement: 3 단계, 이미지 3개 중 3개
    • Remove the right battery by pushing the positive end down and pulling the battery out toward yourself.

    • Repeat the procedure for the left battery.

    • Do not mix used and new batteries or batteries of different types (for example, lithium and alkaline batteries).

  4. Blink Video Doorbell Lens Replacement, Back Panel: 4 단계, 이미지 3개 중 1개 Blink Video Doorbell Lens Replacement, Back Panel: 4 단계, 이미지 3개 중 2개 Blink Video Doorbell Lens Replacement, Back Panel: 4 단계, 이미지 3개 중 3개
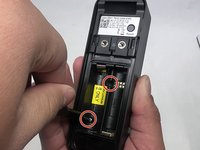
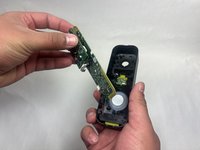
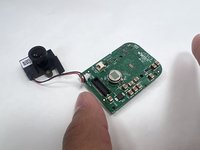
    • Remove the two 6 mm screws in the battery compartment using a JIS #1 screwdriver.

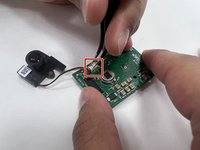
    • Remove the two 7 mm screws above the battery compartment using a JIS #1 screwdriver.

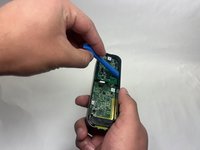
    • Starting from the bottom of the device, pry the back plate away from the rest of the doorbell.

  5. Blink Video Doorbell Lens Replacement, Lens: 5 단계, 이미지 3개 중 1개 Blink Video Doorbell Lens Replacement, Lens: 5 단계, 이미지 3개 중 2개 Blink Video Doorbell Lens Replacement, Lens: 5 단계, 이미지 3개 중 3개
    • Remove the three 6 mm screws from the upper part of the motherboard using a JIS #1 screwdriver.

    • Use an opening tool to release the motherboard from the device.

  6. Blink Video Doorbell Lens Replacement: 6 단계, 이미지 2개 중 1개 Blink Video Doorbell Lens Replacement: 6 단계, 이미지 2개 중 2개
    • Carefully lift up the small daughterboard which contains the camera.

    • Remove two 5 mm screws from the back of the camera using a Phillips #0 screwdriver.

  7. Blink Video Doorbell Lens Replacement: 7 단계, 이미지 2개 중 1개 Blink Video Doorbell Lens Replacement: 7 단계, 이미지 2개 중 2개
    • Use tweezers to detach the white connector from the adapter on the motherboard.

    • Remove the lens.

결론

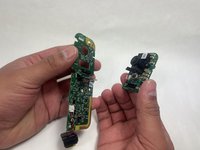
To reassemble your device, follow these instructions in reverse order.

다른 한 분이 해당 안내서를 완성하였습니다.

작성자

4다른 기여자 명과 함께

Kayla Crai

회원 가입일: 10/18/24

510 평판

안내서 4개를 작성함

UMass Dartmouth, Team 1-1, Konn Fall 2024 UMass Dartmouth, Team 1-1, Konn Fall 2024 회원

UMASSD-KONN-F24S1G1

4 회원들

안내서 5개를 작성함

5가이드 댓글

Is it available to purchase the lens

William - 답글

Where can the replacement module/adapter be purchased?

William Meade - 답글

Where can we get the right replacement?

Very helpful article otherwise!

Jesse Jewell - 답글

Where can I get a replacement lens.\nPlease

colin burton - 답글

This would be useful if we could get spare lens, I've got 3 now that have all fogged up and while baking them in the oven improves them they are never as good as when they were new. I've searched high and low and cannot believe Blink are using a bespoke lense, There must be ones out there ??

ChrisB - 답글

댓글 쓰기

조회 통계:

지난 24시간: 7

지난 7일: 44

지난 30일: 212

전체 시간: 1,612