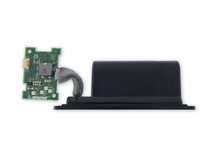
주요 콘텐츠로 건너뛰기

Bose SoundLink Mini II Button Board Replacement

필요한 것

  1. Bose SoundLink Mini II Button Board Replacement, Battery: 1 단계, 이미지 1/2 Bose SoundLink Mini II Button Board Replacement, Battery: 1 단계, 이미지 2/2
    • Flip the speaker over onto its back.

  2. Bose SoundLink Mini II Button Board Replacement, Remove the rubber base: 2 단계, 이미지 1/2 Bose SoundLink Mini II Button Board Replacement, Remove the rubber base: 2 단계, 이미지 2/2
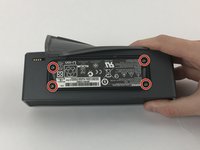
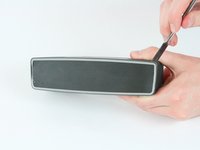
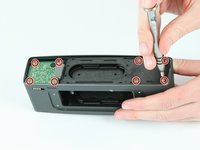
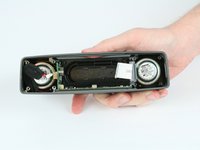
    • Gently remove the rubber base from speaker by pulling around the edges.

  3. Bose SoundLink Mini II Button Board Replacement: 3 단계, 이미지 1/2 Bose SoundLink Mini II Button Board Replacement: 3 단계, 이미지 2/2
    • Remove the four 6mm T9 Torx bit screws from the corners of the battery.

  4. Bose SoundLink Mini II Button Board Replacement: 4 단계, 이미지 1/3 Bose SoundLink Mini II Button Board Replacement: 4 단계, 이미지 2/3 Bose SoundLink Mini II Button Board Replacement: 4 단계, 이미지 3/3
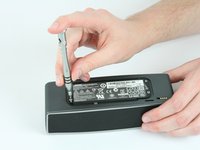
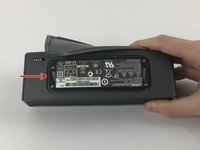
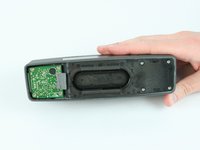
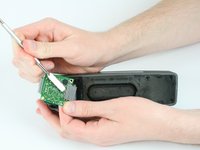
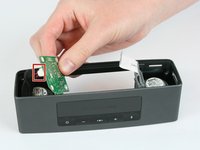
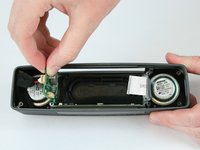
    • Carefully lift the battery from the side nearest the four gold contact pins, but don't try to fully remove it yet.

    • At this point, the battery remains connected via four wires to the power supply board.

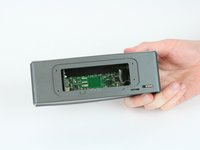
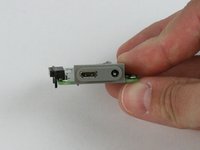
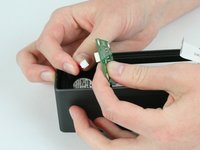
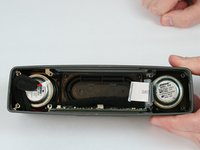
    • Carefully desolder the four wires from the power supply board in order to completely detach the battery. There is very little room for the soldering iron without damaging the case or the board; you may want to remove the board first.

    • For help with soldering, see the soldering guide.

    • Alternatively, you may remove the battery and power supply board together, without any soldering, but access requires some additional disassembly while carefully leaving the battery connected via the wires the entire time.

  5. Bose SoundLink Mini II Button Board Replacement, Bose Technicians' Instruction Manual: 5 단계, 이미지 1/1
  6. Bose SoundLink Mini II Button Board Replacement, Audio Port/USB Circuit Board: 6 단계, 이미지 1/1
    • With the battery removed the button board will now be visible.

  7. Bose SoundLink Mini II Button Board Replacement: 7 단계, 이미지 1/3 Bose SoundLink Mini II Button Board Replacement: 7 단계, 이미지 2/3 Bose SoundLink Mini II Button Board Replacement: 7 단계, 이미지 3/3
    • Remove the rear grille using the metal spudger.

    • The grille bends and deforms easily.

  8. Bose SoundLink Mini II Button Board Replacement: 8 단계, 이미지 1/3 Bose SoundLink Mini II Button Board Replacement: 8 단계, 이미지 2/3 Bose SoundLink Mini II Button Board Replacement: 8 단계, 이미지 3/3
    • Remove the eight 9mm T9 Torx screws from the circuit board and back panel.

    • Use a metal spudger to release the ribbon cable connector and remove cable from the audio/USB board.

  9. Bose SoundLink Mini II Button Board Replacement, Button Board: 9 단계, 이미지 1/2 Bose SoundLink Mini II Button Board Replacement, Button Board: 9 단계, 이미지 2/2
    • Pull the ribbon cable through the rear panel.

  10. Bose SoundLink Mini II Button Board Replacement: 10 단계, 이미지 1/3 Bose SoundLink Mini II Button Board Replacement: 10 단계, 이미지 2/3 Bose SoundLink Mini II Button Board Replacement: 10 단계, 이미지 3/3
    • Remove the top circuit board by lifting up.

    • There is a non latched connector connecting the top board to side board. Be careful to not damage this connector during the removal process.

    • Disconnect the wired pair from the board upon removal.

  11. Bose SoundLink Mini II Button Board Replacement: 11 단계, 이미지 1/2 Bose SoundLink Mini II Button Board Replacement: 11 단계, 이미지 2/2
    • Remove the side board by sliding outward from the device.

    • There is a non latched connector connecting the side board to button board. Be careful to not damage this connector during the removal process.

  12. Bose SoundLink Mini II Button Board Replacement: 12 단계, 이미지 1/1
    • Remove the button board by sliding it out gently.

결론

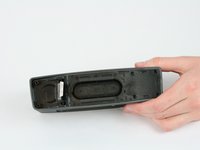
To reassemble your device, follow these instructions in reverse order.

다른 4명이 해당 안내서를 완성하였습니다.

jack dighera

회원 가입일: 02/15/17

273 평판

안내서 1개 작성함

USF Tampa, Team 5-2, Passmore Spring 2017 USF Tampa, Team 5-2, Passmore Spring 2017 회원

USFT-PASSMORE-S17S5G2

4 회원들

안내서 19개 작성하였습니다

댓글 5개

How do you put the rubber cover back? - the tongue, the one in the corner near the charging port, doesn’t want to go in.

Zaar Hai - 답글

Salve. Dove posso procurarmi una scheda audio/usb dol soundlink mini II

Giovanni - 답글

Hi…is it possible to get a replacement board?

Ajoy dsilva - 답글

Hi,

What you refer to as the ‘side board’ under step 10… do you know where I can buy one of these from?

Thanks

Steve.

Steve Shearman - 답글

Where i can by motherboard for sound link mini I ?

Bare - 답글

댓글 쓰기

조회 통계:

24 시간 전: 1

7일 전: 14

30일 전: 74

전체 시간: 8,812