주요 콘텐츠로 건너뛰기

Changing the Bath NF SIRYO CHROME thermostatic cartridge

  1. Changing the Bath NF SIRYO CHROME thermostatic cartridge, Access to the thermostatic cartridge: 1 단계, 이미지 1/3 Changing the Bath NF SIRYO CHROME thermostatic cartridge, Access to the thermostatic cartridge: 1 단계, 이미지 2/3 Changing the Bath NF SIRYO CHROME thermostatic cartridge, Access to the thermostatic cartridge: 1 단계, 이미지 3/3
    • WARNING: Before any intervention, make sure that the inverter is in the "OFF" position and close the water supply to the meter.

    • Using a flat screwdriver, unclip the cover to access the handle fixing screw.

    • Unscrew the fixing screw counterclockwise.

  2. Changing the Bath NF SIRYO CHROME thermostatic cartridge, Dismantling the thermostatic handle: 2 단계, 이미지 1/3 Changing the Bath NF SIRYO CHROME thermostatic cartridge, Dismantling the thermostatic handle: 2 단계, 이미지 2/3 Changing the Bath NF SIRYO CHROME thermostatic cartridge, Dismantling the thermostatic handle: 2 단계, 이미지 3/3
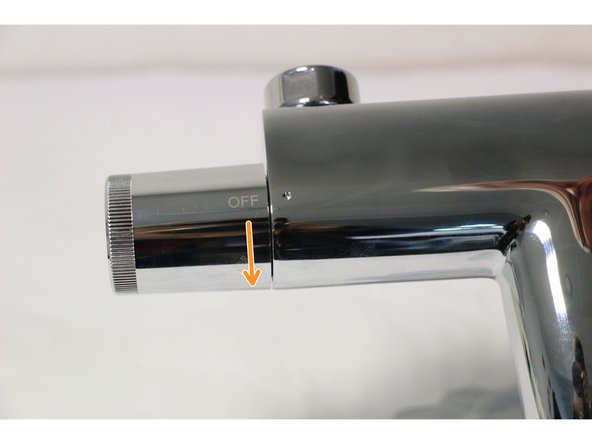
    • Before disassembling, check that the mark on the mixer tap is aligned with the "38°" position, then remove the handle.

    • ATTENTION: before extracting the stop ring (38°), check that the two notches are aligned with the mark on the mixer

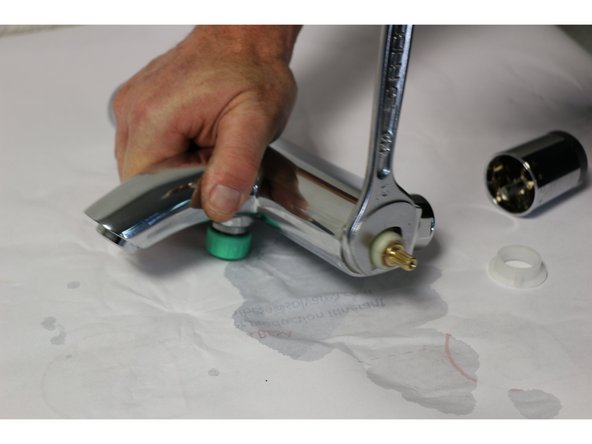
    • Extract the thrust ring

  3. Changing the Bath NF SIRYO CHROME thermostatic cartridge, Removing the thermostatic cartridge: 3 단계, 이미지 1/3 Changing the Bath NF SIRYO CHROME thermostatic cartridge, Removing the thermostatic cartridge: 3 단계, 이미지 2/3 Changing the Bath NF SIRYO CHROME thermostatic cartridge, Removing the thermostatic cartridge: 3 단계, 이미지 3/3
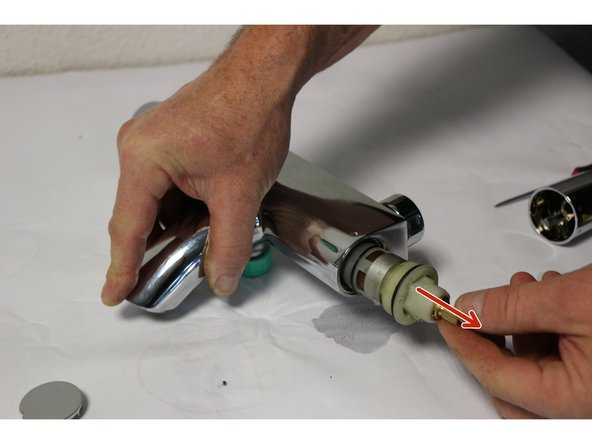
    • Unscrew the thermostatic cartridge anti-clockwise using a 21 wrench.

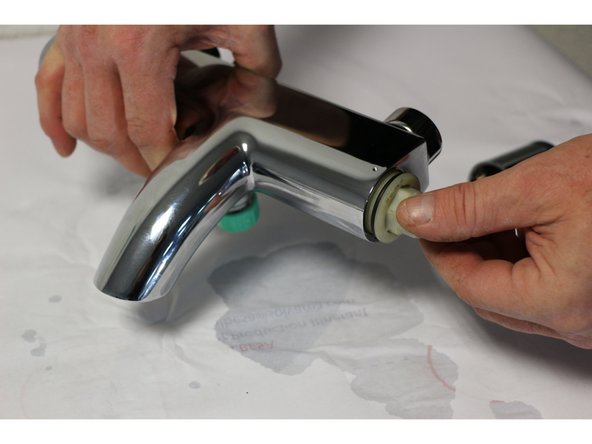
    • Extract the cartridge by hand.

  4. Changing the Bath NF SIRYO CHROME thermostatic cartridge, Reassembly: 4 단계, 이미지 1/3 Changing the Bath NF SIRYO CHROME thermostatic cartridge, Reassembly: 4 단계, 이미지 2/3 Changing the Bath NF SIRYO CHROME thermostatic cartridge, Reassembly: 4 단계, 이미지 3/3
    • Insert the thermostat in the mixer body.

    • Screw in clockwise by hand.

    • Finish the tightening using the spanner 21.

    • ATTENTION: The tightening torque must not exceed 10Nm. We therefore advise you to use a torque wrench so as not to damage the thread of the thermostatic cartridge.

  5. Changing the Bath NF SIRYO CHROME thermostatic cartridge, Replacing and adjusting the stop ring: 5 단계, 이미지 1/3 Changing the Bath NF SIRYO CHROME thermostatic cartridge, Replacing and adjusting the stop ring: 5 단계, 이미지 2/3 Changing the Bath NF SIRYO CHROME thermostatic cartridge, Replacing and adjusting the stop ring: 5 단계, 이미지 3/3
    • Position the two lines marked on the stop ring facing the point of the mixer tap.

    • Turn on the water supply to proceed with the adjustment step.

    • Turn the diverter handle to run the water, then place a thermometer under the flow to check the correct temperature, which should be 38°.

    • If the temperature is not 38°, adjust by turning the wheel clockwise to decrease the temperature (-°C).

    • And counterclockwise to increase the temperature (+°C).

  6. Changing the Bath NF SIRYO CHROME thermostatic cartridge, Replacing the handle: 6 단계, 이미지 1/3 Changing the Bath NF SIRYO CHROME thermostatic cartridge, Replacing the handle: 6 단계, 이미지 2/3 Changing the Bath NF SIRYO CHROME thermostatic cartridge, Replacing the handle: 6 단계, 이미지 3/3
    • Align the reference point on the mixer body with the 38° mark on the handle.

    • Tighten the handle fixing screw using a Phillips screwdriver in a clockwise direction.

    • Replace the cover.

결론

To reassemble your device, follow these instructions in reverse order.

다음 번역가들에게 특별히 감사 드립니다:

fr en

100%

이 번역자 분들은 저희가 세상을 수리하는데 동참해 주시는 분입니다! 기여하시겠습니까?
번역 시작하기 ›

iRobot

회원 가입일: 09/24/09

1 평판

안내서 636개 작성하였습니다

댓글 0개

댓글 쓰기

조회 통계:

24 시간 전: 1

7일 전: 8

30일 전: 38

전체 시간: 1,417