주요 콘텐츠로 건너뛰기

Changing the thermostatic cartridge - Thermostatic Bath NF SIRYO CHROME

필요한 것

  1. Changing the thermostatic cartridge - Thermostatic Bath NF SIRYO CHROME, Required tools: 1 단계, 이미지 1/1
    • 24mm wrench

    • 21mm wrench

    • Flathead screwdriver

    • Phillips screwdriver

  2. Changing the thermostatic cartridge - Thermostatic Bath NF SIRYO CHROME, Access to the inverter: 2 단계, 이미지 1/3 Changing the thermostatic cartridge - Thermostatic Bath NF SIRYO CHROME, Access to the inverter: 2 단계, 이미지 2/3 Changing the thermostatic cartridge - Thermostatic Bath NF SIRYO CHROME, Access to the inverter: 2 단계, 이미지 3/3
    • ATTENTION: Before any disassembly of the inverter, remember to close the water supply from the meter.

    • Check that the position of the reverse handle is on 'OFF'

    • Using a small flat screwdriver, unclip the access cover to the screw that holds it in place.

    • Using a Phillips screwdriver, unscrew the fixing screw of the handle.

  3. Changing the thermostatic cartridge - Thermostatic Bath NF SIRYO CHROME, Removal of the handle of the inverter: 3 단계, 이미지 1/2 Changing the thermostatic cartridge - Thermostatic Bath NF SIRYO CHROME, Removal of the handle of the inverter: 3 단계, 이미지 2/2
    • Unscrew the handle.

  4. Changing the thermostatic cartridge - Thermostatic Bath NF SIRYO CHROME, Disassembly of the inverter: 4 단계, 이미지 1/2 Changing the thermostatic cartridge - Thermostatic Bath NF SIRYO CHROME, Disassembly of the inverter: 4 단계, 이미지 2/2
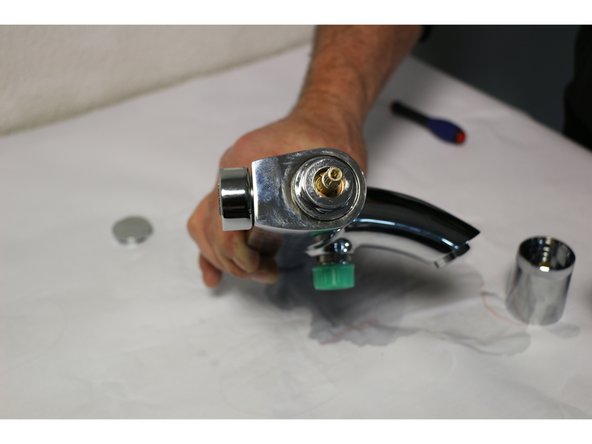
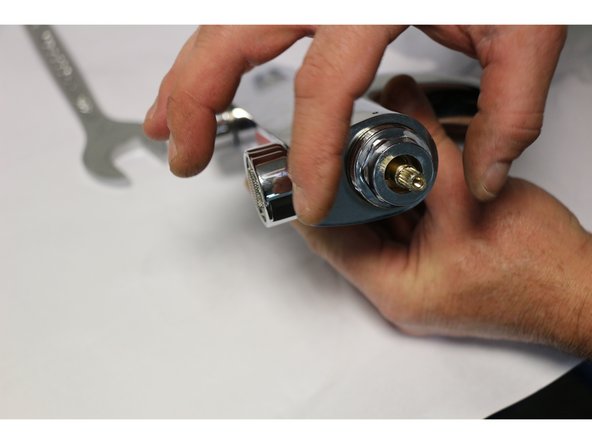
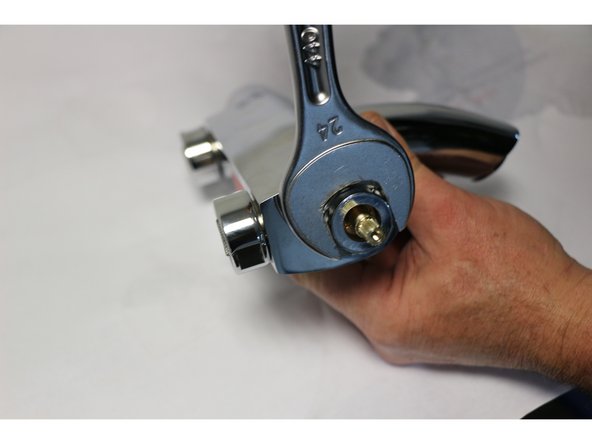
    • Using a 24 flat wrench, unscrew the nut counterclockwise.

    • Remove the inverter.

  5. Changing the thermostatic cartridge - Thermostatic Bath NF SIRYO CHROME, Replacement of the inverter: 5 단계, 이미지 1/3 Changing the thermostatic cartridge - Thermostatic Bath NF SIRYO CHROME, Replacement of the inverter: 5 단계, 이미지 2/3 Changing the thermostatic cartridge - Thermostatic Bath NF SIRYO CHROME, Replacement of the inverter: 5 단계, 이미지 3/3
    • Replacing the inverter

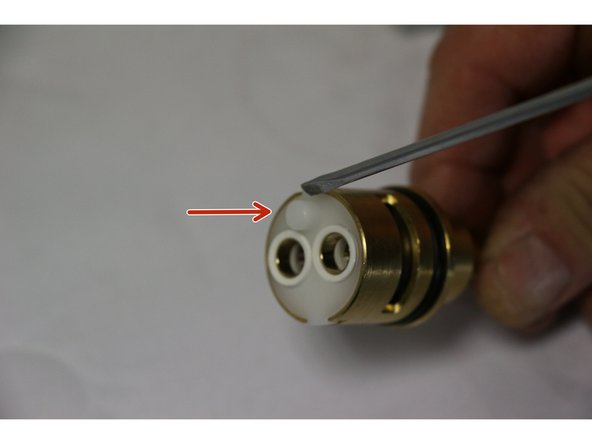
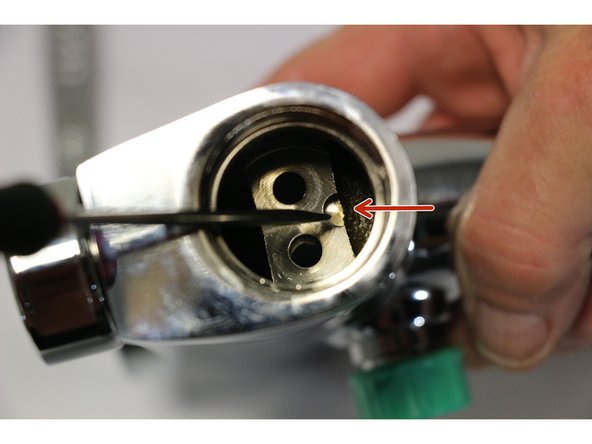
    • Please make sure to properly align the pin of the diverter with the notch indicated by the arrow in the body of the faucet.

  6. Changing the thermostatic cartridge - Thermostatic Bath NF SIRYO CHROME, Reassembly: 6 단계, 이미지 1/3 Changing the thermostatic cartridge - Thermostatic Bath NF SIRYO CHROME, Reassembly: 6 단계, 이미지 2/3 Changing the thermostatic cartridge - Thermostatic Bath NF SIRYO CHROME, Reassembly: 6 단계, 이미지 3/3
    • Insert the diverter into the body of the faucet.

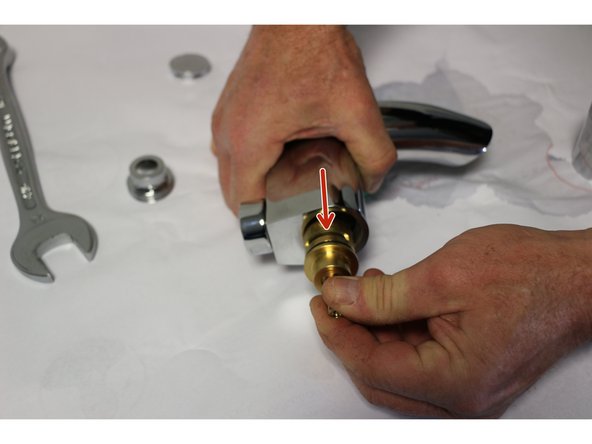
    • Hand-tighten the inverter mounting nut clockwise.

    • Finish tightening using the 24mm wrench.

  7. Changing the thermostatic cartridge - Thermostatic Bath NF SIRYO CHROME, Putting the handle back in place: 7 단계, 이미지 1/3 Changing the thermostatic cartridge - Thermostatic Bath NF SIRYO CHROME, Putting the handle back in place: 7 단계, 이미지 2/3 Changing the thermostatic cartridge - Thermostatic Bath NF SIRYO CHROME, Putting the handle back in place: 7 단계, 이미지 3/3
    • Align the reference point of the faucet body with the "OFF" marking on the handle.

    • Tighten the fixing screw of the handle using a Phillips screwdriver in a clockwise direction.

    • Put the cover back in place.

결승점

다른 2명이 해당 안내서를 완성하였습니다.

다음 번역가들에게 특별히 감사 드립니다:

fr en

100%

이 번역자 분들은 저희가 세상을 수리하는데 동참해 주시는 분입니다! 기여하시겠습니까?
번역 시작하기 ›

iRobot

회원 가입일: 09/24/09

1 평판

안내서 636개 작성하였습니다

댓글 0개

댓글 쓰기

조회 통계:

24 시간 전: 1

7일 전: 7

30일 전: 23

전체 시간: 447