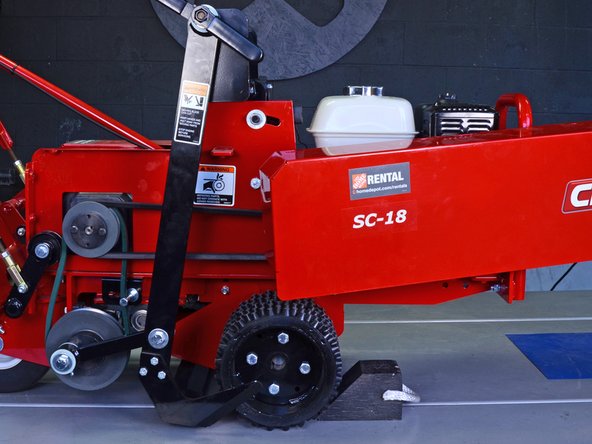
주요 콘텐츠로 건너뛰기

Classen Sod Cutter SC18AHDCA 2019 Engine Belt Replacement

필요한 것

  1. Classen Sod Cutter SC18AHDCA 2019 Engine Belt Replacement, Safety precautions: 1 단계, 이미지 1/2 Classen Sod Cutter SC18AHDCA 2019 Engine Belt Replacement, Safety precautions: 1 단계, 이미지 2/2
    • Before you begin, make sure that the machine is turned off.

    • For safety purposes, disconnect the spark plug.

    • Grab the plastic housing at the end of the spark plug wire.

    • Pull firmly to disconnect the wire from the spark plug.

  2. Classen Sod Cutter SC18AHDCA 2019 Engine Belt Replacement: 2 단계, 이미지 1/1
    • Place wheel chocks against the roller and rear wheel to prevent the machine from moving.

  3. Classen Sod Cutter SC18AHDCA 2019 Engine Belt Replacement, Position the blade: 3 단계, 이미지 1/2 Classen Sod Cutter SC18AHDCA 2019 Engine Belt Replacement, Position the blade: 3 단계, 이미지 2/2
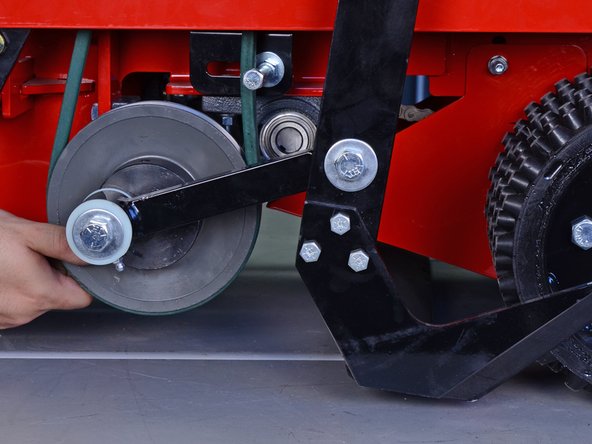
    • Use your hand to slowly rotate the blade pulley so that the blade is pulled back as far as possible.

  4. Classen Sod Cutter SC18AHDCA 2019 Engine Belt Replacement, Unscrew the right guard panel: 4 단계, 이미지 1/3 Classen Sod Cutter SC18AHDCA 2019 Engine Belt Replacement, Unscrew the right guard panel: 4 단계, 이미지 2/3 Classen Sod Cutter SC18AHDCA 2019 Engine Belt Replacement, Unscrew the right guard panel: 4 단계, 이미지 3/3
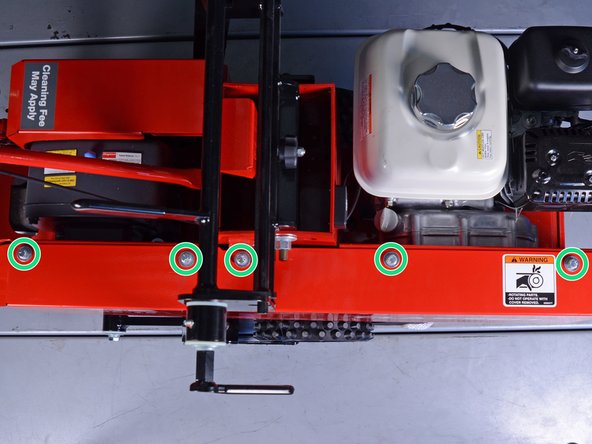
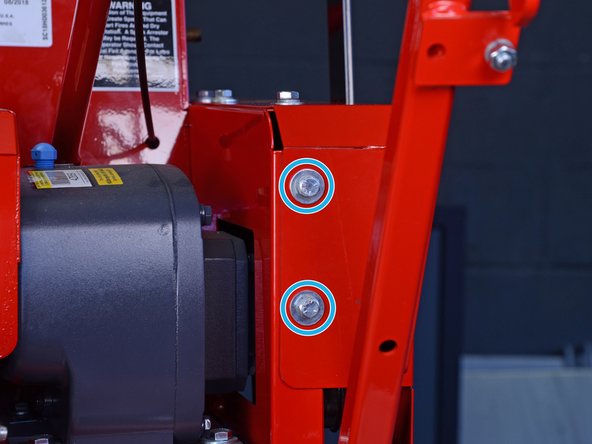
    • Use a 1/2" socket wrench to remove the nine 1 inch-long bolts securing the right guard panel:

    • Two bolts on the front of the panel

    • Five bolts on the top of the panel

    • Two bolts on the back of the panel

  5. Classen Sod Cutter SC18AHDCA 2019 Engine Belt Replacement, Remove the guard panel: 5 단계, 이미지 1/3 Classen Sod Cutter SC18AHDCA 2019 Engine Belt Replacement, Remove the guard panel: 5 단계, 이미지 2/3 Classen Sod Cutter SC18AHDCA 2019 Engine Belt Replacement, Remove the guard panel: 5 단계, 이미지 3/3
    • Slide the guard panel forward until the panel clears the black blade arm.

    • Swing the panel outward to clear the screw post.

    • Remove the panel.

  6. Classen Sod Cutter SC18AHDCA 2019 Engine Belt Replacement, Loosen the idler pulley: 6 단계, 이미지 1/1
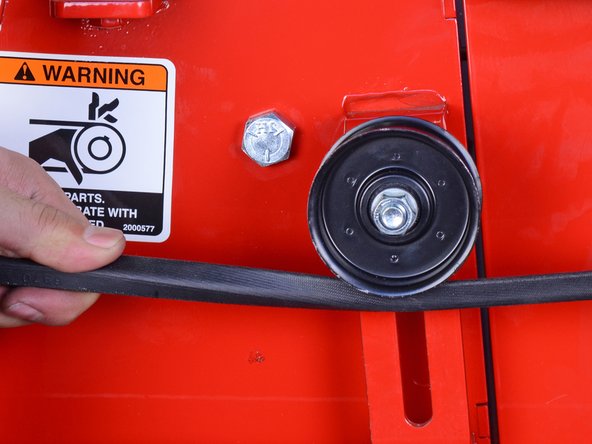
    • Use a 9/16" socket wrench and combination wrench to loosen (but not remove) the idler pulley bolt.

  7. Classen Sod Cutter SC18AHDCA 2019 Engine Belt Replacement, Reassembly tensioning: 7 단계, 이미지 1/2 Classen Sod Cutter SC18AHDCA 2019 Engine Belt Replacement, Reassembly tensioning: 7 단계, 이미지 2/2
    • Re-assembly tip: When you are installing a replacement belt, follow this step to check that the idler pulley is sufficiently tensioning the belt.

    • Use your fingers to roll the belt. If you cannot twist the belt more than a quarter turn, the belt is sufficiently tensioned. If the belt is too loose, set the idler pulley lower to tension the belt more.

  8. Classen Sod Cutter SC18AHDCA 2019 Engine Belt Replacement, Un-tension the belt: 8 단계, 이미지 1/3 Classen Sod Cutter SC18AHDCA 2019 Engine Belt Replacement, Un-tension the belt: 8 단계, 이미지 2/3 Classen Sod Cutter SC18AHDCA 2019 Engine Belt Replacement, Un-tension the belt: 8 단계, 이미지 3/3
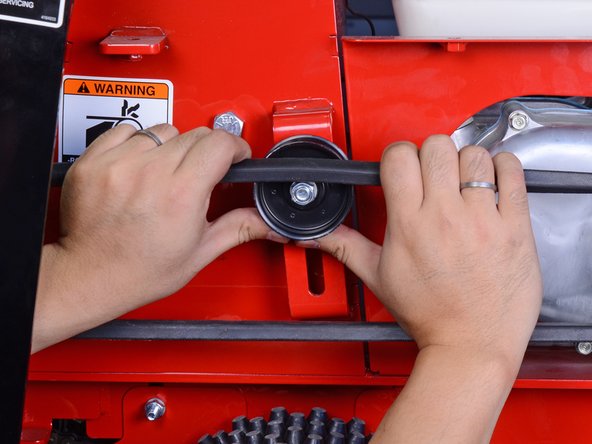
    • Pull the engine belt downwards and slide it off the idler pulley.

    • Slide the belt over the top of the pulley.

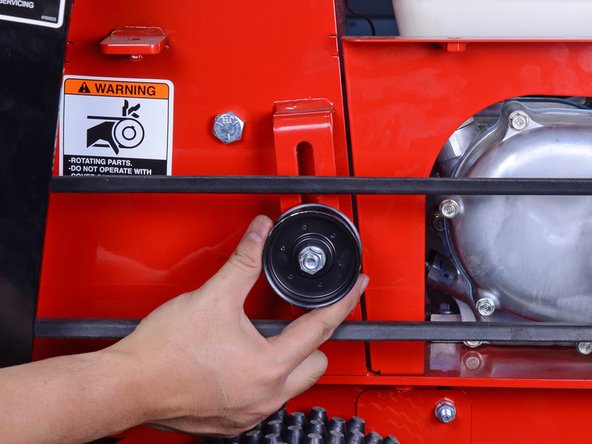
    • Slide the pulley down so that it is not applying any tension to the belt.

  9. Classen Sod Cutter SC18AHDCA 2019 Engine Belt Replacement, Derail the belt: 9 단계, 이미지 1/3 Classen Sod Cutter SC18AHDCA 2019 Engine Belt Replacement, Derail the belt: 9 단계, 이미지 2/3 Classen Sod Cutter SC18AHDCA 2019 Engine Belt Replacement, Derail the belt: 9 단계, 이미지 3/3
    • If you do not plan to reuse the belt, simply cut the belt in order to remove it. Cutting the belt is a much simpler and safer procedure.

    • A tensioned belt can cause severe injuries. Wear thick gloves if possible, and position your hands carefully to avoid pinching.

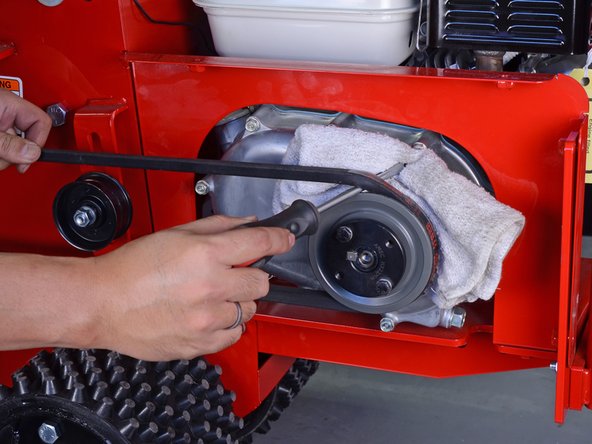
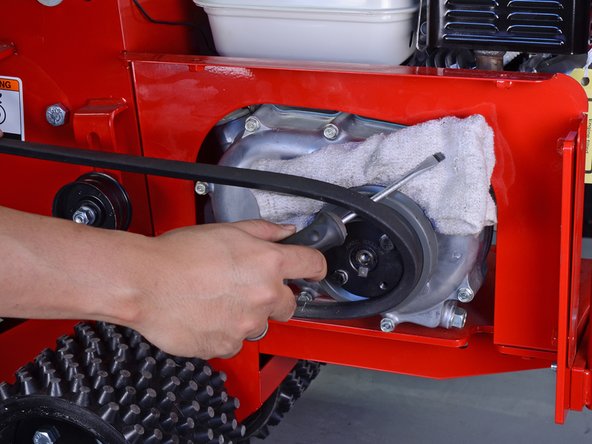
    • Place a rag behind the engine pulley to prevent the engine surface from being scuffed.

    • Wedge a long bolt or screwdriver shaft between the belt and the engine pulley.

    • Carefully feed the belt forward while using the shaft to derail the belt off the pulley.

    • Depending on how old the belt is, this may take significant force.

  10. Classen Sod Cutter SC18AHDCA 2019 Engine Belt Replacement, Remove the engine belt: 10 단계, 이미지 1/1
    • Remove the engine belt.

  11. Classen Sod Cutter SC18AHDCA 2019 Engine Belt Replacement, Re-install the belt: 11 단계, 이미지 1/3 Classen Sod Cutter SC18AHDCA 2019 Engine Belt Replacement, Re-install the belt: 11 단계, 이미지 2/3 Classen Sod Cutter SC18AHDCA 2019 Engine Belt Replacement, Re-install the belt: 11 단계, 이미지 3/3
    • Re-assembly tip: The next two steps show how to reattach and tension a replacement belt.

    • The belt can move unexpectedly and cause severe pinching injuries if you're not careful. Wear thick gloves and be conscious where your hands are while you work.

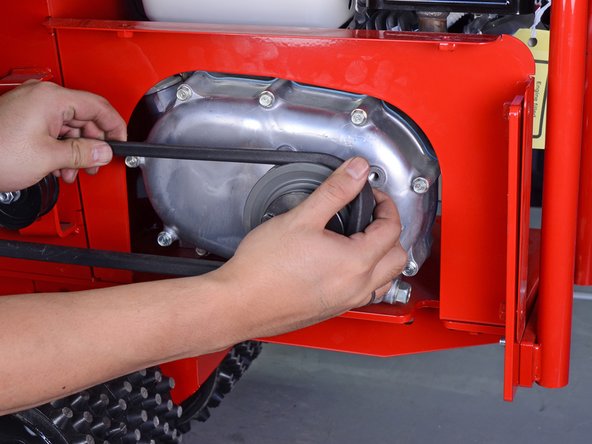
    • Loop the belt onto the rear pulley. Use your fingers to align the front of the belt to the engine pulley, and gradually push the belt into the pulley groove.

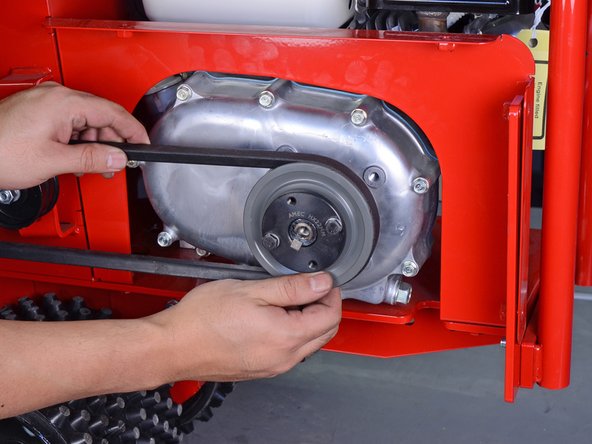
    • Carefully feed the belt forward as you push the belt into the pulley groove, until the entire belt is properly seated in the pulley.

결론

To reassemble your device, follow these instructions in reverse order.

다른 한 분이 해당 안내서를 완성하였습니다.

Arthur Shi

회원 가입일: 01/03/18

257,520 평판

안내서 529개 작성하였습니다

iFixit iFixit 회원

Staff

141 회원들

안내서 17,903개 작성하였습니다

댓글 0개

댓글 쓰기

조회 통계:

24 시간 전: 2

7일 전: 11

30일 전: 38

전체 시간: 2,574