이 버전에는 잘못된 편집 사항이 있을 수 있습니다. 최신 확인된 스냅샷으로 전환하십시오.
필요한 것
-
이 단계는 번역되지 않았습니다. 번역을 도와주십시오
-
Use iFixit plastic opening tool to make small opening in the side of the device, and continue opening back panel
-
-
이 단계는 번역되지 않았습니다. 번역을 도와주십시오
-
There are 5 ribbon cables connected to the motherboard. Two of these cables are clipped on and one is soldered on. Remove the 4 ribbon cables you can clip off using the plastic spudger
-
For large ribbon cable use plastic spudger or your fingers to release ribbon cable clip by pulling the black edges down and pulling ribbon cable out.
-
For ribbon cable on the left side, flip up black hinge to remove ribbon cable
-
Desolder fifth ribbon cable with soldering station.
-
-
-
이 단계는 번역되지 않았습니다. 번역을 도와주십시오
-
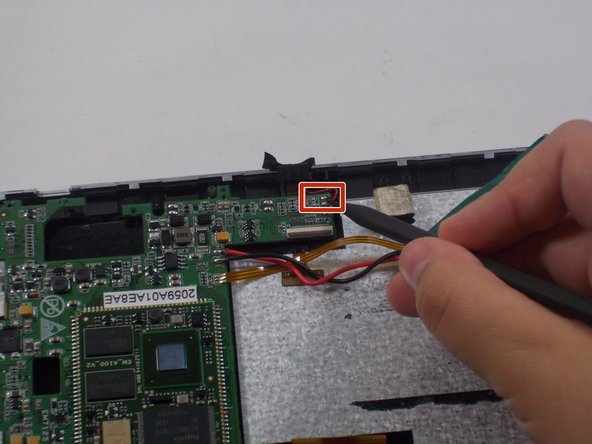
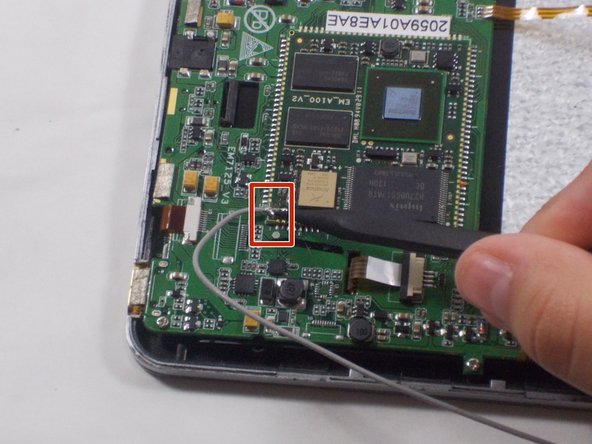
Desolder 2 speaker wires
-
Desolder antenna wire
-
Desolder microphone wire
-
Remove all wires you just desoldered.
-
-
이 단계는 번역되지 않았습니다. 번역을 도와주십시오
-
Desolder the battery wires.
-
If soldering is new to you, then check out this useful guide on soldering and desoldering connections.
-
Remove the battery.
-
-
이 단계는 번역되지 않았습니다. 번역을 도와주십시오
-
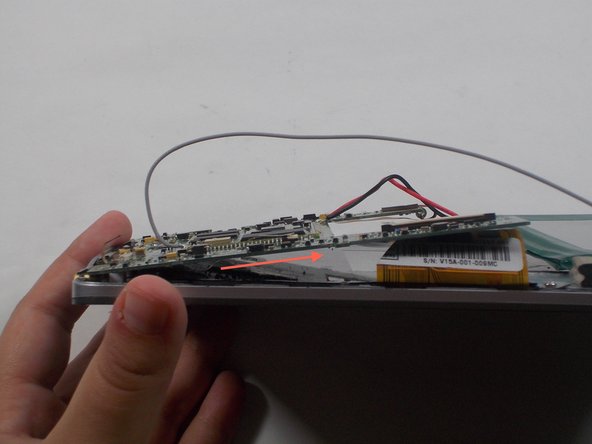
Unscrew 4 screws connecting around mother board using the J0 Phillips head screwdriver.
-
-
이 단계는 번역되지 않았습니다. 번역을 도와주십시오
-
Use plastic spudger to take off motherboard by lifting off right hand side and pulling sideways.
-


팀

UMass Dartmouth, Team 5-2, Martin Fall 2016 UMass Dartmouth, Team 5-2, Martin Fall 2016 회원
UMASSD-MARTIN-F16S5G2
3 회원들
안내서 10개 작성하였습니다