주요 콘텐츠로 건너뛰기

이 안내서에는 최근 변경 사항이 더 있습니다. 최신 비검증 버전으로 전환하십시오.

Dell Inspiron 531 Graphics Card Replacement

필요한 것

  1. Dell Inspiron 531 Graphics Card Replacement, Side Panel: 1 단계, 이미지 1/2 Dell Inspiron 531 Graphics Card Replacement, Side Panel: 1 단계, 이미지 2/2
    • Place the desktop on its side. Make sure to place the computer on a soft but firm surface.

    • Locate and remove the two screws that secure the side panel to the desktop:

    • Two 1/4" Phillips/slotted combination screws.

  2. Dell Inspiron 531 Graphics Card Replacement: 2 단계, 이미지 1/1
    • Slide the side panel towards the back of the desktop in order to remove it.

  3. Dell Inspiron 531 Graphics Card Replacement, Locating the Graphics Card: 3 단계, 이미지 1/2 Dell Inspiron 531 Graphics Card Replacement, Locating the Graphics Card: 3 단계, 이미지 2/2
    • The graphics card is attached to the back of the desktop.

    • The graphics card is located below the three fans.

  4. Dell Inspiron 531 Graphics Card Replacement, Support Bracket: 4 단계, 이미지 1/1
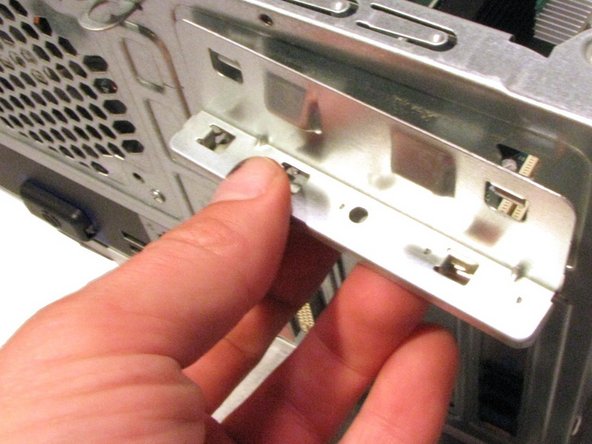
    • Remove the screw that secures the support bracket:

    • One 1/4" Phillips screw

  5. Dell Inspiron 531 Graphics Card Replacement: 5 단계, 이미지 1/2 Dell Inspiron 531 Graphics Card Replacement: 5 단계, 이미지 2/2
    • Remove the support bracket by lifting up and out.

    • There are tabs that hold the bracket in place, therefor lifting up is an important detail.

  6. Dell Inspiron 531 Graphics Card Replacement, Removing the Graphics Card: 6 단계, 이미지 1/2 Dell Inspiron 531 Graphics Card Replacement, Removing the Graphics Card: 6 단계, 이미지 2/2
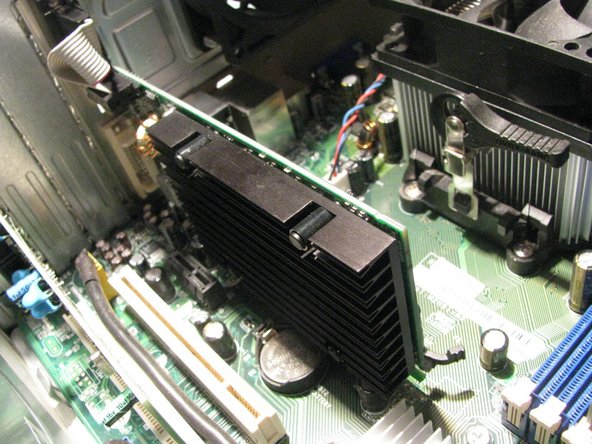
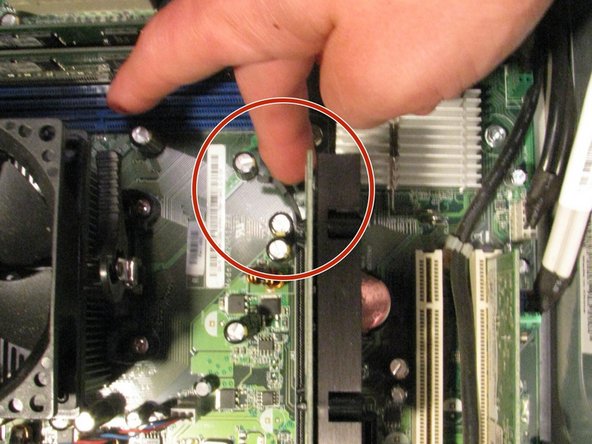
    • Locate the push tab that locks the graphics card into place.

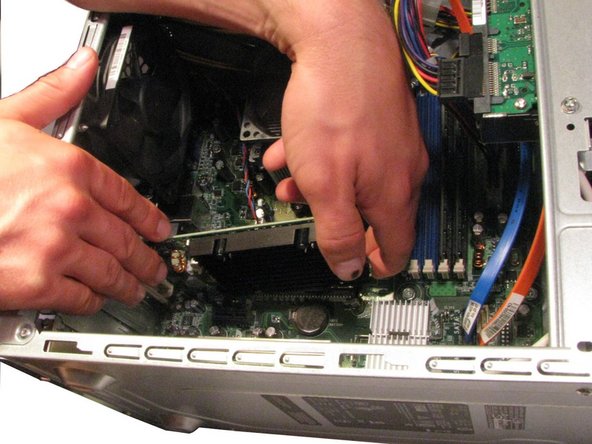
    • Push the tab away from the graphics card and towards the fan.

    • Hold the tab in this position through step 7.

  7. Dell Inspiron 531 Graphics Card Replacement: 7 단계, 이미지 1/2 Dell Inspiron 531 Graphics Card Replacement: 7 단계, 이미지 2/2
    • Keep the tab pushed away from the graphics card (see Step 6).

    • Gently lift the graphics card up and out of the desktop.

  8. Dell Inspiron 531 Graphics Card Replacement: 8 단계, 이미지 1/1
    • Remove the two screws holding the VGA ribbon cable to the bracket:

    • Two M3 hex standoff screws.

  9. Dell Inspiron 531 Graphics Card Replacement: 9 단계, 이미지 1/2 Dell Inspiron 531 Graphics Card Replacement: 9 단계, 이미지 2/2
    • Gently unplug the ribbon cable from the header pins.

    • Remove the other end of the ribbon cable from the bracket.

  10. Dell Inspiron 531 Graphics Card Replacement: 10 단계, 이미지 1/1
    • Remove the two screws holding the DVI adaptor to the bracket:

    • Two M3 hex standoff screws.

  11. Dell Inspiron 531 Graphics Card Replacement: 11 단계, 이미지 1/2 Dell Inspiron 531 Graphics Card Replacement: 11 단계, 이미지 2/2
    • Remove the bracket from the graphics card.

    • The job is done! You can now put the better graphics card in and bask in the joy of an enhanced visual experience.

결론

To reassemble your device, follow these instructions in reverse order.

Scott Havard

회원 가입일: 06/27/16

49,633 평판

안내서 31개 작성하였습니다

댓글 0개

댓글 쓰기

조회 통계:

24 시간 전: 0

7일 전: 1

30일 전: 9

전체 시간: 1,330