소개
If any Dell Precision M3800 keys are no longer working, use this guide to replace the keyboard.
Before using this guide, check for foreign objects under the keys that can cause underperformance. You may be able to fix this issue by dislodging said objects with an ESD-safe brush or small dust blower, instead of replacing the equipment.
Before beginning, be sure to power down the laptop, and unplug from the external power source(s).
Note Before Beginning: You can perform the removal of the fans, RAM, and USB Ports in any order. You might notice some of the later steps have photos that still include parts that were removed previously, this is because you can remove these parts in any order.
필요한 것
-
-
Use a T5 Torx screwdriver to unscrew the ten 3mm screws on the laptop back cover.
-
Lift up the silver cover from the back panel to reveal two screws.
-
Use a Phillips screwdriver to remove the two screws underneath the silver cover.
-
-
-
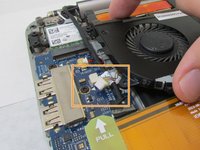
Disconnect the battery cable from the system board [1].
-
Use a Phillips screwdriver to remove the four screws securing the battery to the laptop.
-
Lift the battery off the computer [2].
-
-
-
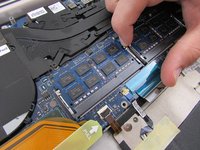
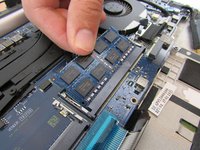
Pull the small silver RAM tabs outwards to pop it out of its place in the laptop body.
-
Remove the RAM from the laptop body (it should easily come out after pulling the silver tabs).
-
-
-
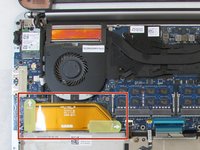
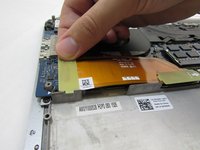
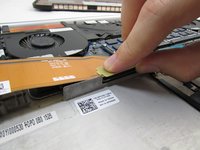
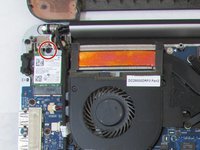
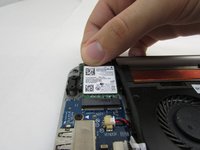
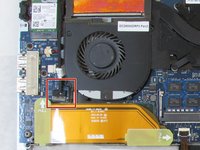
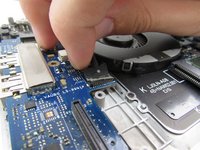
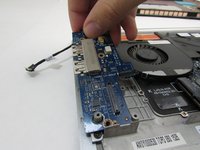
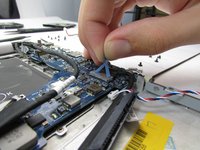
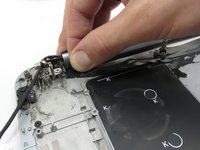
Disconnect the orange wire with the two pull tabs by pulling upwards on the pull tabs.
-
-
-
-
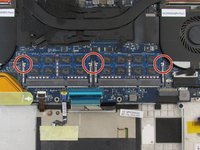
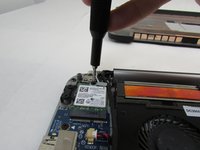
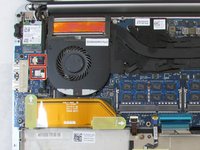
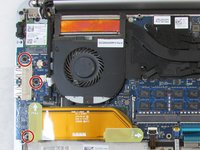
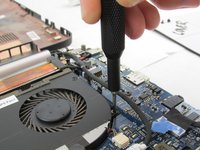
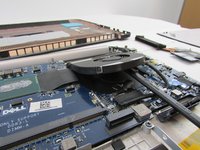
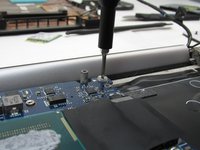
Unscrew the three 3.5 mm screws that secure the circuit board using a Phillips #00 screwdriver.
-
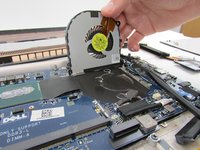
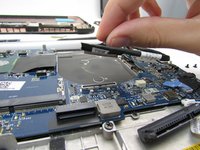
Remove the circuit board by lifting upward.
-
To fully remove the USB ports from the circuit board, you'll need to desolder the points. Use the How to Solder and Desolder Connections guide for more information on soldering and desoldering connections.
-
-
-
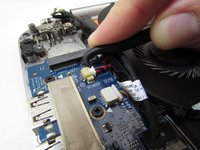
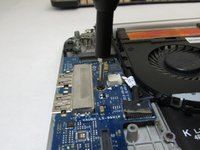
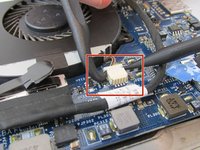
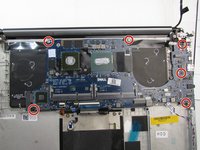
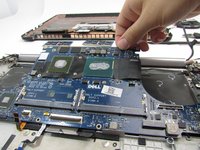
Disconnect the 6 wires that are attached to the motherboard.
-
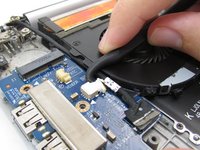
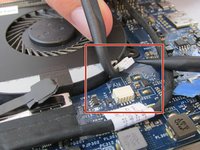
Three of the six wires have a clasp holding the wire. Pull up on the tab and remove the wire.
-
The other three wires have pull tabs and can be removed by pulling from the connector of the wire.
-
-
-
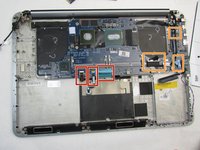
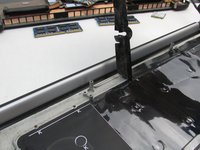
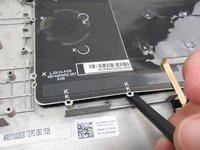
Remove the black piece of tape at the top of the keyboard.
-
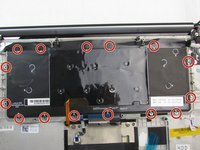
Unscrew the fifteen screws with a 2 millimeter 000 Philips Head.
Consider there's more screws, all the one with a "K" letter, also there's a protective layer of copper with some adhesive, this layer is almost imposible to reuse, but take care removing and possible you can reuse on the new keyboard
-
-
-
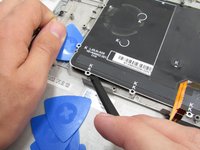
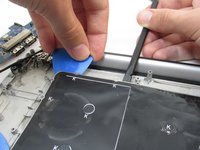
Using a prying tool, place wedges underneath the keyboard until the entire keyboard is removed.
Important note missing from the guide, under the K’s on the back of the keyboard is another 13 screws if you dont remove these before trying to pry the keyboard up you are gonna have a bad time
There is no need to use prying tools, you need to remove 28 screws. there is 1 screw per K marker in the back of the keyboard.
If all these screws are not removed, you will damage the Palmrest -


To reassemble your device, follow these instructions in reverse order.
To reassemble your device, follow these instructions in reverse order.

팀

Embry-Riddle Aeronautical University, Team S12-G2, Lamothe Fall 2019 Embry-Riddle Aeronautical University, Team S12-G2, Lamothe Fall 2019 회원
ERAU-LAMOTHE-F19S12G2
4 회원들
안내서 7개를 작성함
there are 2 additional screws under the metal plate
Andrew Gaquin - 답글
That's right, at first time I tried carefully remove the back plate , with no success, {nly few minutes later I realized it were these 2 screws holding it all together and fighting against my intrusive dids
Alexander Fediushyn -
Thanks for the tip! I corrected the step to include this.
Arthur Shi -