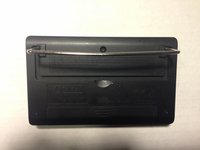
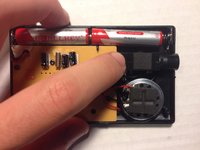
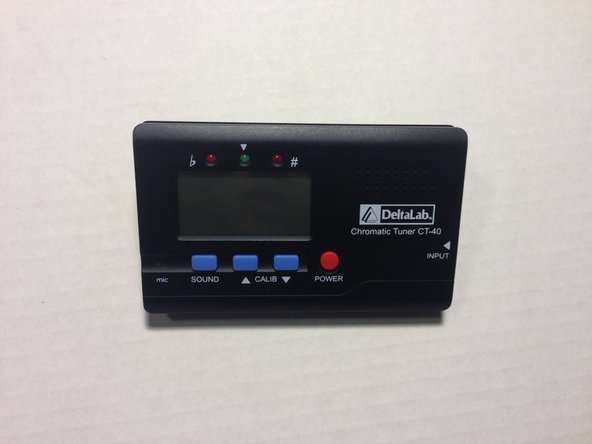
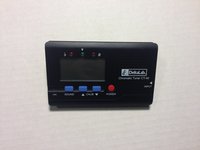
주요 콘텐츠로 건너뛰기

DeltaLab CT-40 Chromatic Tuner Input Jack Port Replacement

필요한 것

  1. DeltaLab CT-40 Chromatic Tuner Input Jack Port Replacement, Input Jack Port: 1 단계, 이미지 2개 중 1개 DeltaLab CT-40 Chromatic Tuner Input Jack Port Replacement, Input Jack Port: 1 단계, 이미지 2개 중 2개
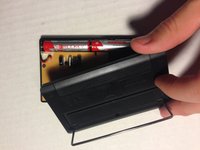
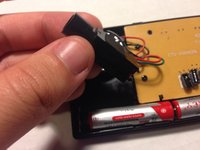
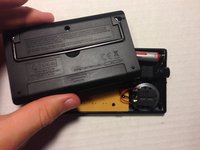
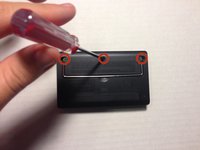
    • First, open the metal stand to access the screws without damaging the body.

  2. DeltaLab CT-40 Chromatic Tuner Input Jack Port Replacement: 2 단계, 이미지 2개 중 1개 DeltaLab CT-40 Chromatic Tuner Input Jack Port Replacement: 2 단계, 이미지 2개 중 2개
    • Remove the 3 outer 1.2 mm Phillips #1 screws using a small head screwdriver.

  3. DeltaLab CT-40 Chromatic Tuner Input Jack Port Replacement: 3 단계, 이미지 2개 중 1개 DeltaLab CT-40 Chromatic Tuner Input Jack Port Replacement: 3 단계, 이미지 2개 중 2개
    • Remove the back casing to reveal the inner circuitry.

  4. DeltaLab CT-40 Chromatic Tuner Input Jack Port Replacement: 4 단계, 이미지 1개 중 1개
    • Locate the different parts of your tuner, finding the broken input jack port.

  5. DeltaLab CT-40 Chromatic Tuner Input Jack Port Replacement: 5 단계, 이미지 2개 중 1개 DeltaLab CT-40 Chromatic Tuner Input Jack Port Replacement: 5 단계, 이미지 2개 중 2개
    • Snip the wires attached to the input jack port using the wire cutter as close to the input jack port as possible.

  6. DeltaLab CT-40 Chromatic Tuner Input Jack Port Replacement: 6 단계, 이미지 2개 중 1개 DeltaLab CT-40 Chromatic Tuner Input Jack Port Replacement: 6 단계, 이미지 2개 중 2개
    • Take your new input jack port and solder the wires to the corresponding connection areas on the new port.

    • Learn how to solder (here).

  7. DeltaLab CT-40 Chromatic Tuner Input Jack Port Replacement: 7 단계, 이미지 2개 중 1개 DeltaLab CT-40 Chromatic Tuner Input Jack Port Replacement: 7 단계, 이미지 2개 중 2개
    • Fold the wires back and put the new input port into the slot where it belongs on the tuner.

  8. DeltaLab CT-40 Chromatic Tuner Input Jack Port Replacement: 8 단계, 이미지 3개 중 1개 DeltaLab CT-40 Chromatic Tuner Input Jack Port Replacement: 8 단계, 이미지 3개 중 2개 DeltaLab CT-40 Chromatic Tuner Input Jack Port Replacement: 8 단계, 이미지 3개 중 3개
    • Replace the casing and 3 1.2 mm Phillips #1 screws using the screwdriver.

결승점

다른 한 분이 해당 안내서를 완성하였습니다.

작성자

2다른 기여자 명과 함께

Theodore Tan

회원 가입일: 02/24/15

137 평판

안내서 1개를 작성함

Cal Poly, Team 23-4, Green Winter 2015 Cal Poly, Team 23-4, Green Winter 2015 회원

CPSU-GREEN-W15S23G4

7 회원들

안내서 15개를 작성함

댓글 0개

댓글 쓰기

조회 통계:

지난 24시간: 0

지난 7일: 4

지난 30일: 6

전체 시간: 580