소개
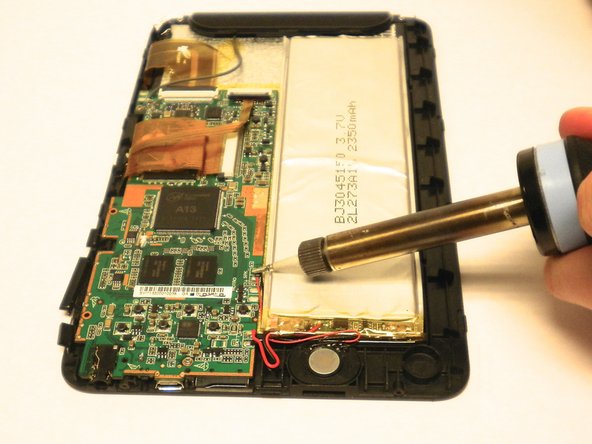
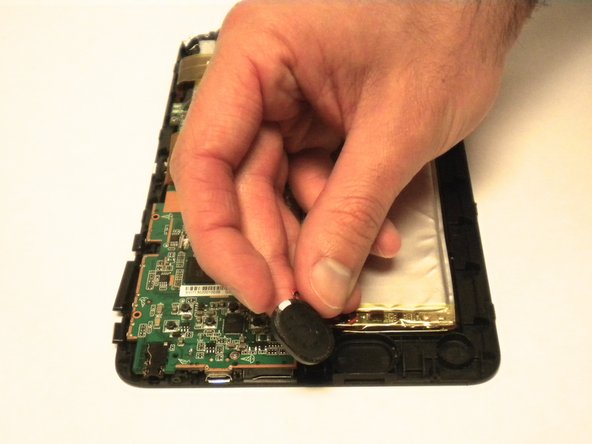
The following guide will show how to replace the speaker for the Digitac Jazz Ultratab C725. This guide requires the use of a soldering iron to properly remove the speaker. If you are unfamiliar with soldering, we recommend that you check out this soldering guide.
필요한 것
-
-
Locate the four 3.5 mm Phillips head screws holding the silver back plate and the screen together. There are 2 screws on the top and another 2 screws on the bottom.
-
Using the Phillips #00 Screwdriver, remove all 4 screws.
-
-
-
Flip your device so that the long side without the buttons is facing you.
-
Insert the Plastic Opening Tool between the silver back plate and the screen about 1 inch from corner of the device on either side.
-
Jimmy the Plastic Opening Tool until the screen unsnaps from the back plate.
-
Work your way down the edge of the device, popping out all locations where the screen snaps into the silver back plate.
-
Go around the corners with the Plastic Opening Tool and unsnap additional snap-in locations as necessary.
-
-


To reassemble your device, follow these instructions in reverse order.
To reassemble your device, follow these instructions in reverse order.
팀

USF Tampa, Team 11-6, Blackwell Winter 2015 USF Tampa, Team 11-6, Blackwell Winter 2015 회원
USFT-BLACKWELL-W15S11G6
2 회원들
안내서 5개 작성하였습니다