주요 콘텐츠로 건너뛰기

Digital2 D2-861G Speaker Replacement

필요한 것

  1. Digital2 D2-861G Speaker Replacement, Battery: 1 단계, 이미지 1/1
    • Working on your device while powered on may result in electric shock. Make sure to unplug and power down your device before you begin.

    • Place your device on a soft cloth to avoid scratching the screen.

    • Flip your device over so back panel is facing upwards

  2. Digital2 D2-861G Speaker Replacement: 2 단계, 이미지 1/2 Digital2 D2-861G Speaker Replacement: 2 단계, 이미지 2/2
    • Do not use a lot of force as it can break the clips or the back panel.

    • Insert spudger in the slot below the micro SD card

    • You should hear clips releasing as you pry along the edges.

    • With the spudger tool, run along the edges of the backing undoing 20 plastic clips.

  3. Digital2 D2-861G Speaker Replacement: 3 단계, 이미지 1/3 Digital2 D2-861G Speaker Replacement: 3 단계, 이미지 2/3 Digital2 D2-861G Speaker Replacement: 3 단계, 이미지 3/3
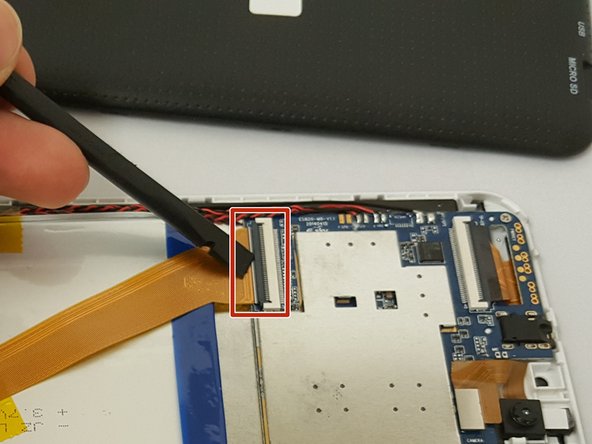
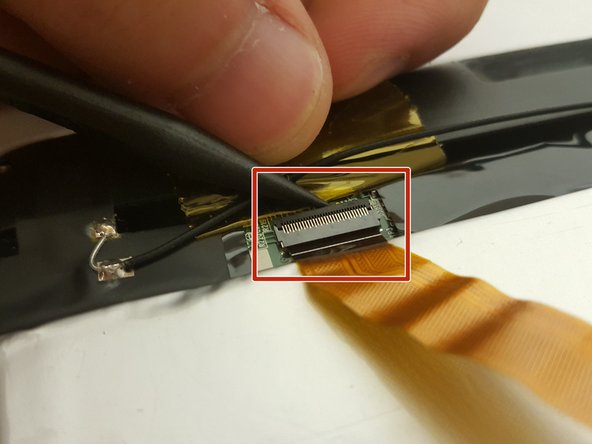
    • Look at the images to locate the black tabs.

    • Carefully remove the tape to avoid damaging the device.

    • Remove ALL the yellow tape securing the gold colored ZIF (Zero insertion force) connector and the battery. Discard or save the tape if you would like.

    • To unclip the connector. Go under the black tab with a spudger or finger nail and simply lift up.

  4. Digital2 D2-861G Speaker Replacement: 4 단계, 이미지 1/2 Digital2 D2-861G Speaker Replacement: 4 단계, 이미지 2/2
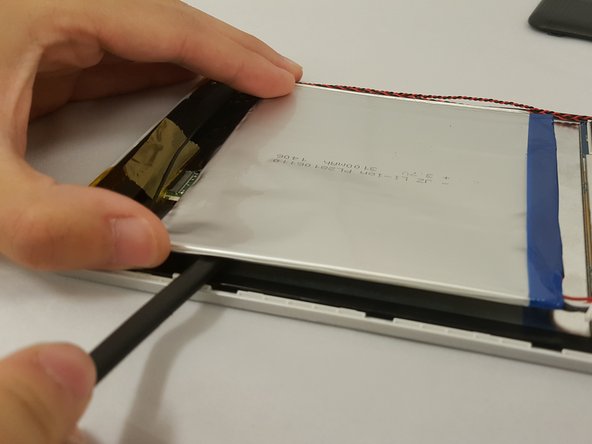
    • Make sure to not bend or puncture the battery when removing it.

    • Locate the bundled cable connector and disconnect it by simply pulling it gently with your hands or using a spudger.

    • Use prying tools to carefully break the adhesive under the battery

  5. Digital2 D2-861G Speaker Replacement, Speaker: 5 단계, 이미지 1/2 Digital2 D2-861G Speaker Replacement, Speaker: 5 단계, 이미지 2/2
    • Be sure to have a magnetic mat or anything magnetic to hold your screws!

    • Now that you have removed the battery, proceed to removing the two 3.51mm screws with your Phillips #00 Screwdriver.

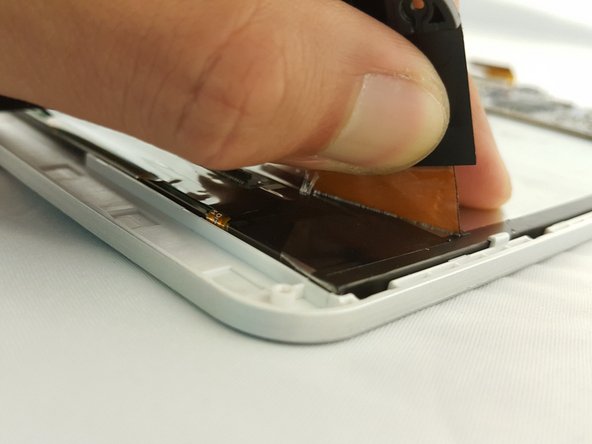
    • Carefully lift the casing and pull back the tape along with the soldered wire.

    • You can remove the soldered wire if you want or leave it connected. Refer to iFixit's How To Solder and Desolder Connections guide.

  6. Digital2 D2-861G Speaker Replacement: 6 단계, 이미지 1/1
    • Refer to iFixit's guide on how to Solder How To Solder and Desolder Connections

    • Now that the casing is off, proceed to the motherboard and solder off the cable. The area that needs soldering will be labled "SPK"

결론

To reassemble your device, follow these instructions in reverse order.

Eduardo Duran

회원 가입일: 09/29/16

600 평판

안내서 5개 작성하였습니다

댓글 0개

댓글 쓰기

조회 통계:

24 시간 전: 0

7일 전: 0

30일 전: 3

전체 시간: 121