필요한 것
-
-
This is the Dualshock 3 controller
-
On the back of the controller, there will be five 7.2mm Phillips screws securing the body of the controller. (The five screws are circled in black.)
-
Remove each of the five screws from the back of the DualShock controller.
-
-
-
Push the center of the rear cover (between the two analog sticks) and carefully lift the lower edge away from the rest of the controller.
-
-
-
-
Push the rear cover slightly toward the top edge of the controller to clear the front edge of the #2 triggers.
-
Pull the rear cover away from the rest of the controller, but be careful so that you won't pop off the #2 triggers.
-
-
-
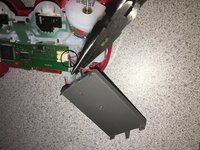
Move the battery off the motherboard so you have enough clearance to access the battery connector.
-
-
이 단계에 사용된 도구:Tweezers$4.99
-
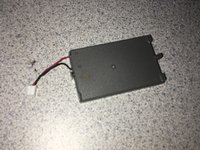
Carefully pull the battery connector away from the socket that is attached to the motherboard. ( Battery connector is circled in black.)
-


To reassemble your device, follow these instructions in reverse order.
다른 3명이 해당 안내서를 완성하였습니다.