주요 콘텐츠로 건너뛰기

Durofix RV332 Battery LED Replacement

필요한 것

  1. Durofix RV332 Battery LED Replacement, Battery LED: 1 단계, 이미지 1/1
    • Remove the six 13 mm case screws with a #0 Phillips screwdriver.

  2. Durofix RV332 Battery LED Replacement: 2 단계, 이미지 1/2 Durofix RV332 Battery LED Replacement: 2 단계, 이미지 2/2
    • Using a plastic opening tool, separate the casing halves to expose the contents of the cordless screwdriver.

  3. Durofix RV332 Battery LED Replacement: 3 단계, 이미지 1/3 Durofix RV332 Battery LED Replacement: 3 단계, 이미지 2/3 Durofix RV332 Battery LED Replacement: 3 단계, 이미지 3/3
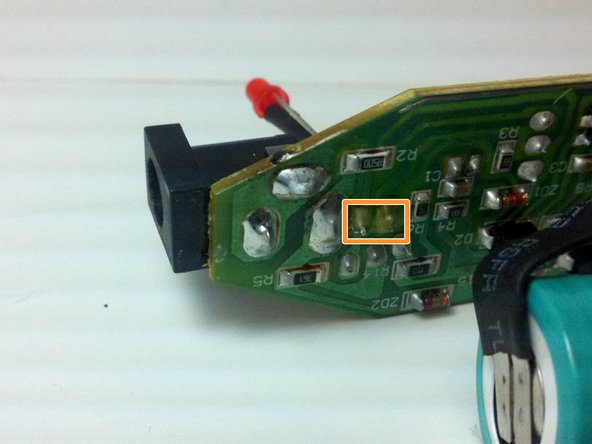
    • Remove printed circuit board, LED, battery, and motor assembly from the screwdriver casing.

    • Use a soldering iron to melt the solder from the LED's two pins on the printed circuit board.

    • Remove the LED from the circuit board while the solder is still melted.

  4. Durofix RV332 Battery LED Replacement: 4 단계, 이미지 1/2 Durofix RV332 Battery LED Replacement: 4 단계, 이미지 2/2
    • Place the positive leg of the new LED through the positive hole in the printed circuit board and solder it into place.

    • Place the negative leg of the LED through the negative hold in the printed circuit board and solder it into place.

결론

To reassemble your device, follow these instructions in reverse order.

Tyler Vincent

회원 가입일: 02/24/14

464 평판

안내서 4개 작성하였습니다

Michigan Tech, Team 5-5, Lauer Spring 2014 Michigan Tech, Team 5-5, Lauer Spring 2014 회원

MTU-LAUER-S14S5G5

3 회원들

안내서 5개 작성하였습니다

0 댓글

댓글 쓰기

조회 통계:

24 시간 전: 1

7일 전: 2

30일 전: 4

전체 시간: 985