주요 콘텐츠로 건너뛰기

Dyson DC08 brush replacement

필요한 것

  1. Dyson DC08 brush replacement, Motor: 1 단계, 이미지 1/3 Dyson DC08 brush replacement, Motor: 1 단계, 이미지 2/3 Dyson DC08 brush replacement, Motor: 1 단계, 이미지 3/3
    • Take off the dust cannister.

    • Remove the suction hose.

  2. Dyson DC08 brush replacement: 2 단계, 이미지 1/3 Dyson DC08 brush replacement: 2 단계, 이미지 2/3 Dyson DC08 brush replacement: 2 단계, 이미지 3/3
    • Extract the front filter.

  3. Dyson DC08 brush replacement: 3 단계, 이미지 1/3 Dyson DC08 brush replacement: 3 단계, 이미지 2/3 Dyson DC08 brush replacement: 3 단계, 이미지 3/3
    • Extract the rear filter.

    • Unscrew the first Torx screw.

  4. Dyson DC08 brush replacement: 4 단계, 이미지 1/2 Dyson DC08 brush replacement: 4 단계, 이미지 2/2
    • Optionally, remove the rear filter cover.

  5. Dyson DC08 brush replacement: 5 단계, 이미지 1/2 Dyson DC08 brush replacement: 5 단계, 이미지 2/2
    • Unscrew the 2nd Torx screw.

    • Disassemble the suction hose connection (optional)

  6. Dyson DC08 brush replacement: 6 단계, 이미지 1/3 Dyson DC08 brush replacement: 6 단계, 이미지 2/3 Dyson DC08 brush replacement: 6 단계, 이미지 3/3
    • Remove the wheels.

    • The wheels clip onto the body of the appliance.

    • Unscrew the 4 Torx screws (two in the right and two on the left).

  7. Dyson DC08 brush replacement: 7 단계, 이미지 1/2 Dyson DC08 brush replacement: 7 단계, 이미지 2/2
    • Open the body of the vacuum cleaner.

    • You can use a multimeter to test the switch.

    • Disconnect the brown wire at the switch.

    • Disconnect the blue wire at the single connector by the motor.

    • Lift out the motor.

  8. Dyson DC08 brush replacement: 8 단계, 이미지 1/2 Dyson DC08 brush replacement: 8 단계, 이미지 2/2
    • Open the motor housing (4 clips).

    • Remover the motor from its plastic casing.

    • Disconnect the motor.

  9. Dyson DC08 brush replacement: 9 단계, 이미지 1/3 Dyson DC08 brush replacement: 9 단계, 이미지 2/3 Dyson DC08 brush replacement: 9 단계, 이미지 3/3
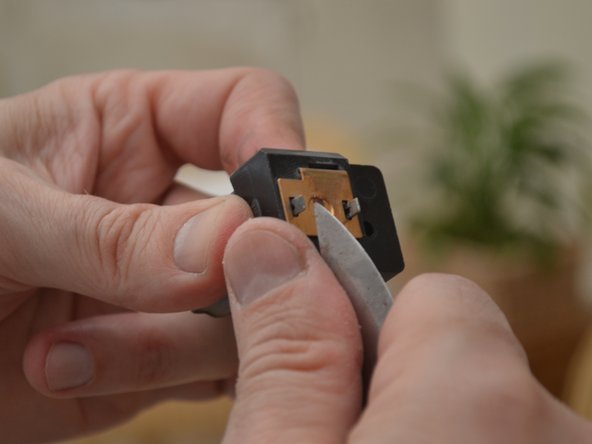
    • disassembly of 2 engine coals (1 Phillips screw per coal)

  10. Dyson DC08 brush replacement: 10 단계, 이미지 1/3 Dyson DC08 brush replacement: 10 단계, 이미지 2/3 Dyson DC08 brush replacement: 10 단계, 이미지 3/3
    • Worn brush.

    • Opening the brush housing.

  11. Dyson DC08 brush replacement: 11 단계, 이미지 1/3 Dyson DC08 brush replacement: 11 단계, 이미지 2/3 Dyson DC08 brush replacement: 11 단계, 이미지 3/3
    • Extraction of the brush and spring.

  12. Dyson DC08 brush replacement: 12 단계, 이미지 1/2 Dyson DC08 brush replacement: 12 단계, 이미지 2/2
    • Removing the brush.

  13. Dyson DC08 brush replacement: 13 단계, 이미지 1/2 Dyson DC08 brush replacement: 13 단계, 이미지 2/2
    • Soldering a new brush.

결론

To reassemble your device, follow these instructions in reverse order.

다른 17명이 해당 안내서를 완성하였습니다.

다음 번역가들에게 특별히 감사 드립니다:

fr en

100%

이 번역자 분들은 저희가 세상을 수리하는데 동참해 주시는 분입니다! 기여하시겠습니까?
번역 시작하기 ›

christophe

회원 가입일: 07/14/12

806 평판

안내서 2개 작성하였습니다

댓글 14개

Very useful guide - I treated myself to a new motor as the cost was not much more than the cost of replacement brushes.

Bob - 답글

Hi, where did you buy the new motor?

Nadja -

Bravo, très bon tutoriel

shog shog - 답글

Bonjour

et si on n’a rien pour souder, y a t’il une autre solution svp?

GALLAS - 답글

Bonjour ! Si vous ne disposez pas de matérial de soudure, nous vous conseillons de vous rendre à un Repair Café ou un Fab Lab. Ces associations mettent du matériel à disposition et peuvent éventuellement aussi vous conseiller sur la démarche à suivre. Bonne réparation !

Claire Miesch -

댓글 쓰기

조회 통계:

24 시간 전: 4

7일 전: 36

30일 전: 183

전체 시간: 17,563