주요 콘텐츠로 건너뛰기

GE 7-4836B Alarm Clock AM-FM Radio AM-FM Switch Replacement

필요한 것

  1. GE 7-4836B Alarm Clock AM-FM Radio AM-FM Switch Replacement, Battery Compartment Cover: 1 단계, 이미지 1/3 GE 7-4836B Alarm Clock AM-FM Radio AM-FM Switch Replacement, Battery Compartment Cover: 1 단계, 이미지 2/3 GE 7-4836B Alarm Clock AM-FM Radio AM-FM Switch Replacement, Battery Compartment Cover: 1 단계, 이미지 3/3
    • Find the battery compartment on the bottom of the clock radio.

    • Using your thumb, push the compartment cover latch toward the battery.

    • With the latch pushed in, pull the compartment cover upward to remove it..

  2. GE 7-4836B Alarm Clock AM-FM Radio AM-FM Switch Replacement, Battery: 2 단계, 이미지 1/2 GE 7-4836B Alarm Clock AM-FM Radio AM-FM Switch Replacement, Battery: 2 단계, 이미지 2/2
    • Lift the battery from the compartment.

    • Pull the battery up and gently disconnect it from the battery connector.

  3. GE 7-4836B Alarm Clock AM-FM Radio AM-FM Switch Replacement, Screws: 3 단계, 이미지 1/2 GE 7-4836B Alarm Clock AM-FM Radio AM-FM Switch Replacement, Screws: 3 단계, 이미지 2/2
    • Using a Phillips #00 Screwdriver, unscrew the six 12mm screws from around the bottom of the clock radio.

  4. GE 7-4836B Alarm Clock AM-FM Radio AM-FM Switch Replacement, LCD Cover: 4 단계, 이미지 1/1
    • Gently pull the liquid crystal display (LCD) cover off.

  5. GE 7-4836B Alarm Clock AM-FM Radio AM-FM Switch Replacement, Clock Radio: 5 단계, 이미지 1/2 GE 7-4836B Alarm Clock AM-FM Radio AM-FM Switch Replacement, Clock Radio: 5 단계, 이미지 2/2
    • Lift the top off. Two gray, plastic internal pieces will fall out when you do this; set them aside.

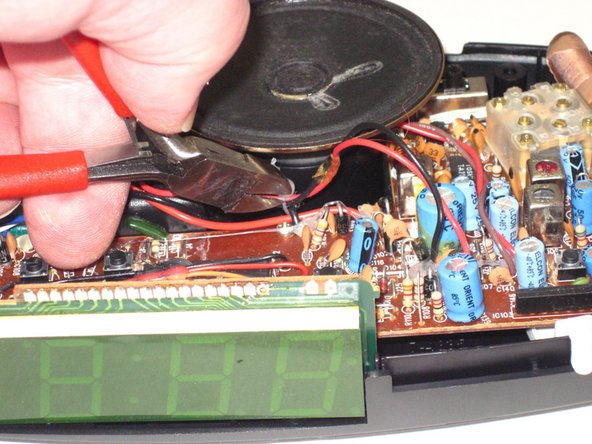
  6. GE 7-4836B Alarm Clock AM-FM Radio AM-FM Switch Replacement, Battery Wires Wire Tie: 6 단계, 이미지 1/2 GE 7-4836B Alarm Clock AM-FM Radio AM-FM Switch Replacement, Battery Wires Wire Tie: 6 단계, 이미지 2/2
    • Using the wire cutters, carefully cut the plastic wire tie.

  7. GE 7-4836B Alarm Clock AM-FM Radio AM-FM Switch Replacement, Speaker: 7 단계, 이미지 1/1
    • Grip the speaker.

    • Lift the speaker from the holder.

  8. GE 7-4836B Alarm Clock AM-FM Radio AM-FM Switch Replacement, Screws: 8 단계, 이미지 1/2 GE 7-4836B Alarm Clock AM-FM Radio AM-FM Switch Replacement, Screws: 8 단계, 이미지 2/2
    • Locate the two 6mm screws on the PCB.

    • Using a Phillips #0 Screwdriver, unscrew the two 6 mm screws from the PCB.

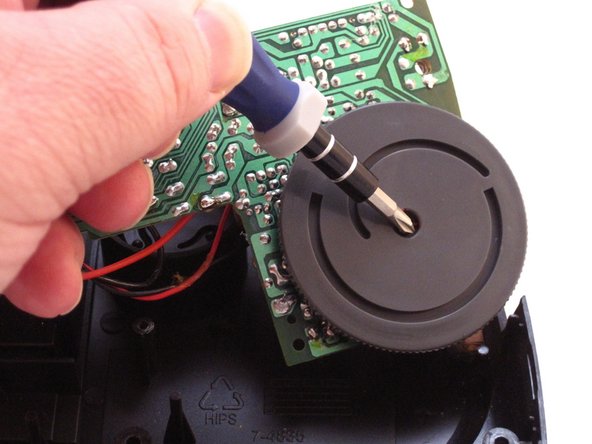
  9. GE 7-4836B Alarm Clock AM-FM Radio AM-FM Switch Replacement, AM-FM Switch Dial Screw: 9 단계, 이미지 1/2 GE 7-4836B Alarm Clock AM-FM Radio AM-FM Switch Replacement, AM-FM Switch Dial Screw: 9 단계, 이미지 2/2
    • Raise the PCB to expose the AM-FM switch dial screw.

    • Using a Phillip's #01 Screwdriver, unscrew the one 3mm screw from the middle of the AM-FM switch dial.

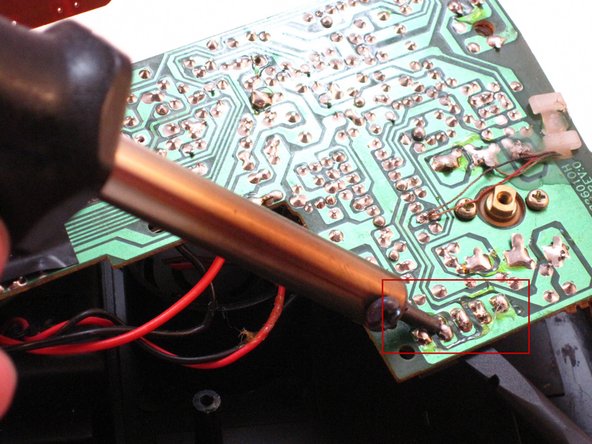
  10. GE 7-4836B Alarm Clock AM-FM Radio AM-FM Switch Replacement, AM-FM Pins: 10 단계, 이미지 1/3 GE 7-4836B Alarm Clock AM-FM Radio AM-FM Switch Replacement, AM-FM Pins: 10 단계, 이미지 2/3 GE 7-4836B Alarm Clock AM-FM Radio AM-FM Switch Replacement, AM-FM Pins: 10 단계, 이미지 3/3
    • Locate the AM-FM pins on the PCB.

    • Carefully apply the hot soldering iron to the solder on top of the AM-FM pins.

    • Gently and firmly push on the pins with the Spudger to remove the switch from the underside of the PCB.

결론

To reassemble your device, follow these instructions in reverse order.

Dominick Giguere

회원 가입일: 10/28/14

848 평판

안내서 6개 작성하였습니다

댓글 0개

댓글 쓰기

조회 통계:

24 시간 전: 0

7일 전: 3

30일 전: 9

전체 시간: 1,059