소개
Use this guide to replace the USB-C charging port and daughterboard in your Samsung Galaxy S20.
The USB-C port is soldered to the daughterboard, so this repair will require you to replace the entire daughterboard.
Note: Retaining water resistance after the repair will depend on how well you reapply the adhesive, but your device will lose its IP (Ingress Protection) rating.
필요한 것
-
-
Heat an iOpener and apply it to the back cover's bottom edge for two minutes.
-
-
-
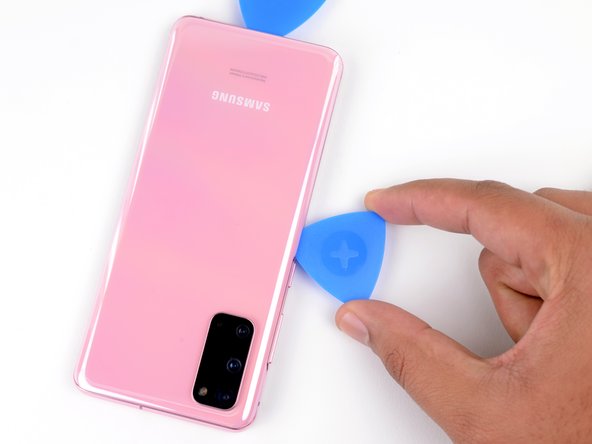
Apply a suction cup to the back of the phone, as close to the center of the bottom edge as possible.
-
Pull on the suction cup with strong, steady force to create a gap between the back cover and the frame.
-
Insert the point of an opening pick into the gap.
-
-
-
Apply a heated iOpener to the left edge of the back cover for two minutes.
-
-
-
Apply a suction cup to the back of the phone, as close to the center of the left edge as possible.
-
Pull on the suction cup with strong, steady force to create a gap between the back cover and the frame.
-
Insert the point of an opening pick into the gap.
-
You can try also applying a few drops of high concentration (over 90%) isopropyl alcohol into the seam to help loosen the adhesive.
-
-
-
Apply a heated iOpener to the right edge of the back cover for two minutes.
-
-
-
Apply a suction cup to the back of the phone, as close to the center of the right edge as possible.
-
Pull on the suction cup with strong, steady force to create a gap between the back cover and the frame.
-
Insert the point of an opening pick into the gap.
-
-
-
-
Apply a heated iOpener to the top edge of the back cover for two minutes.
-
-
-
Gradually slide the pick from the right edge of the device around the top right corner.
-
Continue slicing along the top edge all the way to the top left corner to fully separate the back cover adhesive.
-
-
-
Lift the back cover slowly. Use opening picks to slice any remaining adhesive.
-
Remove the back cover.
-
This is a good point to power on your phone and test all functions before sealing it up. Be sure to power your phone back down completely before you continue working.
-
Remove any adhesive chunks with a pair of tweezers or your fingers. Apply heat if you're having trouble separating the adhesive.
-
If you're using custom-cut adhesives, follow this guide.
-
If you're using double-sided tape, follow this guide.
-
-
-
Use a spudger to pry up and disconnect the wireless charging coil's press connector on the motherboard.
-
-
-
Use a Phillips #00 screwdriver to remove the five 4 mm-long screws securing the motherboard bracket.
-
-
-
Use a pair of blunt-nose tweezers to gently pull up and unclip the motherboard bracket from the plastic midframe.
-
-
-
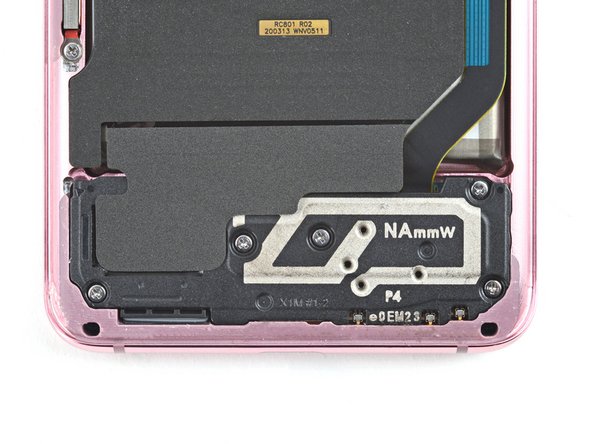
Use a Phillips #00 screwdriver to remove the five 4 mm-long screws securing the loudspeaker and lower midframe.
-
-
-
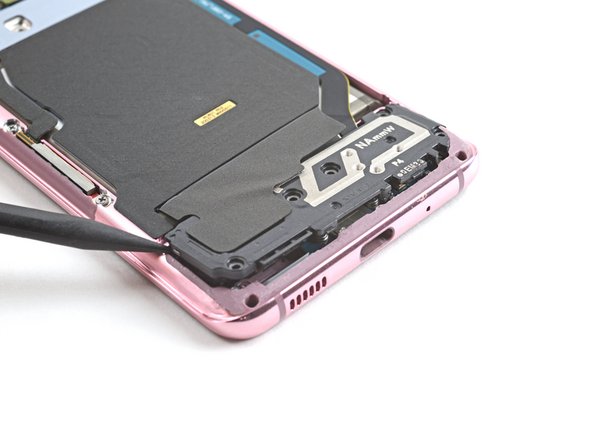
Insert the point of a spudger into the notch in the top left corner of the midframe and pry up to release the clips holding it in place.
-
-
-
Insert the point of a spudger into the notch in the top left corner of the midframe and pry up to release the clips holding it in place.
-
Remove the wireless charging coil.
-
-
-
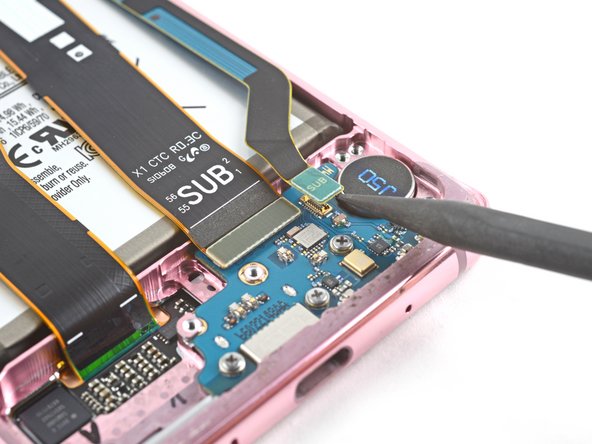
Use a spudger to pry up and disconnect the battery's press connector on the motherboard.
-
-
-
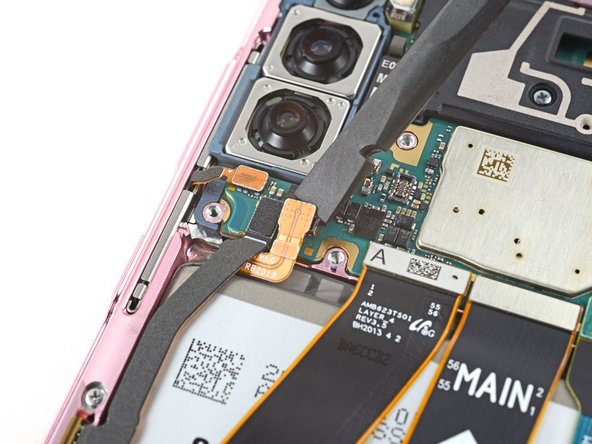
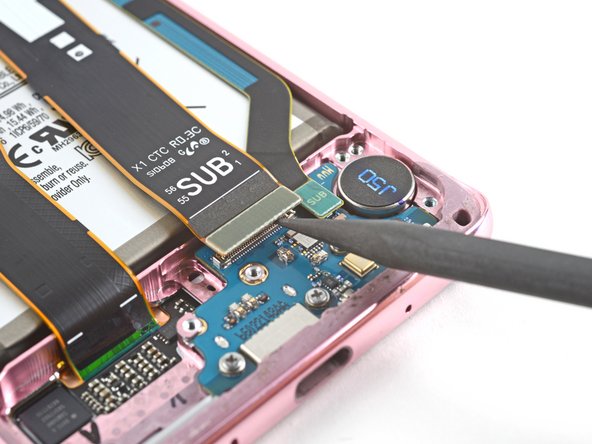
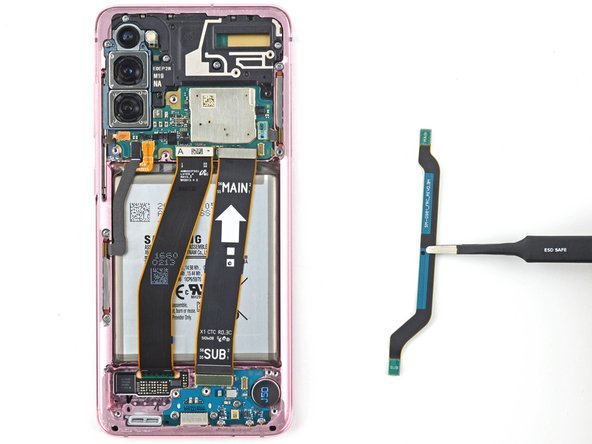
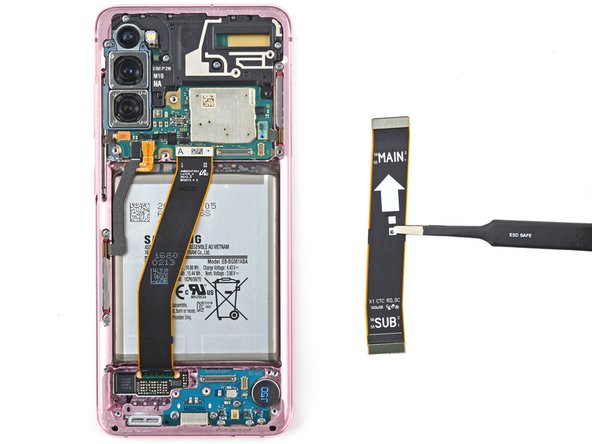
Use a spudger to pry up and disconnect the primary and secondary flex cables from the motherboard.
-
-
-
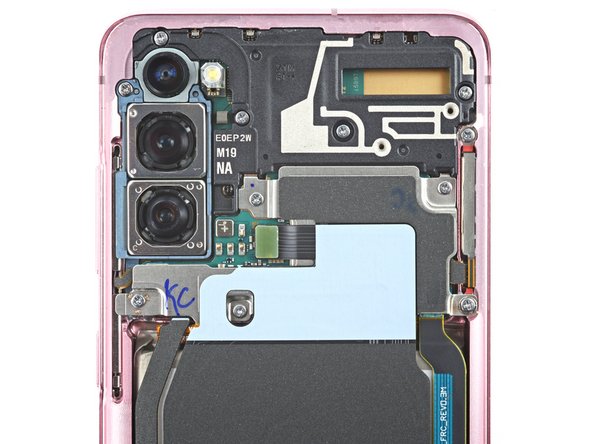
Use a Phillips #00 screwdriver to remove the three 3.4 mm-long screws securing the USB-C port and daughterboard.
-
-
-
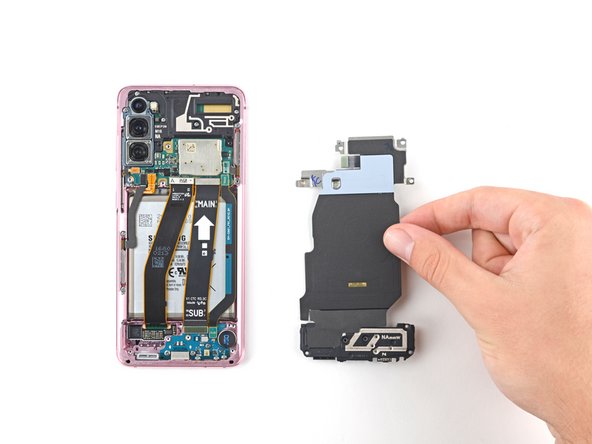
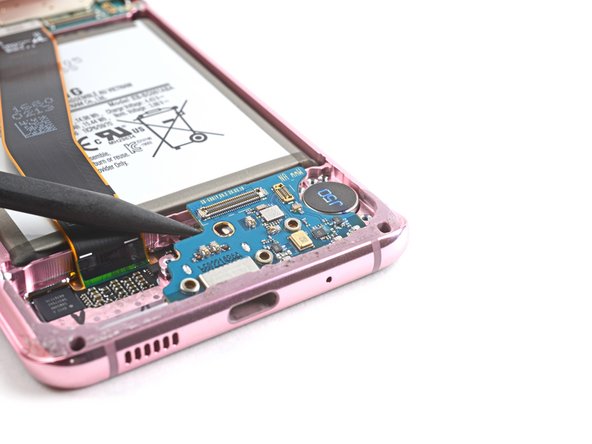
Insert the pointed end of a spudger under the left edge of the daughterboard and pry up to release it from its recess.
-
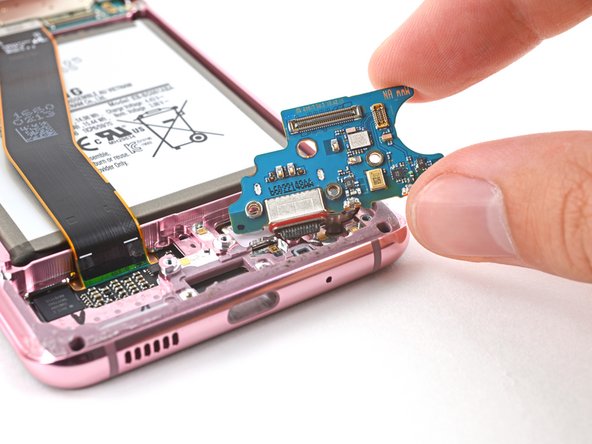
Use a pair of tweezers to pull the daughterboard up and away from the bottom of the device and remove it.
-


To reassemble your device, follow these instructions in reverse order.
Take your e-waste to an R2 or e-Stewards certified recycler.
Repair didn’t go as planned? Check out our Answers community for troubleshooting help.
To reassemble your device, follow these instructions in reverse order.
Take your e-waste to an R2 or e-Stewards certified recycler.
Repair didn’t go as planned? Check out our Answers community for troubleshooting help.
다른 2명이 해당 안내서를 완성하였습니다.

