소개
How to access and replace the black and white LCD screen in your original Game Boy. This is an advanced repair. You'll need to know how to solder to complete this repair, so be sure to check out iFixit's soldering technique guide.
Note: If your Game Boy’s display has the classic “vertical lines” problem, it’s actually easier to fix the old screen than to replace it with a new one. Follow this guide for help repairing the old screen.
필요한 것
-
-
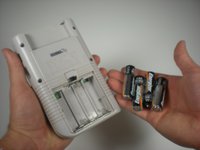
Use a fingernail (or small coin) to push down on the battery door latch and remove the battery door.
-
-
-
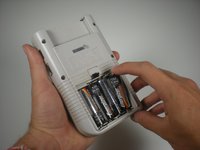
Use a fingernail to pry each battery outward from the positive (+) terminal to remove them.
-
-
-
-
Gently separate the device's front casing from the back casing after you remove the screws.
-
-
-
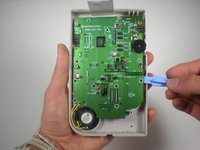
Grip the ribbon connector with your thumb and forefinger. Pull down gently until the connector, not the ribbon itself, comes out of its socket.
-
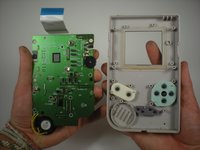
Separate the front and back casings.
-
-
-
Disengage the the three plastic clips that secure the screen to the circuit board.
-
-
-
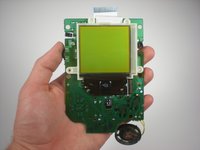
Flip the circuit board over revealing the device screen.
-
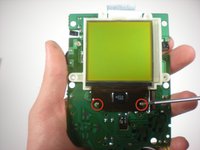
Remove the two screws connecting the screen and the circuit board.
-
-
-
Follow the video instructions to desolder the display connectors and replace your screen.
-


To reassemble your device, follow these instructions in reverse order.
다른 50명이 해당 안내서를 완성하였습니다.
팀

Cal Poly, Team 3-2, Johann Summer 2010 Cal Poly, Team 3-2, Johann Summer 2010 회원
CPSU-JOHANN-R10S3G2
3 회원들
안내서 40개를 작성함
14가이드 댓글
What kind of lcd screen or where can I find one that isn't off of another dmg-01 gameboy?
Floyd Odom - 답글 공유
I was wondering the same. Maybe ebay or Amazon.
What about the new display? Where to get it?
No spare part necessary should be replaced with a link where to buy a new one.
Helmut Kohli - 답글 공유
You can’t buy a new replacement screen unfortunately. Not only is it very difficult to remove the screen, it’s impossible to buy a replacement. They’d be better showing us how to fix a screen. There’s plenty of videos on YT showing how to fix blank vertical line but hardly any on how to fix horizontal lines, and the ones that do don’t work very well.