주요 콘텐츠로 건너뛰기

Garmin inReach Explorer Plus Antenna Replacement

필요한 것

  1. Garmin inReach Explorer Plus Antenna Replacement, Battery: 1 단계, 이미지 1/1
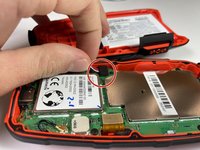
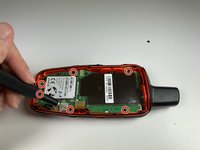
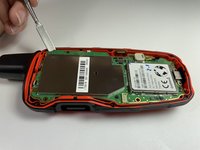
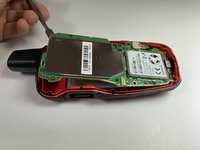
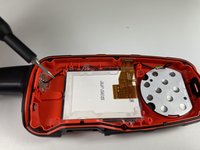
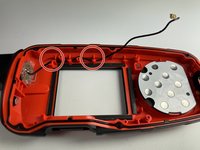
    • Using the TR6 Torx Security screwdriver, remove six 10 mm screws from the back cover of the device.

  2. Garmin inReach Explorer Plus Antenna Replacement: 2 단계, 이미지 1/1
    • Remove the back cover.

  3. Garmin inReach Explorer Plus Antenna Replacement: 3 단계, 이미지 1/2 Garmin inReach Explorer Plus Antenna Replacement: 3 단계, 이미지 2/2
    • Gently grasp the battery wire and disconnect it from the device.

    • Remove the battery from the device.

  4. Garmin inReach Explorer Plus Antenna Replacement, Motherboard: 4 단계, 이미지 1/2 Garmin inReach Explorer Plus Antenna Replacement, Motherboard: 4 단계, 이미지 2/2
    • Using the T5 Torx screwdriver, remove the six 6 mm screws from the motherboard.

  5. Garmin inReach Explorer Plus Antenna Replacement: 5 단계, 이미지 1/2 Garmin inReach Explorer Plus Antenna Replacement: 5 단계, 이미지 2/2
    • Disconnect the LCD screen from the motherboard by lifting on the flap with the nylon spudger.

    • The metal spudger should only be used for serious prying power. If used incorrectly, the metal spudger may damage the components of a device.

  6. Garmin inReach Explorer Plus Antenna Replacement: 6 단계, 이미지 1/2 Garmin inReach Explorer Plus Antenna Replacement: 6 단계, 이미지 2/2
    • Disconnect the antenna from the motherboard by lifting the wire with a nylon spudger.

  7. Garmin inReach Explorer Plus Antenna Replacement: 7 단계, 이미지 1/3 Garmin inReach Explorer Plus Antenna Replacement: 7 단계, 이미지 2/3 Garmin inReach Explorer Plus Antenna Replacement: 7 단계, 이미지 3/3
    • Gently lift the motherboard up and out of the device.

  8. Garmin inReach Explorer Plus Antenna Replacement, LCD Screen: 8 단계, 이미지 1/2 Garmin inReach Explorer Plus Antenna Replacement, LCD Screen: 8 단계, 이미지 2/2
    • Using the T5 Torx screwdriver, remove the two 6 mm screws from the LCD screen.

  9. Garmin inReach Explorer Plus Antenna Replacement: 9 단계, 이미지 1/3 Garmin inReach Explorer Plus Antenna Replacement: 9 단계, 이미지 2/3 Garmin inReach Explorer Plus Antenna Replacement: 9 단계, 이미지 3/3
    • Use a nylon spudger to separate the LCD screen from the main body and remove the LCD screen.

    • The metal spudger should only be used for serious prying power. If used incorrectly, the metal spudger may damage the components of a device.

  10. Garmin inReach Explorer Plus Antenna Replacement, Antenna: 10 단계, 이미지 1/3 Garmin inReach Explorer Plus Antenna Replacement, Antenna: 10 단계, 이미지 2/3 Garmin inReach Explorer Plus Antenna Replacement, Antenna: 10 단계, 이미지 3/3
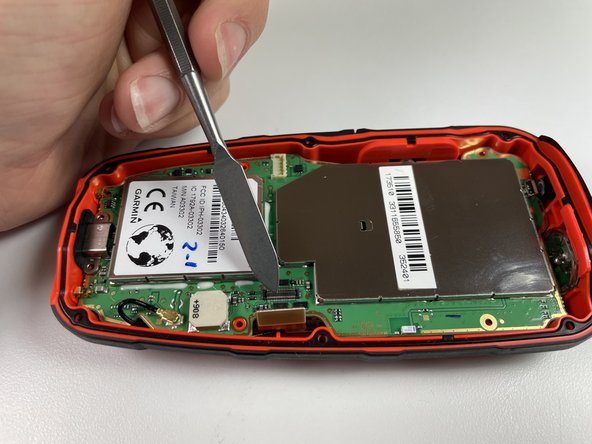
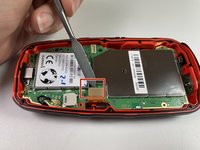
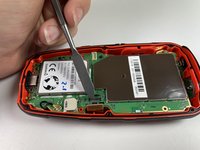
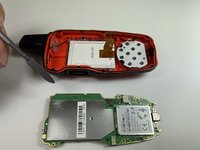
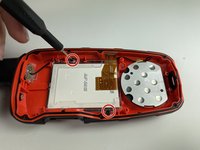
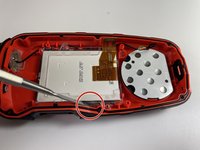
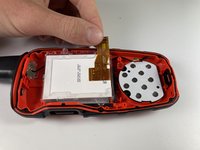
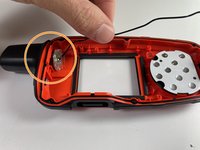
    • Gently pull out the antenna wire and remove the antenna from the device.

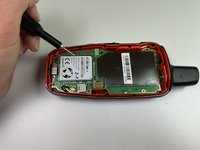
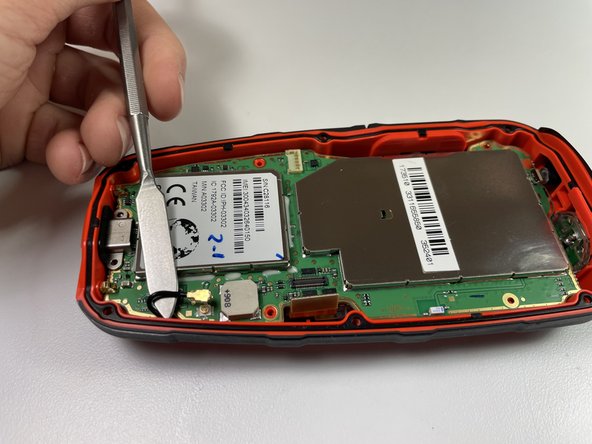
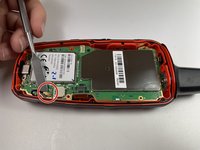
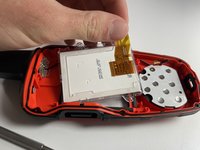
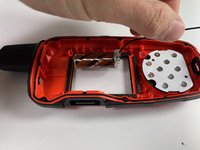
    • The antenna should now slide out easily. If the antenna is stuck, use the spudger to gently dislodge the antenna from its housing.

결론

To reassemble your device, follow these instructions in reverse order.

Sean Kelley

회원 가입일: 09/28/21

387 평판

안내서 4개 작성하였습니다

Clemson, Team 5-4, Hunter Fall 2021 Clemson, Team 5-4, Hunter Fall 2021 회원

CLEM-HUNTER-F21S5G4

4 회원들

안내서 5개 작성하였습니다

댓글 0개

댓글 쓰기

조회 통계:

24 시간 전: 0

7일 전: 1

30일 전: 7

전체 시간: 410