주요 콘텐츠로 건너뛰기

HP Chromebook 11A G8 EE Battery Replacement

필요한 것

  1. HP Chromebook 11A G8 EE Battery Replacement, Keyboard Assembly: 1 단계, 이미지 1/2 HP Chromebook 11A G8 EE Battery Replacement, Keyboard Assembly: 1 단계, 이미지 2/2
    • On the bottom of the laptop, remove four 7 mm screw using a Phillips #1 screwdriver.

    • Using the Phillips #1 screwdriver, remove the two remaining 8 mm screws by the hinges.

  2. HP Chromebook 11A G8 EE Battery Replacement: 2 단계, 이미지 1/3 HP Chromebook 11A G8 EE Battery Replacement: 2 단계, 이미지 2/3 HP Chromebook 11A G8 EE Battery Replacement: 2 단계, 이미지 3/3
    • Flip the laptop over and open up the display.

    • Using the iFixit opening tool, carefully separate the palm rest from the bottom cover by working your way around the perimeter and prying it up.

    • You will hear an audible and tactile click or pop letting you know that you have unclipped a portion of the palm rest from the base enclosure.

    • Lift the palm rest of the laptops towards you, away from the screen.

  3. HP Chromebook 11A G8 EE Battery Replacement: 3 단계, 이미지 1/2 HP Chromebook 11A G8 EE Battery Replacement: 3 단계, 이미지 2/2
    • Carefully, lift the keyboard ribbon lock and disconnect the keyboard ribbon from the motherboard.

    • Disconnect the touchpad ribbon from the motherboard, and remove top cover.

    • Remove the keyboard.

  4. HP Chromebook 11A G8 EE Battery Replacement, Speaker: 4 단계, 이미지 1/3 HP Chromebook 11A G8 EE Battery Replacement, Speaker: 4 단계, 이미지 2/3 HP Chromebook 11A G8 EE Battery Replacement, Speaker: 4 단계, 이미지 3/3
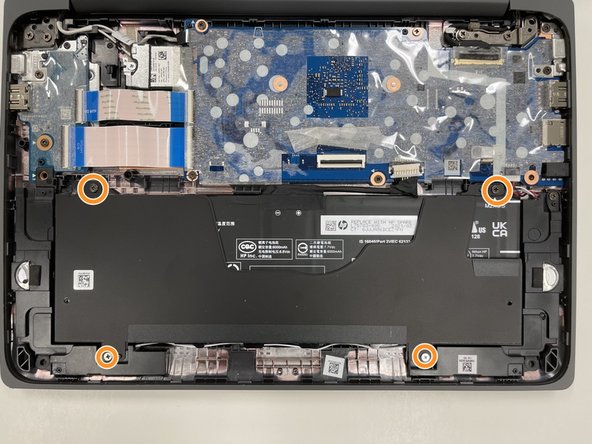
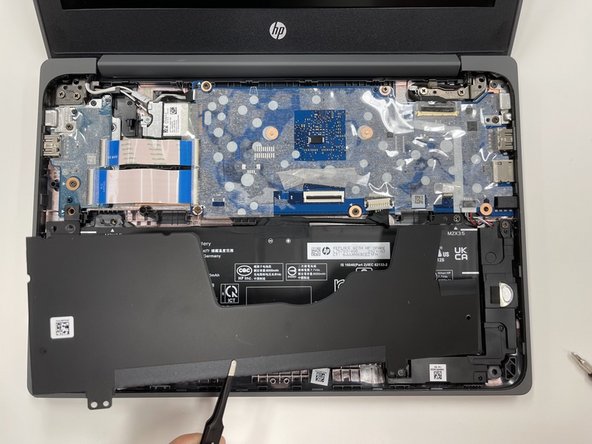
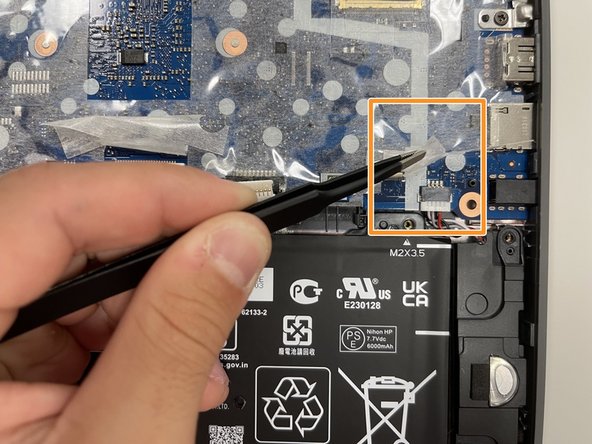
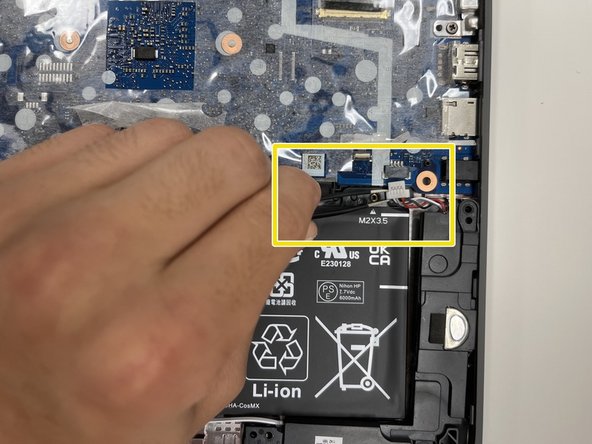
    • Using the tweezers, carefully disconnect the battery cable from the motherboard.

    • Use the Phillips #0 screwdriver, remove the four 3.5 mm screws that secure the battery cover to the battery.

    • Using the tweezers, carefully remove the battery cover.

  5. HP Chromebook 11A G8 EE Battery Replacement: 5 단계, 이미지 1/3 HP Chromebook 11A G8 EE Battery Replacement: 5 단계, 이미지 2/3 HP Chromebook 11A G8 EE Battery Replacement: 5 단계, 이미지 3/3
    • Using the Phillips #1 screwdriver, remove the 3.5 mm screw that secures the speaker to the frame.

    • Peel back the clear sheet.

    • Using the tweezers, carefully disconnect the speaker cable from the motherboard.

  6. HP Chromebook 11A G8 EE Battery Replacement: 6 단계, 이미지 1/2 HP Chromebook 11A G8 EE Battery Replacement: 6 단계, 이미지 2/2
    • Remove the speaker cable from the routing channel on the keyboard.

    • Using your hands, carefully lift the speakers out of the alignment pins, and remove.

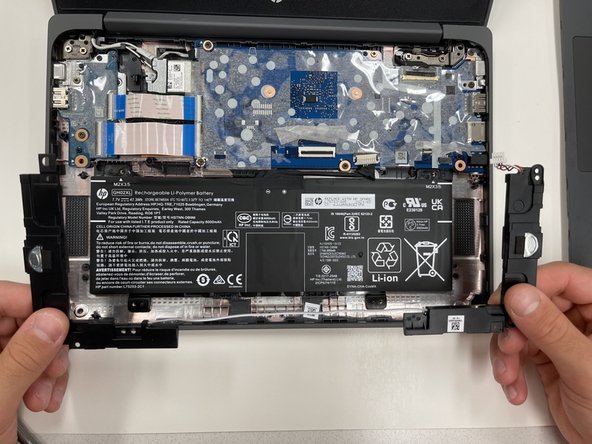
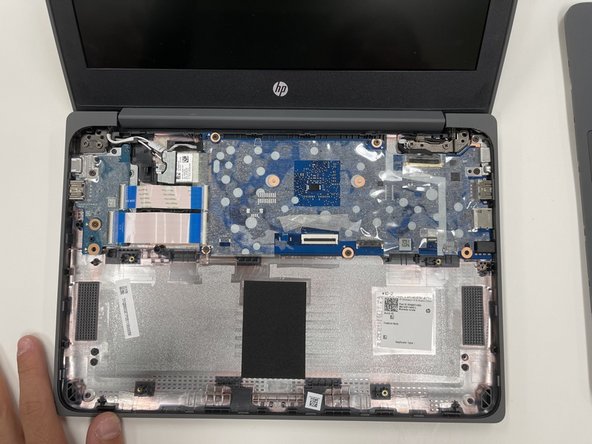
  7. HP Chromebook 11A G8 EE Battery Replacement, Battery: 7 단계, 이미지 1/2 HP Chromebook 11A G8 EE Battery Replacement, Battery: 7 단계, 이미지 2/2
    • Lift the battery out of the case and remove.

결론

To reassemble your device, follow these instructions in reverse order.

다른 2명이 해당 안내서를 완성하였습니다.

Ella Portwood

회원 가입일: 09/03/21

684 평판

안내서 4개 작성하였습니다

University of Alabama, Team 2-1, Bedsole Fall 2021 University of Alabama, Team 2-1, Bedsole Fall 2021 회원

UA-BEDSOLE-F21S2G1

4 회원들

안내서 7개 작성하였습니다

댓글 0개

댓글 쓰기

조회 통계:

24 시간 전: 0

7일 전: 7

30일 전: 47

전체 시간: 1,820