소개
This guide will instruct you on how to safely remove and replace heatsink in your HP Elitebook x360 830 G6. Excessive force to remove, or replace, any part should not be needed. If you find yourself straining to remove, or replace, a part, please review the steps to ensure you are doing it correctly. Proper storage of every part and screw is extremely important when completing this guide. When taking any hardware out of the laptop, place it safely off to the side as it will need to be reinstalled.
필요한 것
-
-
Use a Torx T5 screwdriver to loosen the five captive screws holding the back cover.
-
-
-
Insert an opening pick between a corner of the back corner and the chassis, near a hinge.
-
Pry upward to release the retaining clips.
-
Repeat this process for the opposite corner.
-
-
-
Insert your opening pick between the back cover and chassis, along the edge of the cover between the hinges.
-
Pry up to release the additional retaining clips.
-
-
-
-
Grab the cover by the corners next to the hinges.
-
Swing the cover open and away from you.
-
Lift and remove the back cover from the laptop body.
-
-
-
Use the point of a spudger to push the sides of the battery connector out of its socket.
-
Push on alternate sides to "walk" the connector out.
-
-
-
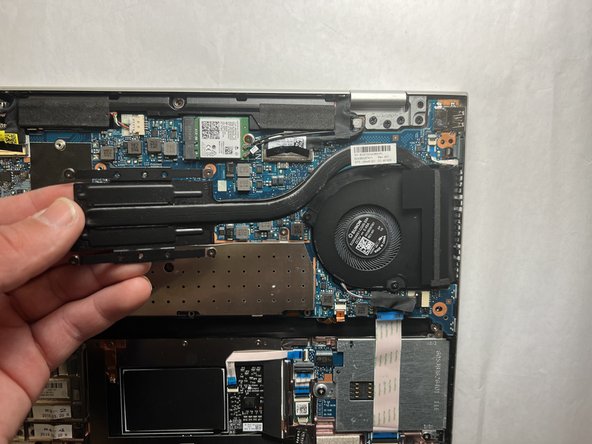
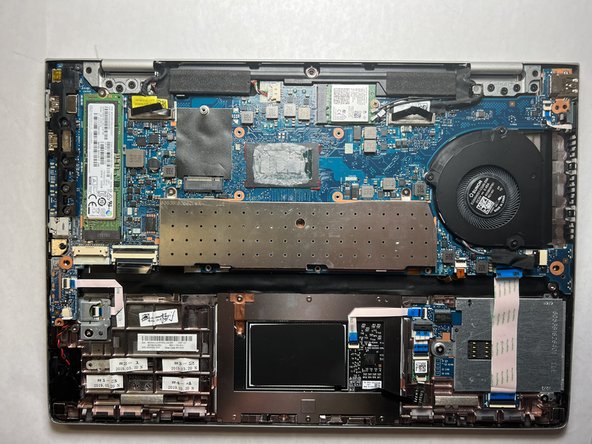
Use a Phillips #0 screwdriver to remove each of the four 3 mm screws at each corner of the heatsink.
-


To reassemble your device, follow these instructions in reverse order.
To reassemble your device, follow these instructions in reverse order.

팀

IUPUI, Team 3-3, Harley Spring 2024 IUPUI, Team 3-3, Harley Spring 2024 회원
IUPUI-HARLEY-S24S3G3
4 회원들
안내서 3개 작성하였습니다