이 버전에는 잘못된 편집 사항이 있을 수 있습니다. 최신 확인된 스냅샷으로 전환하십시오.
필요한 것
-
이 단계는 번역되지 않았습니다. 번역을 도와주십시오
-
With the case closed, place the Mini 1000 top-side down on a flat surface.
-
Push both of the battery release latches toward each other.
-
-
이 단계는 번역되지 않았습니다. 번역을 도와주십시오
-
Lift the battery out of the Mini 1000 from the edge closest to the release latches.
-
-
-
이 단계는 번역되지 않았습니다. 번역을 도와주십시오
-
Remove the following two screws:
-
One 6 mm Phillips screw
-
One 4 mm Phillips screw
-
-
이 단계는 번역되지 않았습니다. 번역을 도와주십시오
-
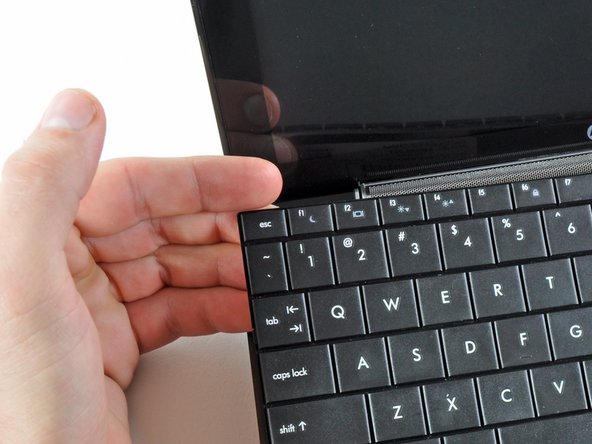
While pushing through the opening with one hand, grasp the left upper edge with the other hand and slightly pull the keyboard towards you.
-
Once an opening has been established, grasp the keyboard and slowly lift it upwards along the upper perimeter of the top edge.
-
-
이 단계는 번역되지 않았습니다. 번역을 도와주십시오
-
Lift the keyboard out of the upper case, minding the cable that is still connecting it to the motherboard.
-
-
이 단계는 번역되지 않았습니다. 번역을 도와주십시오
-
Use your fingernail or the flat end of a spudger to flip up the retaining flap on the keyboard cable ZIF socket.
-
Pull the cable out of its socket and remove the keyboard.
-


다른 5명이 해당 안내서를 완성하였습니다.
