주요 콘텐츠로 건너뛰기

HP Pavilion 13-s128nr Battery Replacement

필요한 것

  1. HP Pavilion 13-s128nr Battery Replacement, Back Panel: 1 단계, 이미지 1/2 HP Pavilion 13-s128nr Battery Replacement, Back Panel: 1 단계, 이미지 2/2
    • Use the iFixit opening tool to take off the rubber caps.

    • Remove the screws using the Phillips #0 screwdriver.

  2. HP Pavilion 13-s128nr Battery Replacement: 2 단계, 이미지 1/1
    • Use the Jimmy to pry around the seam of the laptop.

    • Remove the back panel of the laptop.

    • Don't completely remove the back panel as there are ribbon cables that can be easily damaged if removed quickly.

  3. HP Pavilion 13-s128nr Battery Replacement: 3 단계, 이미지 1/2 HP Pavilion 13-s128nr Battery Replacement: 3 단계, 이미지 2/2
    • Using the iFixit opening tool to lift the tabs holding in the cables connecting the keyboard to the motherboard.

    • Pull the cable from the motherboard.

  4. HP Pavilion 13-s128nr Battery Replacement, Battery: 4 단계, 이미지 1/2 HP Pavilion 13-s128nr Battery Replacement, Battery: 4 단계, 이미지 2/2
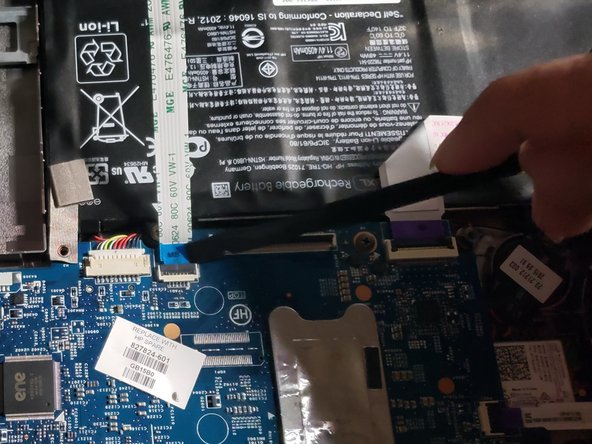
    • Lift upwards on the black tabs the purple strip is connected to.

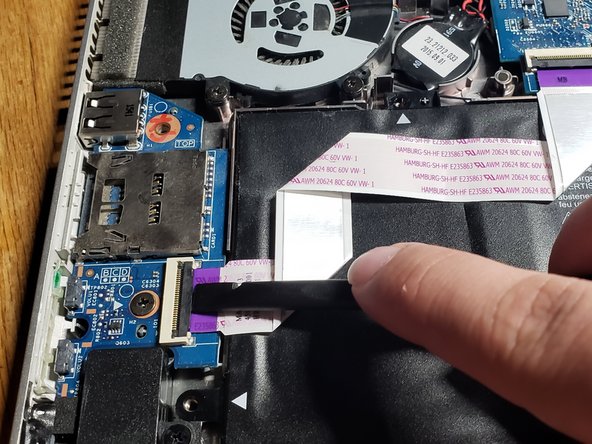
    • Gently pull the purple strip out of its place.

  5. HP Pavilion 13-s128nr Battery Replacement: 5 단계, 이미지 1/1
    • Using the Phillips #0 screwdriver, remove the five screws holding the battery in place.

  6. HP Pavilion 13-s128nr Battery Replacement: 6 단계, 이미지 1/1
    • Pull the white cable connected to the motherboard out using the iFixit opening tool.

  7. HP Pavilion 13-s128nr Battery Replacement: 7 단계, 이미지 1/1
    • Remove the battery.

    • There are little snap tabs on the right side of the battery. Be sure not to break them by pulling the battery out towards the left side.

결론

To reassemble your device, follow these instructions in reverse order.

다른 한 분이 해당 안내서를 완성하였습니다.

Sydney Bell

회원 가입일: 02/13/20

317 평판

안내서 2개 작성하였습니다

댓글 0개

댓글 쓰기

조회 통계:

24 시간 전: 0

7일 전: 2

30일 전: 13

전체 시간: 1,100