소개
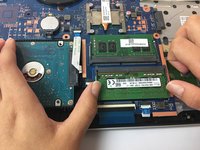
By following this guide, you will be able to change the RAM sticks on your laptop. You may wish to do this if you want to upgrade the maximum RAM available or if you are noticing slowdown on your computer. You will first remove the battery before you remove the RAM.
필요한 것
-
-
Using the plastic opening tool, remove the top rubber feet on the back panel as it hides one of the screws we will be removing.
-
-
-
Using a PH0 screwdriver, unscrew the ten 4.4mm Phillips head screws located on the back panel.
-
-
-
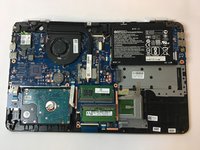
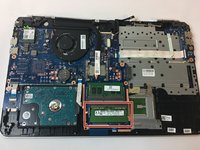
Using the plastic opening tool, remove the back cover of the laptop.
What? I think you have have neglected to mention the DVD drawer. I believe it needs to be pulled out after removing the center screw and before removing the cover.
Dan Enslow - 답글
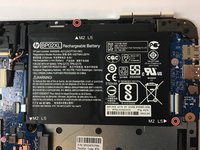
Yes, best to remove the drawer as recommended. Also there are 3 screws holding the battery, not 2.
Lastly, pay careful attention to the orientation photo when removing the back.
I did not have the plastic tool but used a small Teflon type kitchen spatula and it did the trick. Do not use a metal screw driver or other such tool.
-
-
-
-
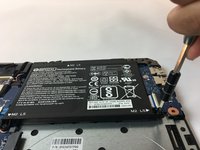
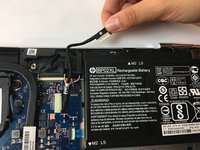
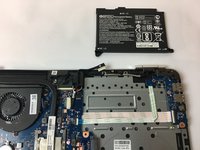
Using a PH0 screwdriver, unscrew the two 3.8mm PH0 Phillips head screws that hold the battery in place.
-


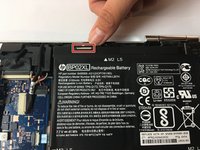


To reassemble your device, follow these instructions in reverse order.
To reassemble your device, follow these instructions in reverse order.
다른 2명이 해당 안내서를 완성하였습니다.
팀

USF Tampa, Team S13-G3, Cagle Fall 2017 USF Tampa, Team S13-G3, Cagle Fall 2017 회원
USFT-CAGLE-F17S13G3
2 회원들
안내서 6개를 작성함
댓글 한 개
Thanks mate….your steps are helpful <3
Can you please guide on how to buy the RAM for this laptop…my current RAM is 4GB
Im planning to upgrade to 8GB
thanks