주요 콘텐츠로 건너뛰기

HTC One Remix Speaker Replacement

필요한 것

  1. HTC One Remix Speaker Replacement, Speaker: 1 단계, 이미지 1/1
    • Use the sim eject tool to remove the SIM cards on either side of the phone.

  2. HTC One Remix Speaker Replacement: 2 단계, 이미지 1/1
  3. HTC One Remix Speaker Replacement: 3 단계, 이미지 1/1
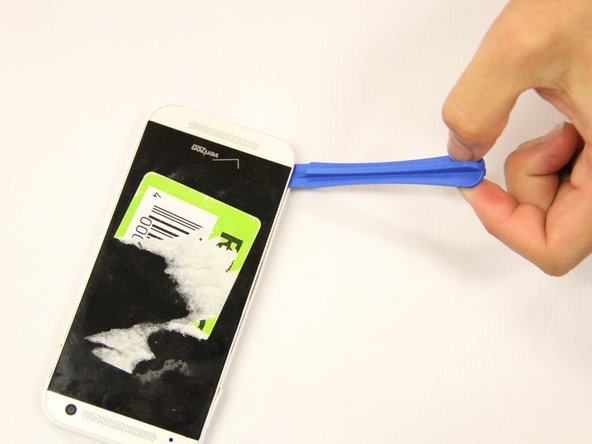
    • Once the top of the phone is warm, use a plastic spudger to pry the top left corner up.

    • The top is glued on so it may be difficult to get off.

  4. HTC One Remix Speaker Replacement: 4 단계, 이미지 1/1
    • Remove the single 3 mm screw that is on the top left side using a Torx 4 screwdriver.

  5. HTC One Remix Speaker Replacement: 5 단계, 이미지 1/2 HTC One Remix Speaker Replacement: 5 단계, 이미지 2/2
    • Use the plastic prying tool to pry off the back cover. Place the tool in the SIM card insert and lift off the back cover with force. Continue to do this all around the phone.

    • Be careful to not break the wiring that is connected from the inside to the back of the phone.

  6. HTC One Remix Speaker Replacement: 6 단계, 이미지 1/2 HTC One Remix Speaker Replacement: 6 단계, 이미지 2/2
    • With tweezers, remove the small pieces of yellow tape that cover the zif connectors.

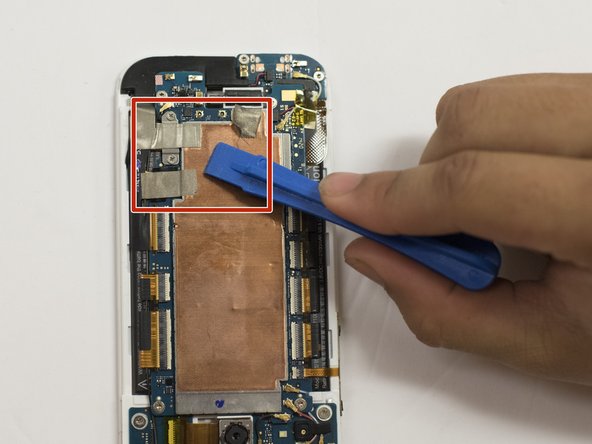
    • Use the plastic prying tool to take off the three pieces of silver tape. They are located at the bottom right corner of the copper plate.

  7. HTC One Remix Speaker Replacement: 7 단계, 이미지 1/3 HTC One Remix Speaker Replacement: 7 단계, 이미지 2/3 HTC One Remix Speaker Replacement: 7 단계, 이미지 3/3
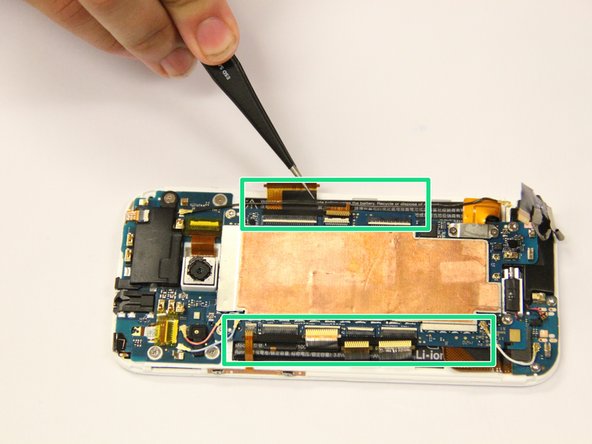
    • With the plastic spudger, disconnect the eight ZIF connectors. Do this by lifting the small white lines up and pulling the ribbon from it.

    • Use tweezers to carefully detach the eight ribbon cables from the connectors.

  8. HTC One Remix Speaker Replacement: 8 단계, 이미지 1/1
    • Remove the two 1 mm screws at the bottom right of the motherboard using a Torx 4 screwdriver.

  9. HTC One Remix Speaker Replacement: 9 단계, 이미지 1/3 HTC One Remix Speaker Replacement: 9 단계, 이미지 2/3 HTC One Remix Speaker Replacement: 9 단계, 이미지 3/3
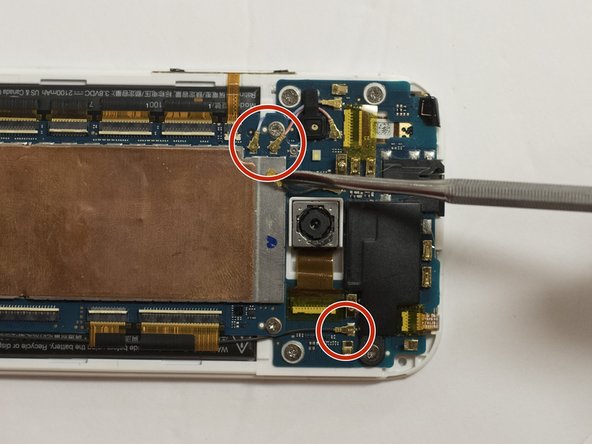
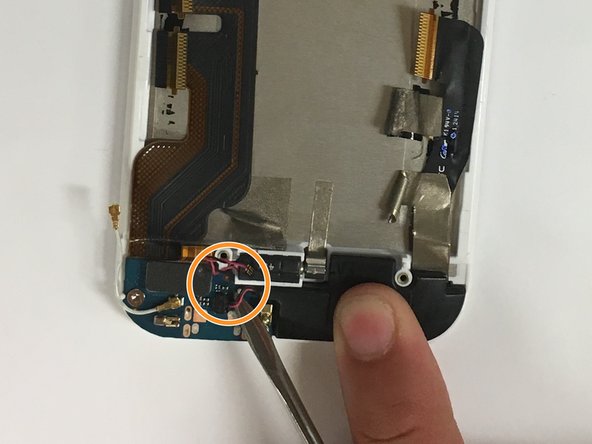
    • Pull off one end of each of the five colored connecting cables from the motherboard.

    • Pull the black and red wire from the motherboard on the bottom left.

    • Below the bottom left gold cable.

  10. HTC One Remix Speaker Replacement: 10 단계, 이미지 1/1
    • Remove the four 3 mm screws on each corner of the motherboard using a Torx 4 screwdriver.

    • Gently lift the motherboard out of the phone using the plastic opening tool.

    • Make sure the ribbon cables are out of the way when removing the motherboard.

  11. HTC One Remix Speaker Replacement: 11 단계, 이미지 1/1
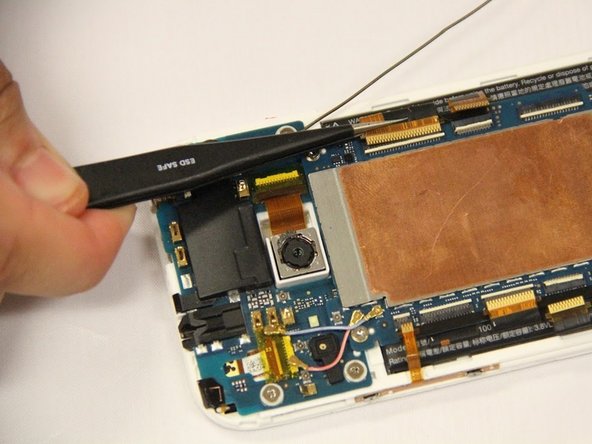
    • With a plastic opening tool, remove the black speaker at the bottom of the phone.

  12. HTC One Remix Speaker Replacement: 12 단계, 이미지 1/1
    • Loosen the camera on the phone using a plastic opening tool.

    • Do not detach the camera from the phone itself.

  13. HTC One Remix Speaker Replacement: 13 단계, 이미지 1/1
    • Remove the gold tape at the top right corner of the phone and disconnect the ribbon wire from the circuit board.

  14. HTC One Remix Speaker Replacement: 14 단계, 이미지 1/1
    • Remove the four 1mm screws on the circuit board using a Phillips #00 screwdriver.

    • Remove the circuit board.

  15. HTC One Remix Speaker Replacement: 15 단계, 이미지 1/2 HTC One Remix Speaker Replacement: 15 단계, 이미지 2/2
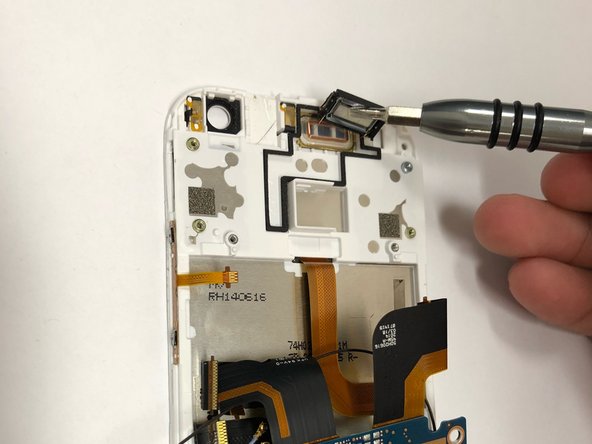
    • Using a plated screwdriver, remove the magnetic speaker from the phone itself.

결론

To reassemble your device, follow these instructions in reverse order.

Marcos Loza

회원 가입일: 04/10/18

936 평판

안내서 4개 작성하였습니다

댓글 0개

댓글 쓰기

조회 통계:

24 시간 전: 0

7일 전: 0

30일 전: 0

전체 시간: 114