주요 콘텐츠로 건너뛰기

Honda 3000 Watt Inverter Generator EU3000IS1AWK Carburetor Replacement

필요한 것

  1. Honda 3000 Watt Inverter Generator EU3000IS1AWK Carburetor Replacement, Disconnect the spark plug: 1 단계, 이미지 1/2 Honda 3000 Watt Inverter Generator EU3000IS1AWK Carburetor Replacement, Disconnect the spark plug: 1 단계, 이미지 2/2
    • Before you begin, make sure the generator is off and cool to the touch.

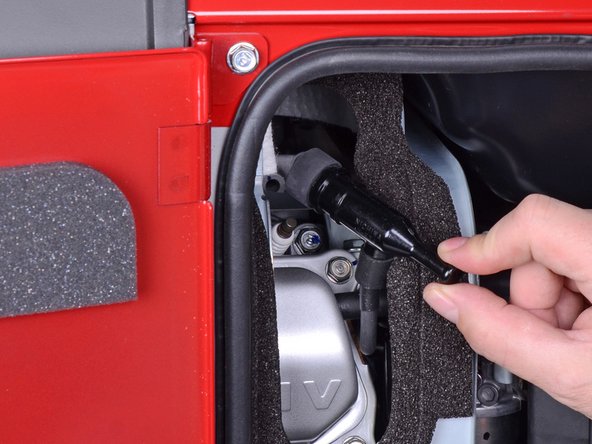
    • Use a large flathead screwdriver to unlock the maintenance cover.

    • Open the maintenance cover.

  2. Honda 3000 Watt Inverter Generator EU3000IS1AWK Carburetor Replacement: 2 단계, 이미지 1/2 Honda 3000 Watt Inverter Generator EU3000IS1AWK Carburetor Replacement: 2 단계, 이미지 2/2
    • Use a Phillips screwdriver to remove the screw securing the spark plug cover.

    • Remove the spark plug cover.

  3. Honda 3000 Watt Inverter Generator EU3000IS1AWK Carburetor Replacement: 3 단계, 이미지 1/2 Honda 3000 Watt Inverter Generator EU3000IS1AWK Carburetor Replacement: 3 단계, 이미지 2/2
    • Grab the plastic housing at the end of the spark plug wire.

    • Pull firmly to disconnect the wire from the spark plug.

  4. Honda 3000 Watt Inverter Generator EU3000IS1AWK Carburetor Replacement, Engage the fuel cutoff: 4 단계, 이미지 1/2 Honda 3000 Watt Inverter Generator EU3000IS1AWK Carburetor Replacement, Engage the fuel cutoff: 4 단계, 이미지 2/2
    • Turn the fuel valve to the cutoff position.

  5. Honda 3000 Watt Inverter Generator EU3000IS1AWK Carburetor Replacement, Remove the air cleaner filter: 5 단계, 이미지 1/3 Honda 3000 Watt Inverter Generator EU3000IS1AWK Carburetor Replacement, Remove the air cleaner filter: 5 단계, 이미지 2/3 Honda 3000 Watt Inverter Generator EU3000IS1AWK Carburetor Replacement, Remove the air cleaner filter: 5 단계, 이미지 3/3
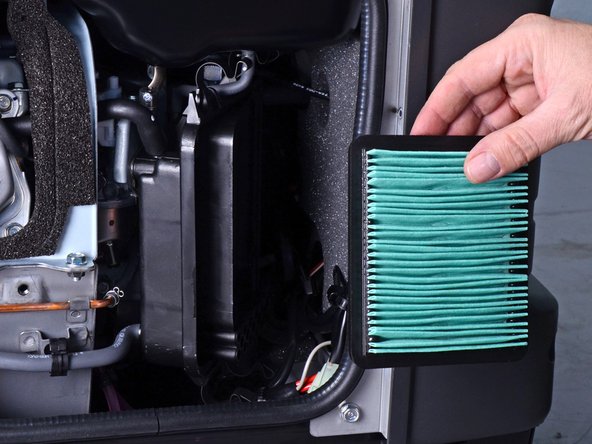
    • Unlatch the four clips securing the air cleaner cover.

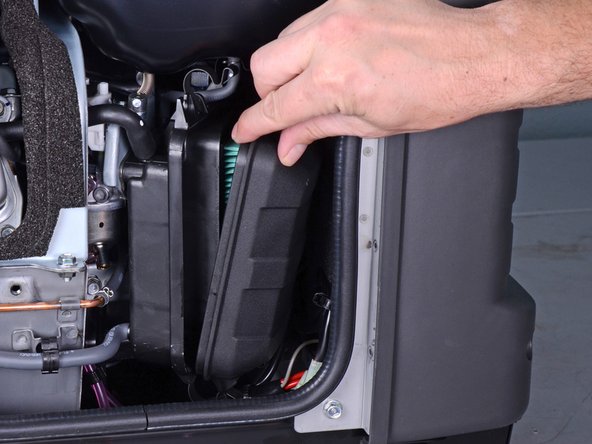
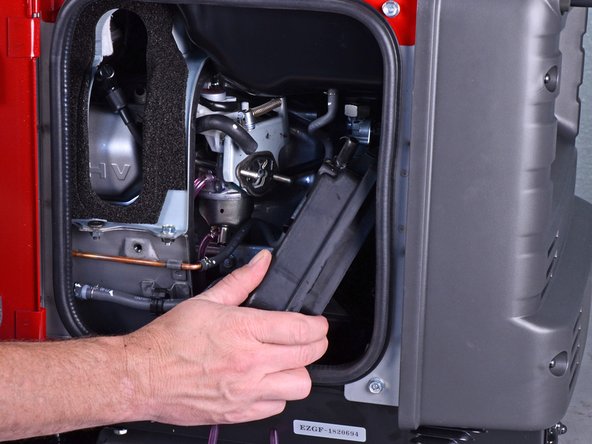
    • Remove the air cleaner cover.

  6. Honda 3000 Watt Inverter Generator EU3000IS1AWK Carburetor Replacement: 6 단계, 이미지 1/2 Honda 3000 Watt Inverter Generator EU3000IS1AWK Carburetor Replacement: 6 단계, 이미지 2/2
    • Remove the air cleaner filter from the housing.

  7. Honda 3000 Watt Inverter Generator EU3000IS1AWK Carburetor Replacement, Remove the air cleaner housing: 7 단계, 이미지 1/2 Honda 3000 Watt Inverter Generator EU3000IS1AWK Carburetor Replacement, Remove the air cleaner housing: 7 단계, 이미지 2/2
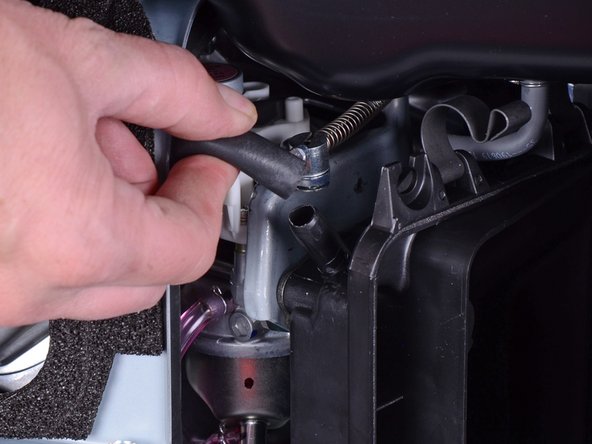
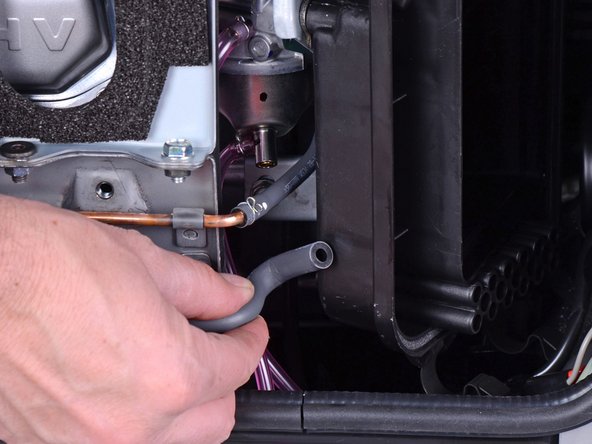
    • Pull and disconnect the breather tube from the top corner of the air cleaner housing.

  8. Honda 3000 Watt Inverter Generator EU3000IS1AWK Carburetor Replacement: 8 단계, 이미지 1/2 Honda 3000 Watt Inverter Generator EU3000IS1AWK Carburetor Replacement: 8 단계, 이미지 2/2
    • Pull and disconnect the lower tube from the bottom corner of the air cleaner housing.

  9. Honda 3000 Watt Inverter Generator EU3000IS1AWK Carburetor Replacement: 9 단계, 이미지 1/1
    • Use a 10 mm socket to remove the three fasteners securing the air cleaner housing:

    • Two 10 mm nuts

    • During reassembly, tighten these nuts to 6.3 ft-lb (8.5 N-m).

    • One 10 mm bolt

  10. Honda 3000 Watt Inverter Generator EU3000IS1AWK Carburetor Replacement: 10 단계, 이미지 1/2 Honda 3000 Watt Inverter Generator EU3000IS1AWK Carburetor Replacement: 10 단계, 이미지 2/2
    • Pull the housing out slightly from its recess.

    • The housing still has tubes clipped to it.

  11. Honda 3000 Watt Inverter Generator EU3000IS1AWK Carburetor Replacement: 11 단계, 이미지 1/1
    • Use a flathead screwdriver to pry and unclip the tube from the air cleaner housing.

  12. Honda 3000 Watt Inverter Generator EU3000IS1AWK Carburetor Replacement: 12 단계, 이미지 1/1
    • Remove the air cleaner housing.

  13. Honda 3000 Watt Inverter Generator EU3000IS1AWK Carburetor Replacement, Drain the carburetor bowl: 13 단계, 이미지 1/3 Honda 3000 Watt Inverter Generator EU3000IS1AWK Carburetor Replacement, Drain the carburetor bowl: 13 단계, 이미지 2/3 Honda 3000 Watt Inverter Generator EU3000IS1AWK Carburetor Replacement, Drain the carburetor bowl: 13 단계, 이미지 3/3
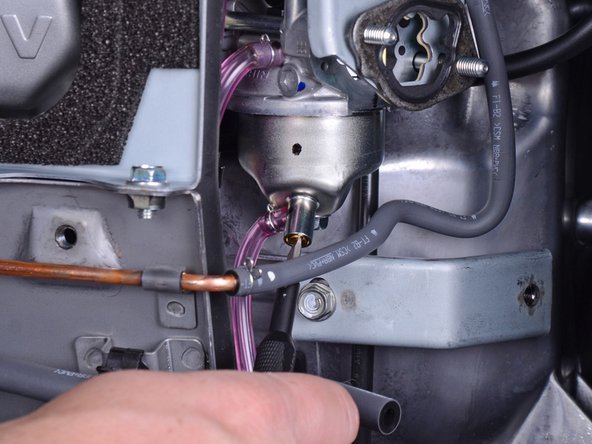
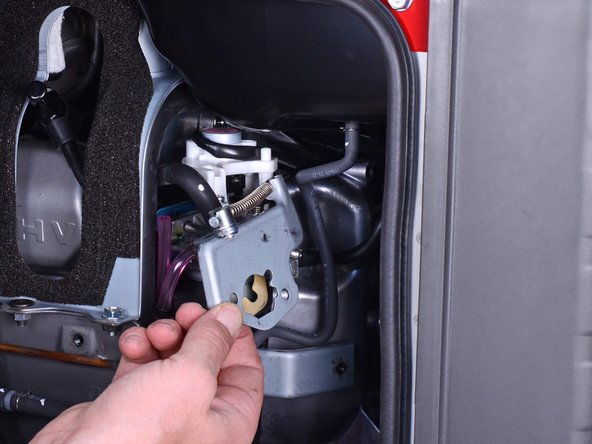
    • Place a container below the carburetor drain tube to catch the excess fuel.

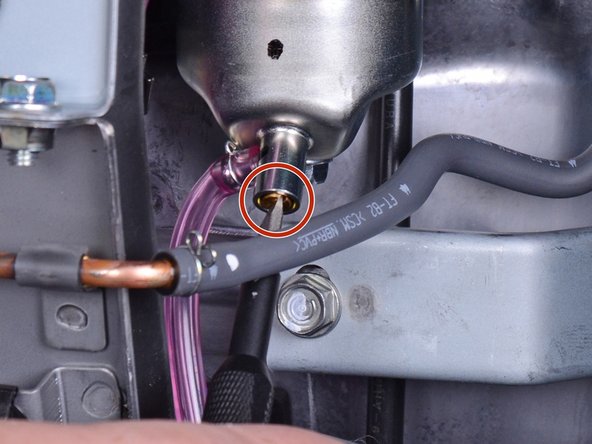
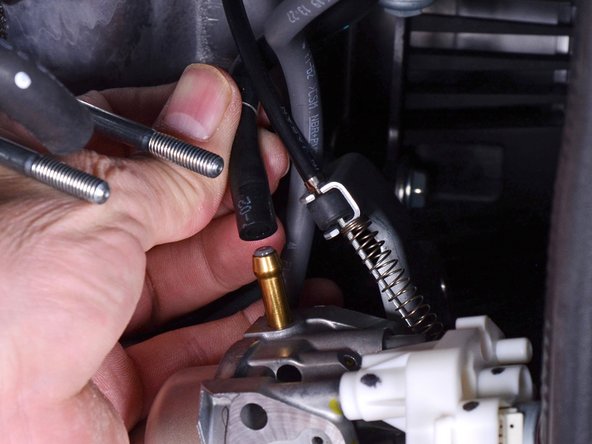
    • The carburetor drain screw is located at the bottom of the carburetor.

    • Use a flathead screwdriver to loosen the brass fuel drain screw until fuel begins to drain out of the carburetor.

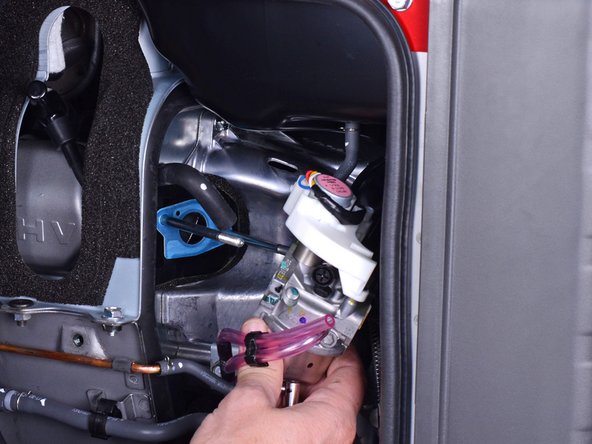
    • Once you drain the fuel bowl, re-tighten the fuel drain screw.

  14. Honda 3000 Watt Inverter Generator EU3000IS1AWK Carburetor Replacement, Remove the carburetor: 14 단계, 이미지 1/1
  15. Honda 3000 Watt Inverter Generator EU3000IS1AWK Carburetor Replacement: 15 단계, 이미지 1/2 Honda 3000 Watt Inverter Generator EU3000IS1AWK Carburetor Replacement: 15 단계, 이미지 2/2
    • Slide the choke stay off the carburetor mounting bolts and move it out of the way.

    • The choke stay will still be attached to the choke cable.

  16. Honda 3000 Watt Inverter Generator EU3000IS1AWK Carburetor Replacement: 16 단계, 이미지 1/1
  17. Honda 3000 Watt Inverter Generator EU3000IS1AWK Carburetor Replacement: 17 단계, 이미지 1/3 Honda 3000 Watt Inverter Generator EU3000IS1AWK Carburetor Replacement: 17 단계, 이미지 2/3 Honda 3000 Watt Inverter Generator EU3000IS1AWK Carburetor Replacement: 17 단계, 이미지 3/3
    • Slide the carburetor off the mounting bolts.

    • The carburetor is still attached to the generator with wires and hoses.

    • During reassembly, use the third photo as a reference for how to route the carburetor tubes.

  18. Honda 3000 Watt Inverter Generator EU3000IS1AWK Carburetor Replacement: 18 단계, 이미지 1/1
    • Disconnect the throttle control connector from the top of the carburetor.

    • Unwrap the throttle control wires from the carburetor.

  19. Honda 3000 Watt Inverter Generator EU3000IS1AWK Carburetor Replacement: 19 단계, 이미지 1/3 Honda 3000 Watt Inverter Generator EU3000IS1AWK Carburetor Replacement: 19 단계, 이미지 2/3 Honda 3000 Watt Inverter Generator EU3000IS1AWK Carburetor Replacement: 19 단계, 이미지 3/3
    • Use pliers to squeeze and loosen the hose clamp securing the carburetor fuel hose.

    • Pull and disconnect the fuel hose from the carburetor.

    • Fuel may leak out when you disconnect this hose. Be ready to catch any spillage.

  20. Honda 3000 Watt Inverter Generator EU3000IS1AWK Carburetor Replacement: 20 단계, 이미지 1/1
    • Remove the carburetor.

  21. Honda 3000 Watt Inverter Generator EU3000IS1AWK Carburetor Replacement: 21 단계, 이미지 1/1
    • If your replacement carburetor did not come with hose clips, transfer the existing clips onto the new carburetor.

  22. Honda 3000 Watt Inverter Generator EU3000IS1AWK Carburetor Replacement: 22 단계, 이미지 1/1
결론

To reassemble your device, follow these instructions in reverse order.

다른 2명이 해당 안내서를 완성하였습니다.

Arthur Shi

회원 가입일: 01/03/18

254,032 평판

안내서 529개 작성하였습니다

iFixit iFixit 회원

Staff

135 회원들

안내서 17,243개 작성하였습니다

댓글 0개

댓글 쓰기

조회 통계:

24 시간 전: 2

7일 전: 19

30일 전: 103

전체 시간: 4,727