주요 콘텐츠로 건너뛰기

How To Apply Stretch Release Battery Adhesive

필요한 것

  1. How To Apply Stretch Release Battery Adhesive, Remove the old adhesive: 1 단계, 이미지 1/1
    • Keep track of the approximate location of the old battery adhesive. It may be helpful to take a quick photo to reference later.

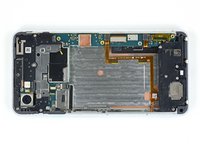
    • Begin by removing all of the old adhesive and residue from the adhesion surfaces in the battery well.

    • You can pull the adhesive off with tweezers or your fingers, roll it up on the tip of a spudger with a roll-and-pull motion, or scrape it off with the flat end of a spudger.

  2. How To Apply Stretch Release Battery Adhesive, Clean the surface: 2 단계, 이미지 1/1
    • Finish cleaning the surface using a lint-free cloth (or coffee filter) and some high-concentration isopropyl alcohol (90% or higher).

    • Wait at least a minute to let the alcohol evaporate after cleaning.

  3. How To Apply Stretch Release Battery Adhesive, Inspect your device: 3 단계, 이미지 1/2 How To Apply Stretch Release Battery Adhesive, Inspect your device: 3 단계, 이미지 2/2
    • The following steps show a general use case for the stretch release adhesive strips—locations will vary between phone models. Evaluate what will work for your specific repair before you install the adhesive.

    • With the device powered off, inspect the battery well on your device:

    • Avoid applying adhesive over ribbon cables or delicate surfaces like NFC or wireless charging coils.

    • Avoid applying adhesive too close to sensitive components.

  4. How To Apply Stretch Release Battery Adhesive, Align the adhesive strips: 4 단계, 이미지 1/1
    • The stretch release adhesive strips will be applied to the rear of the replacement battery, and may need to be cut to length.

    • If you don't need to cut the adhesive strips to length, skip the next two steps.

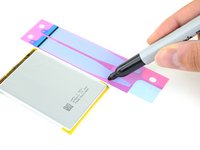
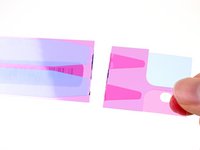
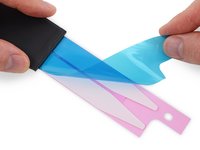
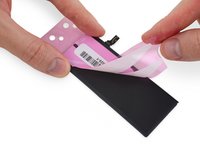
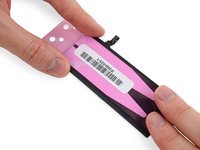
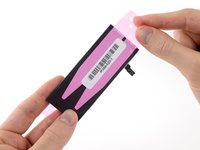
    • Lay the stretch release adhesive strips next to your replacement battery, aligning the pull tabs slightly above the top edge of the battery.

  5. How To Apply Stretch Release Battery Adhesive: 5 단계, 이미지 1/2 How To Apply Stretch Release Battery Adhesive: 5 단계, 이미지 2/2
    • Using a pen, mark a line on the stretch release adhesive just slightly above the bottom edge of the battery.

  6. How To Apply Stretch Release Battery Adhesive, Cut the adhesive to length: 6 단계, 이미지 1/3 How To Apply Stretch Release Battery Adhesive, Cut the adhesive to length: 6 단계, 이미지 2/3 How To Apply Stretch Release Battery Adhesive, Cut the adhesive to length: 6 단계, 이미지 3/3
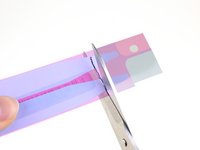
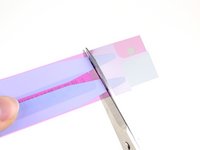
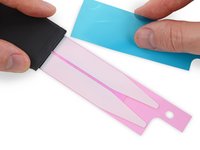
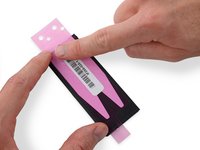
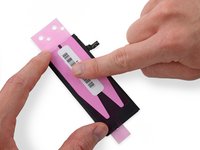
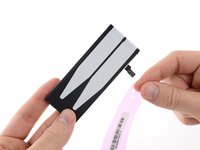
    • Use a pair of sharp scissors or a razor blade to cut the stretch release adhesive tabs at the marked line.

    • If your scissors are dull, they may gum up the adhesive—you might have to start over with fresh strips.

    • Remove the excess section of adhesive.

  7. How To Apply Stretch Release Battery Adhesive: 7 단계, 이미지 1/3 How To Apply Stretch Release Battery Adhesive: 7 단계, 이미지 2/3 How To Apply Stretch Release Battery Adhesive: 7 단계, 이미지 3/3
    • Remove the small sections of blue film covering the flat ends of the adhesive strips. Don't remove the entire blue liner, just the small parts covering the pull tabs.

  8. How To Apply Stretch Release Battery Adhesive: 8 단계, 이미지 1/3 How To Apply Stretch Release Battery Adhesive: 8 단계, 이미지 2/3 How To Apply Stretch Release Battery Adhesive: 8 단계, 이미지 3/3
    • Carefully align the exposed portion of the adhesive strips along the edge of the front of the battery, and press them gently into place.

    • Some devices need to have the battery pull tabs located near the top of the device, and some have them located near the bottom. Evaluate what will work for your repair.

    • Take care to line up the strips correctly the first time. Once they adhere to the battery, they can't be removed and realigned.

  9. How To Apply Stretch Release Battery Adhesive: 9 단계, 이미지 1/3 How To Apply Stretch Release Battery Adhesive: 9 단계, 이미지 2/3 How To Apply Stretch Release Battery Adhesive: 9 단계, 이미지 3/3
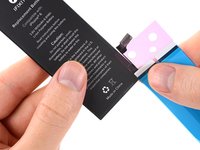
    • Place the battery face down on a flat surface.

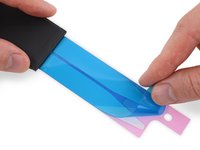
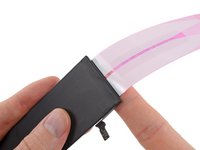
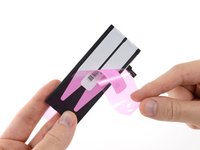
    • Starting at the cut end of the adhesive strips, peel off the large blue film covering the strips.

    • Use a pair of tweezers to loosen the blue layer if you have trouble starting near the cut section of adhesive.

    • The blue film sometimes has a defect that prevents it from peeling off, and the strips have to be discarded and replaced.

    • If this happens to you and you got your strips from iFixit, contact us and we'll send you a replacement on the double.

    • In the meantime, you can temporarily reassemble your phone with a bit of double-sided tape to hold the battery.

  10. How To Apply Stretch Release Battery Adhesive: 10 단계, 이미지 1/2 How To Apply Stretch Release Battery Adhesive: 10 단계, 이미지 2/2
    • Using your fingertip, gently roll the adhesive strips over the bottom edge of the battery, toward the back.

    • Don't pull or stretch the strips as you apply them.

  11. How To Apply Stretch Release Battery Adhesive: 11 단계, 이미지 1/2 How To Apply Stretch Release Battery Adhesive: 11 단계, 이미지 2/2
    • Lay the strips down flat on the back of the battery.

  12. How To Apply Stretch Release Battery Adhesive: 12 단계, 이미지 1/3 How To Apply Stretch Release Battery Adhesive: 12 단계, 이미지 2/3 How To Apply Stretch Release Battery Adhesive: 12 단계, 이미지 3/3
    • Use your fingers or a cloth to press the strips firmly into place along the back of the battery.

  13. How To Apply Stretch Release Battery Adhesive: 13 단계, 이미지 1/3 How To Apply Stretch Release Battery Adhesive: 13 단계, 이미지 2/3 How To Apply Stretch Release Battery Adhesive: 13 단계, 이미지 3/3
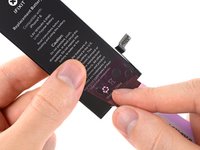
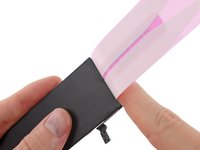
    • Carefully peel away the remaining piece of film, fully exposing the adhesive strips.

    • Set the battery lightly in place in the device.

    • Plug in the battery connector temporarily to ensure that the cable reaches the socket. Disconnect the battery before resuming reassembly.

    • Press the battery into place, and continue with your repair.

결론

For optimal performance, calibrate your newly installed battery after completing this guide.

다른 13명이 해당 안내서를 완성하였습니다.

Carsten Frauenheim

회원 가입일: 03/10/20

110,900 평판

안내서 338개 작성하였습니다

iFixit iFixit 회원

Staff

136 회원들

안내서 16,560개 작성하였습니다

댓글 2개

The strips I have (from another supplier) have pink film on one side and clear on the other. How do I tell, apart from the colour, which side goes on the back of the battery?

Philip Le Riche - 답글

I've worked it out. Comparing the first two photos of Step 5 you can see that the pull tabs have a black stripe on one side but are fully black on the other. The stripe side sticks to the battery as it's all sticky except just for the stripe. The black on the other side is then exposed. Not being sticky, it prevents it from sticking to anything it shouldn't.

Philip Le Riche -

댓글 쓰기

조회 통계:

24 시간 전: 12

7일 전: 72

30일 전: 344

전체 시간: 10,718