주요 콘텐츠로 건너뛰기

How to Install a Plastic Snap With a Handheld Tool

필요한 것

  1. How to Install a Plastic Snap With a Handheld Tool, Snap information: 1 단계, 이미지 2개 중 1개 How to Install a Plastic Snap With a Handheld Tool, Snap information: 1 단계, 이미지 2개 중 2개
    • A full set of plastic snaps consists of four parts:

    • Two caps

    • One stud

    • One socket

    • When the snap is installed, the socket and stud will lock together, while a cap holds each of them in place from the other side of the fabric.

  2. How to Install a Plastic Snap With a Handheld Tool, Pierce the fabric: 2 단계, 이미지 2개 중 1개 How to Install a Plastic Snap With a Handheld Tool, Pierce the fabric: 2 단계, 이미지 2개 중 2개
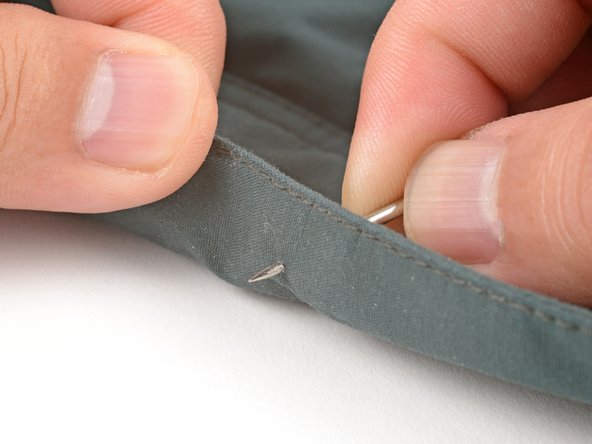
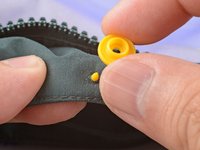
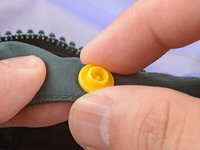
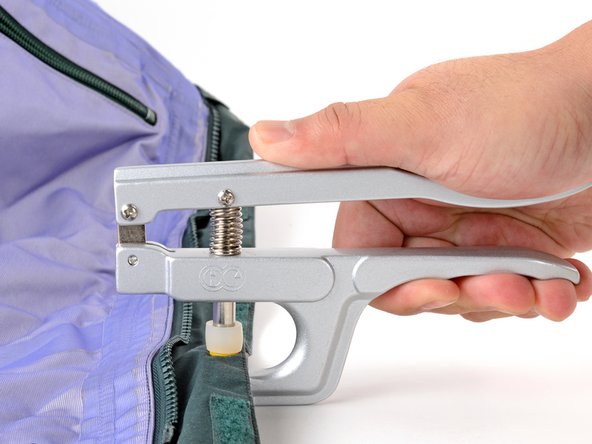
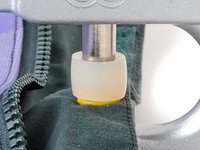
    • Push the point of an awl through the fabric to pierce a hole for the snap.

    • It's better to measure twice, pierce once! Piercing the fabric multiple times within a small area will weaken the fabric.

  3. How to Install a Plastic Snap With a Handheld Tool, Install the snap: 3 단계, 이미지 3개 중 1개 How to Install a Plastic Snap With a Handheld Tool, Install the snap: 3 단계, 이미지 3개 중 2개 How to Install a Plastic Snap With a Handheld Tool, Install the snap: 3 단계, 이미지 3개 중 3개
    • Use your fingers to squeeze a cap pin through the fabric hole.

  4. How to Install a Plastic Snap With a Handheld Tool: 4 단계, 이미지 3개 중 1개 How to Install a Plastic Snap With a Handheld Tool: 4 단계, 이미지 3개 중 2개 How to Install a Plastic Snap With a Handheld Tool: 4 단계, 이미지 3개 중 3개
    • Place either a stud or a socket on top of the pin.

    • If you can't see the pin after placing the stud or socket, the fabric is too thick for the snap. You'll need a cap with a longer pin.

  5. How to Install a Plastic Snap With a Handheld Tool: 5 단계, 이미지 2개 중 1개 How to Install a Plastic Snap With a Handheld Tool: 5 단계, 이미지 2개 중 2개
    • Make sure the snap is facing the correct side for the clothing item.

    • Center the snap components in the fastener tool. The cap should sit fully in the black die cup.

  6. How to Install a Plastic Snap With a Handheld Tool: 6 단계, 이미지 3개 중 1개 How to Install a Plastic Snap With a Handheld Tool: 6 단계, 이미지 3개 중 2개 How to Install a Plastic Snap With a Handheld Tool: 6 단계, 이미지 3개 중 3개
    • Firmly squeeze the fastener tool handles. The white rubber head should bulge slightly from the force.

    • Release the handles and remove the tool from the snap.

  7. How to Install a Plastic Snap With a Handheld Tool, Check the new snap: 7 단계, 이미지 2개 중 1개 How to Install a Plastic Snap With a Handheld Tool, Check the new snap: 7 단계, 이미지 2개 중 2개
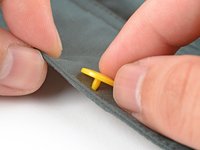
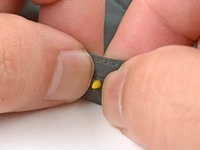
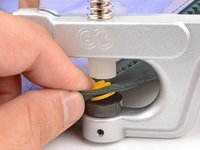
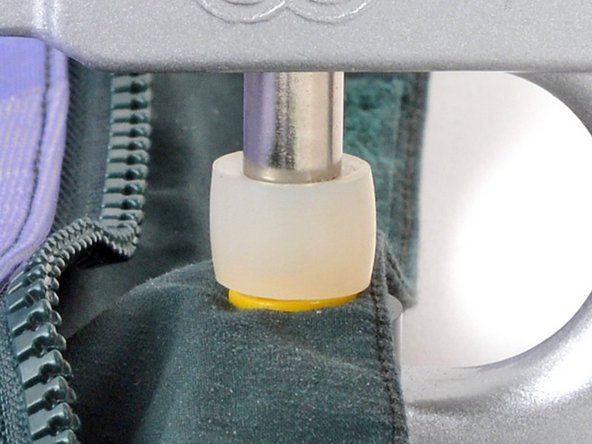
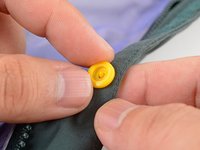
    • Visually inspect the snap. The center pin should be evenly flattened.

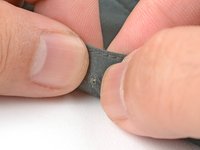
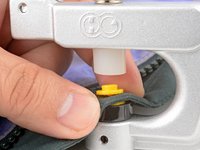
    • Pull on the snap. The snap shouldn't feel loose.

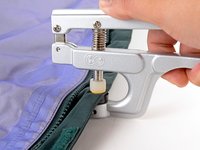
    • If the pin isn't evenly flattened or the snap feels loose, use the fastener tool to compress the snap again. If that doesn't fix it, remove the snap and start again.

  8. How to Install a Plastic Snap With a Handheld Tool, Install the other half of the set: 8 단계, 이미지 3개 중 1개 How to Install a Plastic Snap With a Handheld Tool, Install the other half of the set: 8 단계, 이미지 3개 중 2개 How to Install a Plastic Snap With a Handheld Tool, Install the other half of the set: 8 단계, 이미지 3개 중 3개
    • Repeat the procedure to install the other half of the snap set.

결론

For more clothing repair guides, click here.

다른 2명이 해당 안내서를 완성하였습니다.

작성자

3다른 기여자 명과 함께

Arthur Shi

회원 가입일: 01/03/18

309,324 평판

안내서 699개를 작성함

iFixit iFixit 회원

Staff

123 회원들

안내서 23,584개를 작성함

0가이드 댓글

댓글 쓰기

조회 통계:

지난 24시간: 3

지난 7일: 41

지난 30일: 232

전체 시간: 1,261