이 버전에는 잘못된 편집 사항이 있을 수 있습니다. 최신 확인된 스냅샷으로 전환하십시오.
필요한 것
-
이 단계는 번역되지 않았습니다. 번역을 도와주십시오
-
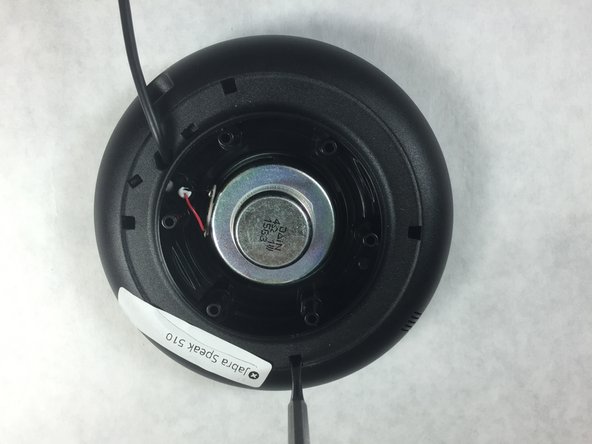
Using a metal spudger, peel back the foam pad on the bottom of the device to reveal six screws.
-
-
-
이 단계는 번역되지 않았습니다. 번역을 도와주십시오
-
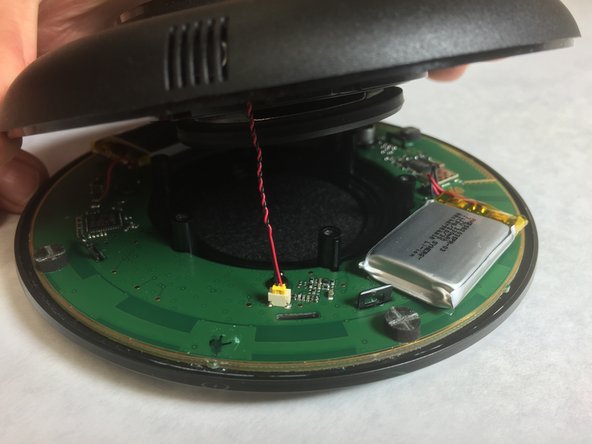
Use a small, pointed metal spudger to release the plastic tabs connecting the faceplate to the bottom of the speaker.
-
Slowly flip the device open like a clam shell.
-
-
이 단계는 번역되지 않았습니다. 번역을 도와주십시오
-
Once you have carefully separated the bottom case from the top case, locate the two batteries attached to the motherboard.
-
Desolder the battery connections using the heated soldering iron.
-
-
이 단계는 번역되지 않았습니다. 번역을 도와주십시오
-
Carefully pry the battery away from the motherboard using a plastic opening tool. The glue gives very slowly under constant pressure and cannot be hurried. As the battery starts to lift you can insert the prying tool further as you continue to lift the battery.
-
The adhesive may still have sufficient stickiness to hold the new batteries, but if not, replace it with double sided tape.
-
Solder the wires of the new batteries to the board, making sure that the red and black go to the correct pads.
-


다른 20명이 해당 안내서를 완성하였습니다.
팀

IUPUI, Team 2-3, Harley Spring 2016 IUPUI, Team 2-3, Harley Spring 2016 회원
IUPUI-HARLEY-S16S2G3
4 회원들
안내서 8개 작성하였습니다
댓글 9개
Very precisely described steps, super well written - excellent job Ed, thanks
Thank`s so much! Great job!
Is it possible to change the USB cable?