주요 콘텐츠로 건너뛰기
수리 커뮤니티 가입 - 계정 만들기

Jura Capresso IMPRESSA J5 opening procedure

필요한 것

  1. Jura Capresso IMPRESSA J5  opening procedure, Jura Capresso IMPRESSA J5  opening procedure: 1 단계, 이미지 1개 중 1개
    • Unplug the power cord!

    • Remove the water tank and the drip tray. Remove all coffee beans from the storage container.

    댓글 쓰기

  2. Jura Capresso IMPRESSA J5  opening procedure: 2 단계, 이미지 3개 중 1개 Jura Capresso IMPRESSA J5  opening procedure: 2 단계, 이미지 3개 중 2개 Jura Capresso IMPRESSA J5  opening procedure: 2 단계, 이미지 3개 중 3개
    • Flip open the lid of the bean compartment.

    • Unscrew the two slotted screws inside the bean compartment. The screws have a rubber washer and will not come out completely.

    • Remove the bean compartment.

    댓글 쓰기

  3. Jura Capresso IMPRESSA J5  opening procedure: 3 단계, 이미지 3개 중 1개 Jura Capresso IMPRESSA J5  opening procedure: 3 단계, 이미지 3개 중 2개 Jura Capresso IMPRESSA J5  opening procedure: 3 단계, 이미지 3개 중 3개
    이 단계에 사용된 도구:
    iFixit Precision 4 mm Screwdriver Bit
    $2.99
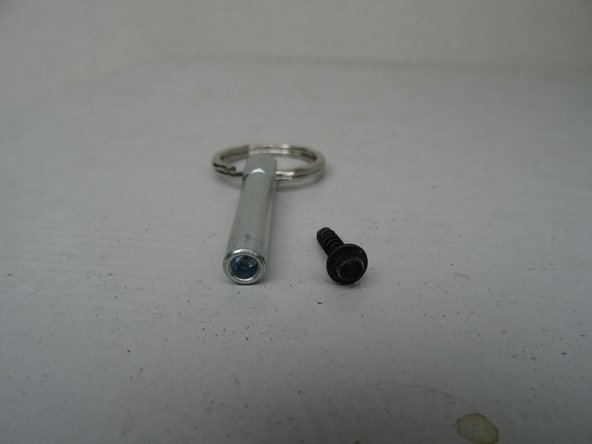
    • The top cover is fastened with oval head screws. Unscrew them.

    • These screws have an oval head that makes them look like rivets (picture 2). You need to use a special bit - also available at iFixit - for their removal. Here a DIY guide. If the right bit is not available, it could be done with a pair of needle nose pliers. Jura wants to keep us out of our own machines!!!

    댓글 쓰기

  4. Jura Capresso IMPRESSA J5  opening procedure: 4 단계, 이미지 1개 중 1개
    • Also remove the two oval head screws underneath the ground coffee compartment lid.

    댓글 쓰기

  5. Jura Capresso IMPRESSA J5  opening procedure: 5 단계, 이미지 1개 중 1개
    • Now you can pry up the top cover all around.

    • Remove the top cover. This often requires a little force.

    • Use plastic tools to avoid scratching your device.

    댓글 쓰기

  6. Jura Capresso IMPRESSA J5  opening procedure: 6 단계, 이미지 2개 중 1개 Jura Capresso IMPRESSA J5  opening procedure: 6 단계, 이미지 2개 중 2개
    • Turn the device with the back facing you.

    • Turn the Jura label a few degrees counterclockwise. If it's hard to do, use a small suction cup.

    • Remove the Jura label.

    댓글 쓰기

  7. Jura Capresso IMPRESSA J5  opening procedure: 7 단계, 이미지 3개 중 1개 Jura Capresso IMPRESSA J5  opening procedure: 7 단계, 이미지 3개 중 2개 Jura Capresso IMPRESSA J5  opening procedure: 7 단계, 이미지 3개 중 3개
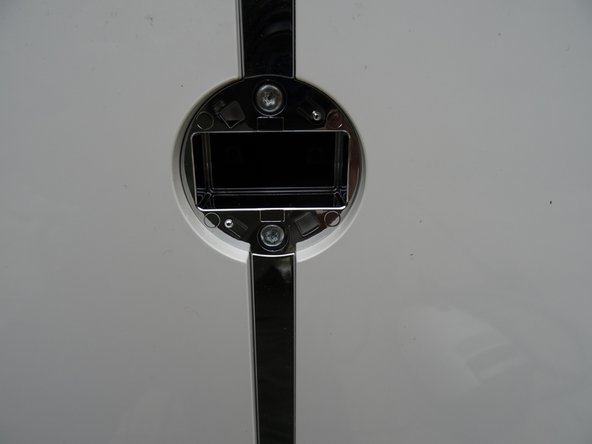
    • Underneath the label you will find two Torx T15 screws. Remove them.

    • Carefully pull the top of the chrome cover slightly outwards, then push it down and put it aside.

    댓글 쓰기

  8. Jura Capresso IMPRESSA J5  opening procedure: 8 단계, 이미지 1개 중 1개
    • Remove the Torx T15 screw on the side panel with the water tank.

    댓글 쓰기

  9. Jura Capresso IMPRESSA J5  opening procedure: 9 단계, 이미지 2개 중 1개 Jura Capresso IMPRESSA J5  opening procedure: 9 단계, 이미지 2개 중 2개
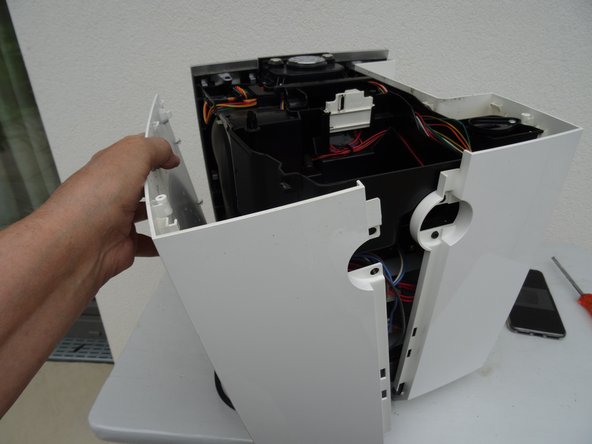
    • Pull the right side panel slightly towards the back.

    • Remove the side panel.

    댓글 쓰기

  10. Jura Capresso IMPRESSA J5  opening procedure: 10 단계, 이미지 1개 중 1개
    • Pull the left side panel slightly towards the back and remove it.

    댓글 쓰기

결론

Follow the steps in reverse order to reassemble your device.

취소: 해당 안내서를 완성하지 않았습니다.

다른 3명이 해당 안내서를 완성하였습니다.

다음 번역가들에게 특별히 감사 드립니다:

de en

100%

이 번역인들은 저희가 세상을 수리하는 데 도움을 주고 있어요! 기여하시겠습니까?
번역 시작하기 ›

작성자

1다른 기여자 명과 함께

VauWeh

회원 가입일: 10/19/15

334,272 평판

안내서 311개를 작성함

0가이드 댓글

댓글 쓰기

조회 통계:

지난 24시간: 3

지난 7일: 20

지난 30일: 74

전체 시간: 6,023