주요 콘텐츠로 건너뛰기

Keychron K3 Ultra-slim Wireless Mechanical Keyboard Disassembly

필요한 것

  1. Keychron K3 Ultra-slim Wireless Mechanical Keyboard Disassembly, Remove the USB/Power Off Keyboard: 1 단계, 이미지 1/2 Keychron K3 Ultra-slim Wireless Mechanical Keyboard Disassembly, Remove the USB/Power Off Keyboard: 1 단계, 이미지 2/2
    • Unplug the keyboard and toggle the leftmost switch to the 'Off" Position

    • For reference, the switches are located on the top of the keyboard.

  2. Keychron K3 Ultra-slim Wireless Mechanical Keyboard Disassembly, Remove Keycaps: 2 단계, 이미지 1/3 Keychron K3 Ultra-slim Wireless Mechanical Keyboard Disassembly, Remove Keycaps: 2 단계, 이미지 2/3 Keychron K3 Ultra-slim Wireless Mechanical Keyboard Disassembly, Remove Keycaps: 2 단계, 이미지 3/3
    • Using a keycap puller, carefully remove the keys from the keyboard

    • NEVER attempt to remove the keyboard keys on any keyboard without a keycap puller or tool specialized to remove keyboard keys, not using the correct tool may damage the keys

  3. Keychron K3 Ultra-slim Wireless Mechanical Keyboard Disassembly, Confirm switches are hot-swappable: 3 단계, 이미지 1/2 Keychron K3 Ultra-slim Wireless Mechanical Keyboard Disassembly, Confirm switches are hot-swappable: 3 단계, 이미지 2/2
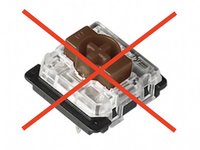
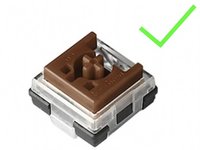
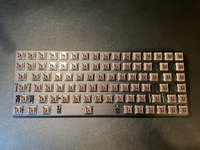
    • Check that your switches are hot-swappable. If they are not, trying to remove them will damage your keyboard.

    • The mechanical switches are NOT hot-swappable, and the colored stem is smaller and more oblong.

    • The optical switches are hot-swappable, and they have a larger colored stem which is mostly square.

  4. Keychron K3 Ultra-slim Wireless Mechanical Keyboard Disassembly, Removal of Switches: 4 단계, 이미지 1/3 Keychron K3 Ultra-slim Wireless Mechanical Keyboard Disassembly, Removal of Switches: 4 단계, 이미지 2/3 Keychron K3 Ultra-slim Wireless Mechanical Keyboard Disassembly, Removal of Switches: 4 단계, 이미지 3/3
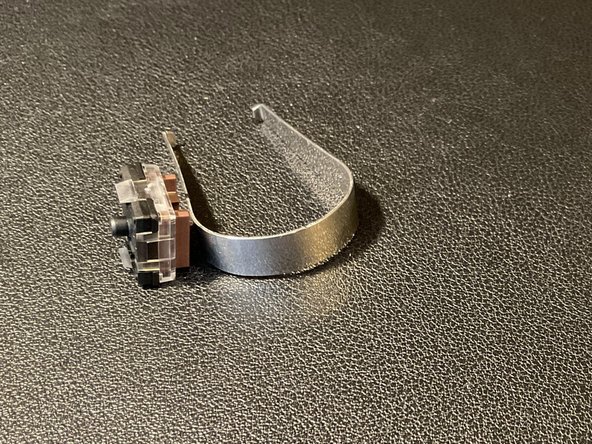
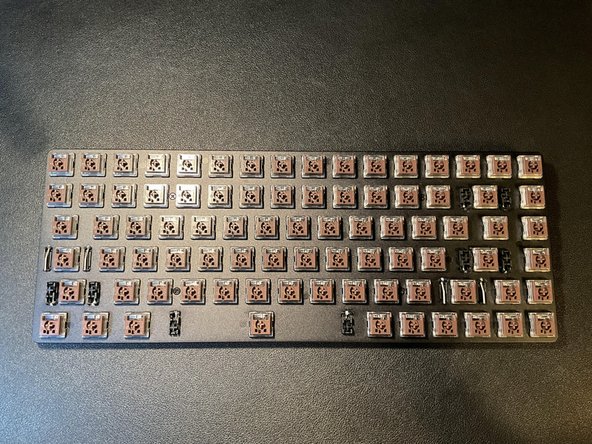
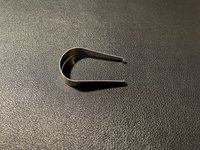
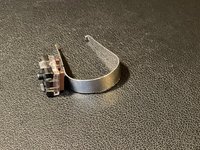
    • Use a switch puller to remove the switches.

    • If you have the included switch puller from Keychrone, it may be tough removing said switches.

    • Each switch has small tabs on the corners to grab and remove them. (The Included switch puller might require extra strength to remove)

  5. Keychron K3 Ultra-slim Wireless Mechanical Keyboard Disassembly, Remove the Chassis Screws: 5 단계, 이미지 1/1
    • Use a # 1 philips drill bit to remove the 4 screws on the keyboard

  6. Keychron K3 Ultra-slim Wireless Mechanical Keyboard Disassembly, Separate the Base and Top: 6 단계, 이미지 1/3 Keychron K3 Ultra-slim Wireless Mechanical Keyboard Disassembly, Separate the Base and Top: 6 단계, 이미지 2/3 Keychron K3 Ultra-slim Wireless Mechanical Keyboard Disassembly, Separate the Base and Top: 6 단계, 이미지 3/3
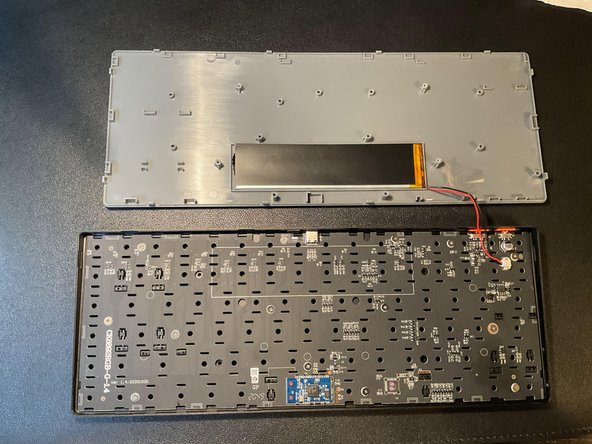
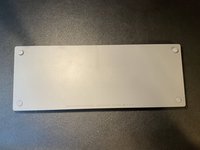
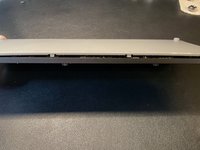
    • Use a spudger or another wedge tool to pry open the plastic base from the aluminum chassis.

    • Use caution when removing the base from the chassis as there are tabs that hold them together!

    • CAUTION: The battery is located on the plastic bottom. The battery is connected to the PCB located near the orange switches and USB

  7. Keychron K3 Ultra-slim Wireless Mechanical Keyboard Disassembly, Disconnect the Battery: 7 단계, 이미지 1/2 Keychron K3 Ultra-slim Wireless Mechanical Keyboard Disassembly, Disconnect the Battery: 7 단계, 이미지 2/2
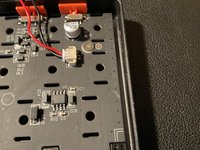
    • Use tweezers to disconnect the battery from the PCB.

    • Use caution when removing the PCB! Pull away from the connector. Do not attempt to jiggle the cable as this may loosen/damage the connector

  8. Keychron K3 Ultra-slim Wireless Mechanical Keyboard Disassembly, Remove the PCB: 8 단계, 이미지 1/1
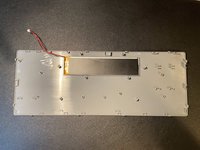
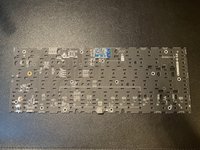
    • Remove the 14 screws with a # 1 Philips screw driver bit

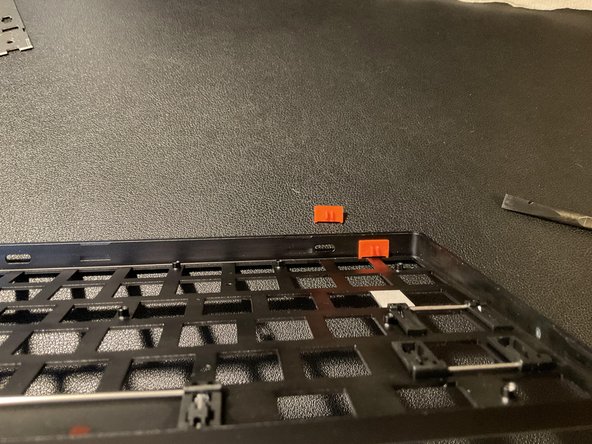
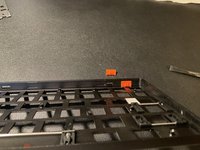
    • To remove the PCB from the aluminum frame, use a spudger to wedge it out.

  9. Keychron K3 Ultra-slim Wireless Mechanical Keyboard Disassembly, Disassembly complete: 9 단계, 이미지 1/2 Keychron K3 Ultra-slim Wireless Mechanical Keyboard Disassembly, Disassembly complete: 9 단계, 이미지 2/2
    • The PCB is now removed and able to work on.

    • When you reassemble the keyboard, make sure to put the orange toggles with the two nubs pointing towards the switch side of the aluminum frame.

결론

To reassemble your device, follow these instructions in reverse order.

다른 4명이 해당 안내서를 완성하였습니다.

Mike Villasenor

회원 가입일: 05/04/20

235 평판

안내서 1개 작성함

댓글 4개

Feel free to leave advice if you think I should change any steps. This is my first guide. Enjoy!

Mike Villasenor - 답글

Hi Mike,

Great job! Check out this article on creating guides–it has some great tips! Looking forward to reading your next one!

Amber Taus -

Do you know what size screws the keyboard uses?

Sam Jackson - 답글

Does anyone know where I can get a replacement battery for this keyboard?

Rakshak Raghavan - 답글

댓글 쓰기

조회 통계:

24 시간 전: 4

7일 전: 51

30일 전: 179

전체 시간: 6,804