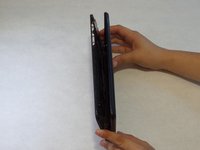
주요 콘텐츠로 건너뛰기

LG G Pad 8.3 Battery Replacement

필요한 것

  1. LG G Pad 8.3 Battery Replacement, Back Panel: 1 단계, 이미지 1/2 LG G Pad 8.3 Battery Replacement, Back Panel: 1 단계, 이미지 2/2
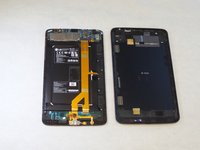
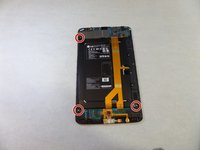
    • With the tablet face down, pull the SD card slot cover out.

    • Using a Phillips #000 screwdriver, remove the 3mm screw located in the SD card slot.

  2. LG G Pad 8.3 Battery Replacement: 2 단계, 이미지 1/3 LG G Pad 8.3 Battery Replacement: 2 단계, 이미지 2/3 LG G Pad 8.3 Battery Replacement: 2 단계, 이미지 3/3
    • Insert a plastic opening tool in the small crevasse between the screen and the back panel.

    • Pry the screen away from the back panel.

    • Repeat this on each edge of the device.

    • We found it helpful to leave multiple plastic opening tools wedged in the crevasse to prevent it from closing.

    • This requires heavy force. The back of the device is attached with an adhesive. If the back panel is too hard to remove, use the iOpener.

  3. LG G Pad 8.3 Battery Replacement: 3 단계, 이미지 1/2 LG G Pad 8.3 Battery Replacement: 3 단계, 이미지 2/2
    • After using the plastic opening tools, pry the device open with your hands.

    • Remove the back panel from the screen.

  4. LG G Pad 8.3 Battery Replacement, Speaker: 4 단계, 이미지 1/2 LG G Pad 8.3 Battery Replacement, Speaker: 4 단계, 이미지 2/2
    이 단계에 사용된 도구:
    Magnetic Project Mat
    $19.95
    구매
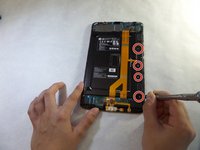
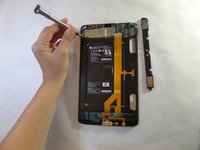
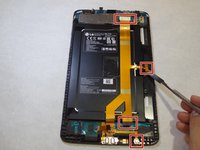
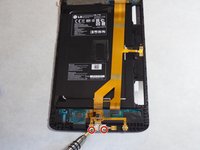
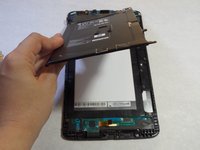
    • Remove the four 3 mm Phillips #000 screws that are attached to the speaker.

    • These screws are very small so make sure to keep track of them. You can use iFixit's Pro Magnetic Project Mat to help.

  5. LG G Pad 8.3 Battery Replacement: 5 단계, 이미지 1/1
    • Use your fingers to remove the speaker.

  6. LG G Pad 8.3 Battery Replacement, Battery: 6 단계, 이미지 1/2 LG G Pad 8.3 Battery Replacement, Battery: 6 단계, 이미지 2/2
    • Remove the 3mm Phillips #000 screws from the corners of the battery.

  7. LG G Pad 8.3 Battery Replacement: 7 단계, 이미지 1/3 LG G Pad 8.3 Battery Replacement: 7 단계, 이미지 2/3 LG G Pad 8.3 Battery Replacement: 7 단계, 이미지 3/3
    • Using a spudger or a plastic opening tool, disconnect the ribbon cable from the right side of the device.

    • The cable is attached with an adhesive.

    • These images use a metal spudger, which has the potential to damage the device. Use a plastic opening tool or standard spudger instead.

  8. LG G Pad 8.3 Battery Replacement: 8 단계, 이미지 1/2 LG G Pad 8.3 Battery Replacement: 8 단계, 이미지 2/2
    • Using the Phillips #000 screwdriver, remove the two 3mm screws located at the bottom of the ribbon cable.

    • Remove the ribbon cable from the device.

  9. LG G Pad 8.3 Battery Replacement: 9 단계, 이미지 1/2 LG G Pad 8.3 Battery Replacement: 9 단계, 이미지 2/2
    • Unhook the battery from the top of the device.

결론

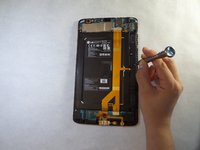
To reassemble your device, follow these instructions in reverse order.

다른 18명이 해당 안내서를 완성하였습니다.

Mario Salguero

회원 가입일: 09/14/15

781 평판

안내서 6개 작성하였습니다

CSU Fullerton, Team 1-6, Bruce Fall 2015 CSU Fullerton, Team 1-6, Bruce Fall 2015 회원

CSUF-BRUCE-F15S1G6

4 회원들

안내서 14개 작성하였습니다

댓글 9개

Every teardown I can find on this tablet has that darn screw in the sd card slot, but mine does not!! Does ANYBODY have teardown for mine? I can send pics, it's Verizon Gpad 8.3 LTE, slot holds sd and sim but NO screw. Son spilled water on it so screen is all dark and haptic stays on, I'd like to attempt the rice trick if I can open it.

Wesley Krasko - 답글

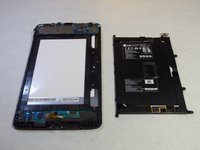
The other models have a sponge adhesive on the back of the battery.

Completely disregard the first screw.

supramaster2099 -

Wesley - Me too. I have no idea why Android released two different models with the same freaking model name. I thought they had more common sense than that. If anyone has the teardown for the new model, holler.

Slavelike Constructs - 답글

Same here. No screw

jon - 답글

sorry this teardown is not for the 8.3

krackeddude - 답글

댓글 쓰기

조회 통계:

24 시간 전: 1

7일 전: 32

30일 전: 92

전체 시간: 44,329