주요 콘텐츠로 건너뛰기

LG Phoenix 2 Charge Port Replacement

필요한 것

  1. LG Phoenix 2 Charge Port Replacement, Battery: 1 단계, 이미지 1/3 LG Phoenix 2 Charge Port Replacement, Battery: 1 단계, 이미지 2/3 LG Phoenix 2 Charge Port Replacement, Battery: 1 단계, 이미지 3/3
    • Place a fingernail in the notch at the bottom edge of the phone.

    • Pull on the back cover with one hand while keeping the rest of the phone steady, and run your fingernail along the edge.

  2. LG Phoenix 2 Charge Port Replacement: 2 단계, 이미지 1/3 LG Phoenix 2 Charge Port Replacement: 2 단계, 이미지 2/3 LG Phoenix 2 Charge Port Replacement: 2 단계, 이미지 3/3
    • Place a fingernail in the notch at the bottom edge of the battery.

    • Pull the battery out.

  3. LG Phoenix 2 Charge Port Replacement, Motherboard: 3 단계, 이미지 1/2 LG Phoenix 2 Charge Port Replacement, Motherboard: 3 단계, 이미지 2/2
    • Remove all nine of the 3.0mm screws on the back of the phone using a Phillips #0 screwdriver, including the one attaching the camera lens.

  4. LG Phoenix 2 Charge Port Replacement: 4 단계, 이미지 1/2 LG Phoenix 2 Charge Port Replacement: 4 단계, 이미지 2/2
    • With the plastic opening tool, pry between the screen and the outer chrome edge to remove the bottom shield from the rest of the phone.

  5. LG Phoenix 2 Charge Port Replacement: 5 단계, 이미지 1/3 LG Phoenix 2 Charge Port Replacement: 5 단계, 이미지 2/3 LG Phoenix 2 Charge Port Replacement: 5 단계, 이미지 3/3
    • With a plastic opening tool, disconnect all three ribbon connectors from the motherboard: one for the front camera, one for the rear camera, and one for the screen.

  6. LG Phoenix 2 Charge Port Replacement: 6 단계, 이미지 1/3 LG Phoenix 2 Charge Port Replacement: 6 단계, 이미지 2/3 LG Phoenix 2 Charge Port Replacement: 6 단계, 이미지 3/3
    • Using a plastic opening tool, separate the motherboard from the back frame and remove it from the device.

  7. LG Phoenix 2 Charge Port Replacement, Charge Port: 7 단계, 이미지 1/2 LG Phoenix 2 Charge Port Replacement, Charge Port: 7 단계, 이미지 2/2
  8. LG Phoenix 2 Charge Port Replacement: 8 단계, 이미지 1/3 LG Phoenix 2 Charge Port Replacement: 8 단계, 이미지 2/3 LG Phoenix 2 Charge Port Replacement: 8 단계, 이미지 3/3
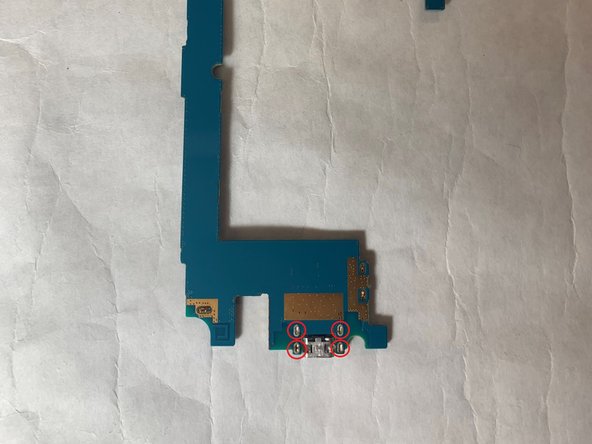
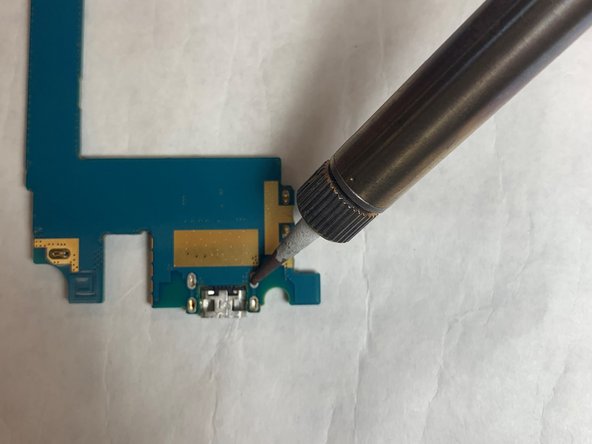
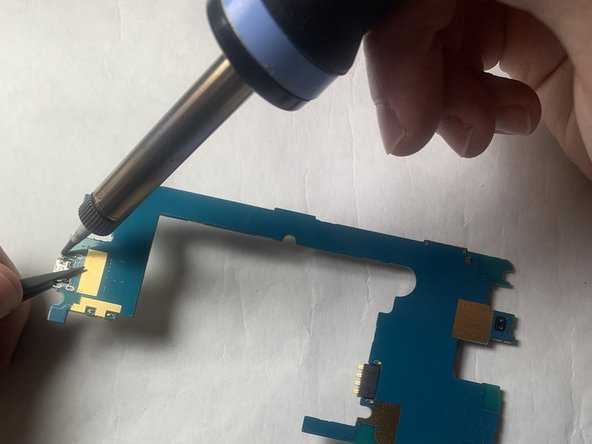
    • Desolder the USB port from the motherboard and remove it from the device.

결론

To reassemble your device, follow these instructions in reverse order.

다른 3명이 해당 안내서를 완성하였습니다.

Alex Selsley

회원 가입일: 11/04/19

325 평판

안내서 2개 작성하였습니다

IUPUI, Team S1-G1, Harley Fall 2019 IUPUI, Team S1-G1, Harley Fall 2019 회원

IUPUI-HARLEY-F19S1G1

3 회원들

안내서 4개 작성하였습니다

댓글 0개

댓글 쓰기

조회 통계:

24 시간 전: 0

7일 전: 6

30일 전: 17

전체 시간: 689