소개
Use this guide to replace and access a faulty port in your Lenovo IdeaPad 320-17IKB.
The several different ports that this laptop has allows the user to access and connect to other external devices or charge other devices; such as HDMI ports, power connector port, Ethernet port, SD port, CD port, USB ports, and the headphone jack.
If you aren’t able to connect to a port or if the port needs to be cleaned, you may need to consider cleaning or replacing the port. Follow the instructions in this guide to access the component.
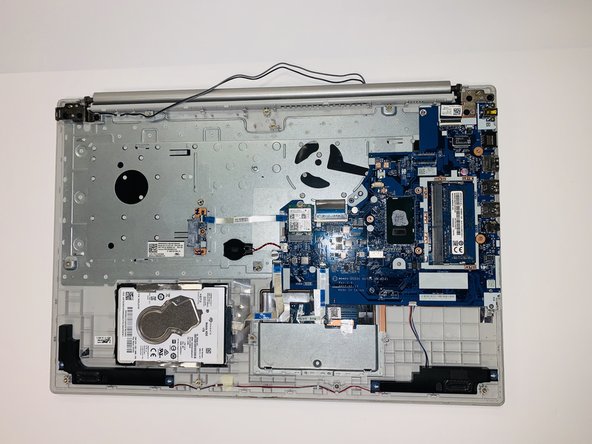
Before using this guide, check out the Lenovo IdeaPad 320-17IKB Troubleshooting. Be cautious when lifting the back panel off the laptop to not damage any hardware.
Be sure to back up your hard drive before opening your laptop so that you don’t lose any data while you’re doing the replacement. Make sure to power off your laptop completely and disconnect from any external power source prior to beginning the process.
필요한 것
-
-
-
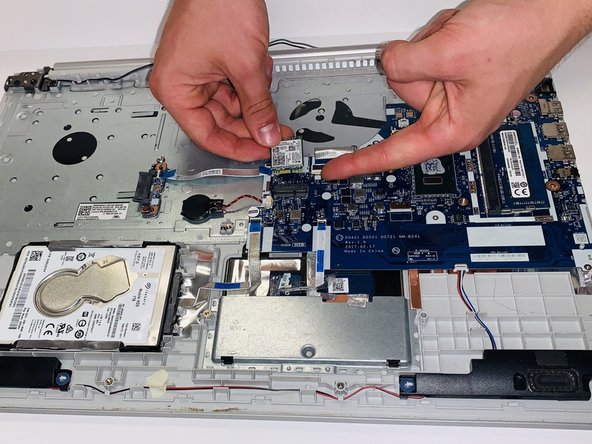
Remove the single 3mm Phillips #0 screw from the Wi-Fi card.
-
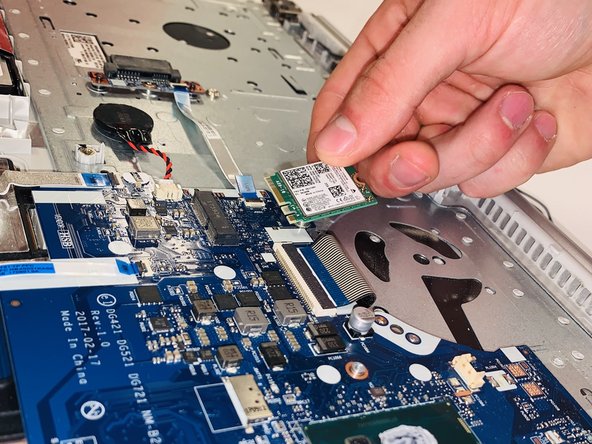
Pull the Wi-Fi card straight out of the laptop.
-
-
-
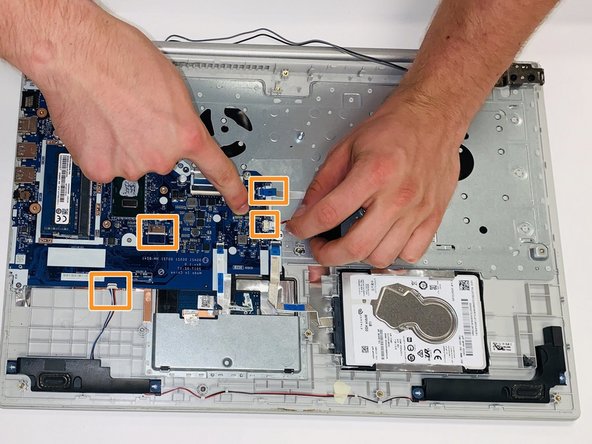
Gently pull the blue ribbon marked with "MB" connectors.
-
Gently remove the other connectors in the picture by pulling them straight out.
-
Blue connectors encased in a black holder may require tweezers to unclasp the connector for removal.
-
-
-
Locate the terminals that need to be removed.
-
Clean the terminals with isopropyl alcohol and an old tooth brush.
-


To reassemble your device, follow these instructions in reverse order.
To reassemble your device, follow these instructions in reverse order.
다른 한 분이 해당 안내서를 완성하였습니다.

팀

Embry-Riddle Aeronautical University, Team S6-G3, Salas Fall 2019 Embry-Riddle Aeronautical University, Team S6-G3, Salas Fall 2019 회원
ERAU-SALAS-F19S6G3
4 회원들
안내서 10개 작성하였습니다