주요 콘텐츠로 건너뛰기

Lenovo Tab 4 TB-8504F Motherboard Replacement

필요한 것

  1. Lenovo Tab 4 TB-8504F Motherboard Replacement, Battery: 1 단계, 이미지 1/3 Lenovo Tab 4 TB-8504F Motherboard Replacement, Battery: 1 단계, 이미지 2/3 Lenovo Tab 4 TB-8504F Motherboard Replacement, Battery: 1 단계, 이미지 3/3
    • Start at the microSD slot.

    • Use the opening pick to slide underneath the back cover of the tablet.

    • Slide the opening pick around the tablet until the back cover is off.

  2. Lenovo Tab 4 TB-8504F Motherboard Replacement: 2 단계, 이미지 1/3 Lenovo Tab 4 TB-8504F Motherboard Replacement: 2 단계, 이미지 2/3 Lenovo Tab 4 TB-8504F Motherboard Replacement: 2 단계, 이미지 3/3
    이 단계에 사용된 도구:
    Tweezers
    $4.99
    구매
    • Remove the 8 screws with a Phillips #000 screwdriver [bit].

    • There is a screw under the blue "s" sticker.

    • Remove tape holding plate down.

    • Use precision tweezers or your fingers to remove plate.

  3. Lenovo Tab 4 TB-8504F Motherboard Replacement: 3 단계, 이미지 1/2 Lenovo Tab 4 TB-8504F Motherboard Replacement: 3 단계, 이미지 2/2
    • Remove yellow tape.

    • Use a spudger or plastic opening tool to remove the battery's ribbon cable from the motherboard.

  4. Lenovo Tab 4 TB-8504F Motherboard Replacement: 4 단계, 이미지 1/3 Lenovo Tab 4 TB-8504F Motherboard Replacement: 4 단계, 이미지 2/3 Lenovo Tab 4 TB-8504F Motherboard Replacement: 4 단계, 이미지 3/3
    • Gently pull on the two stretch release adhesive strips. Do not pull up, pull away from battery.

    • Once the tabs are off, lift the battery up from the frame.

    • Do not bend or puncture the battery.

  5. Lenovo Tab 4 TB-8504F Motherboard Replacement, MicroSD Card Reader: 5 단계, 이미지 1/2 Lenovo Tab 4 TB-8504F Motherboard Replacement, MicroSD Card Reader: 5 단계, 이미지 2/2
    이 단계에 사용된 도구:
    Tweezers
    $4.99
    구매
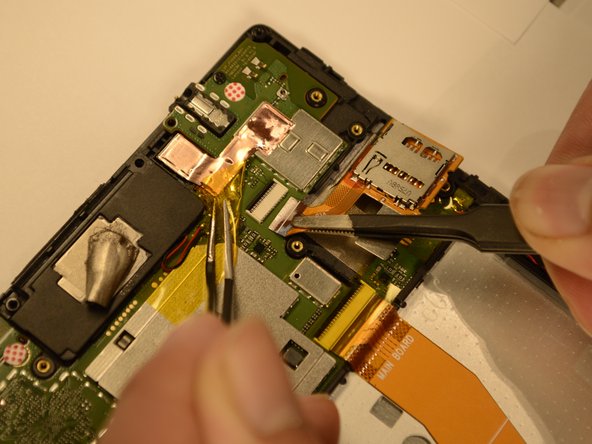
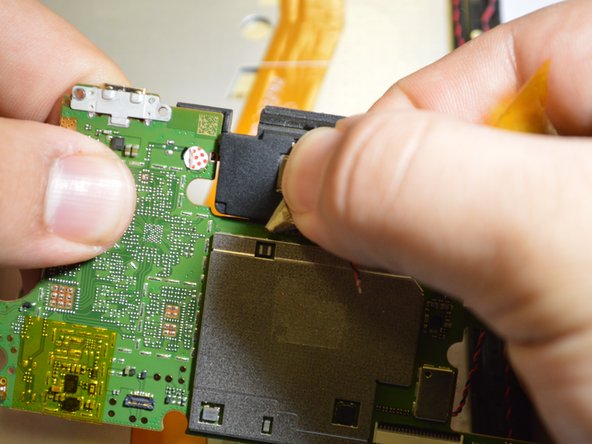
    • There is a yellow tape holding the microSD card reader connector. Use tweezers to hold down the tape.

    • Gently lift the tab on the microSD card reader's ZIF connector, and gently pull the ribbon cable free.

  6. Lenovo Tab 4 TB-8504F Motherboard Replacement: 6 단계, 이미지 1/2 Lenovo Tab 4 TB-8504F Motherboard Replacement: 6 단계, 이미지 2/2
    • Lift the microSD card reader with tweezers or your fingers.

  7. Lenovo Tab 4 TB-8504F Motherboard Replacement, Rear Camera: 7 단계, 이미지 1/2 Lenovo Tab 4 TB-8504F Motherboard Replacement, Rear Camera: 7 단계, 이미지 2/2
    이 단계에 사용된 도구:
    Tweezers
    $4.99
    구매
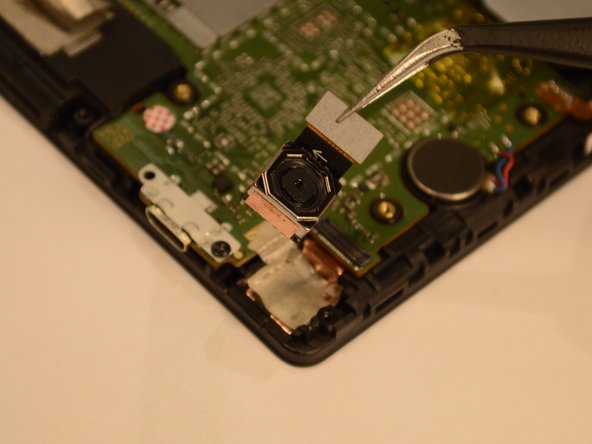
    • Use a spudger to lift the rear camera press-fit connector up and free.

    • Use tweezers to lift the rear camera out of the frame.

  8. Lenovo Tab 4 TB-8504F Motherboard Replacement, Front Camera: 8 단계, 이미지 1/2 Lenovo Tab 4 TB-8504F Motherboard Replacement, Front Camera: 8 단계, 이미지 2/2
    이 단계에 사용된 도구:
    Tweezers
    $4.99
    구매
    • Using tweezers, lift the yellow tape hiding the front camera.

    • Disconnect the front camera's connector from the motherboard using tweezers.

  9. Lenovo Tab 4 TB-8504F Motherboard Replacement, Motherboard: 9 단계, 이미지 1/2 Lenovo Tab 4 TB-8504F Motherboard Replacement, Motherboard: 9 단계, 이미지 2/2
    이 단계에 사용된 도구:
    Tweezers
    $4.99
    구매
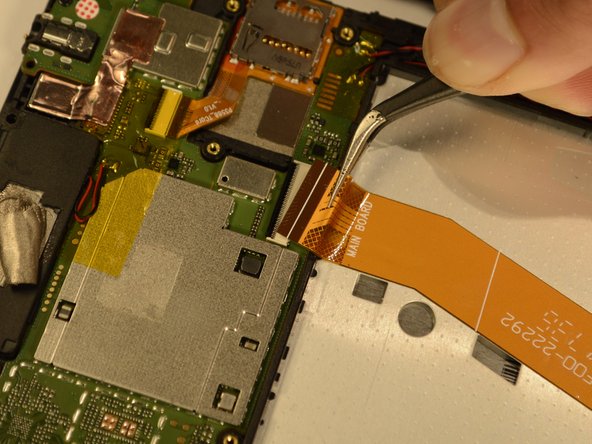
    • Use tweezers to pull screen digitizer cable from the motherboard.

  10. Lenovo Tab 4 TB-8504F Motherboard Replacement: 10 단계, 이미지 1/1
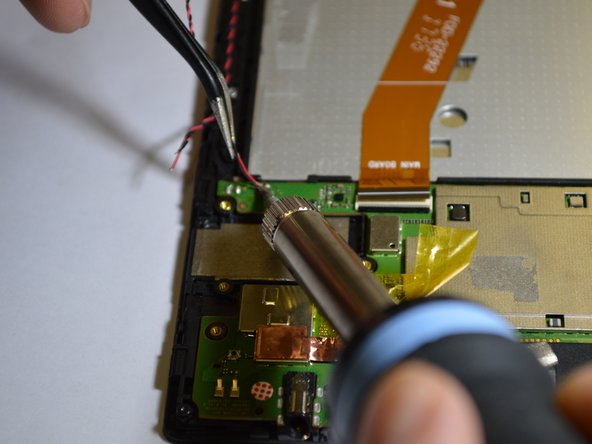
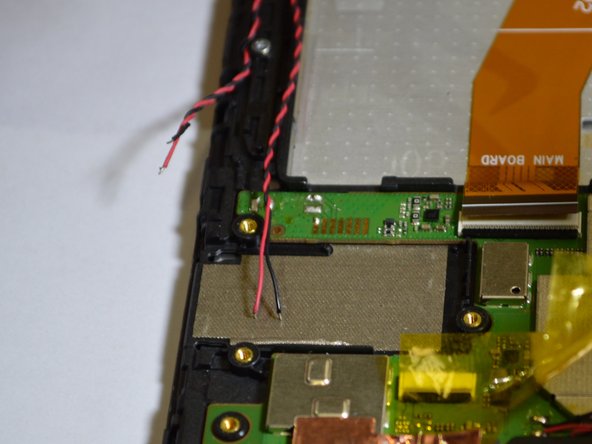
    • Desolder the two top speaker wires from the motherboard.

    • Be careful as the soldering iron is hot! Improper handling can result in severe burns.

  11. Lenovo Tab 4 TB-8504F Motherboard Replacement: 11 단계, 이미지 1/3 Lenovo Tab 4 TB-8504F Motherboard Replacement: 11 단계, 이미지 2/3 Lenovo Tab 4 TB-8504F Motherboard Replacement: 11 단계, 이미지 3/3
    • Desolder the black and red speaker wires from the motherboard.

  12. Lenovo Tab 4 TB-8504F Motherboard Replacement: 12 단계, 이미지 1/1
    • Use a Phillips #000 screwdriver to remove the two screws that secure the speaker to the motherboard.

  13. Lenovo Tab 4 TB-8504F Motherboard Replacement: 13 단계, 이미지 1/2 Lenovo Tab 4 TB-8504F Motherboard Replacement: 13 단계, 이미지 2/2
    • Lift motherboard from the tablet.

    • Using your hand, you can separate the top speaker from the motherboard.

결론

To reassemble your device, follow these instructions in reverse order.

다른 3명이 해당 안내서를 완성하였습니다.

Ivan Chavez

회원 가입일: 02/06/19

776 평판

안내서 6개 작성하였습니다

댓글 0개

댓글 쓰기

조회 통계:

24 시간 전: 0

7일 전: 8

30일 전: 47

전체 시간: 3,888