이 버전에는 잘못된 편집 사항이 있을 수 있습니다. 최신 확인된 스냅샷으로 전환하십시오.
필요한 것
-
이 단계는 번역되지 않았습니다. 번역을 도와주십시오
-
Using your hands, slide the two locking tabs away from each other to release the battery.
-
Slide the battery up and out of the device.
-
-
이 단계는 번역되지 않았습니다. 번역을 도와주십시오
-
Using the JIS #00 screwdriver, unscrew seven screws from the back cover.
-
Use the JIS #00 screwdriver to remove the single 2.8 mm screw from the back cover.
-
-
이 단계는 번역되지 않았습니다. 번역을 도와주십시오
-
Insert a plastic opening tool into the edges of the laptop and work your way around the edges to pry off the back cover from the device.
-
Remove the back cover from the device.
-
-
이 단계는 번역되지 않았습니다. 번역을 도와주십시오
-
Using the JIS #00 screwdriver, remove the single 2.8 mm screw securing the SSD to the device.
-
-
이 단계는 번역되지 않았습니다. 번역을 도와주십시오
-
Lift up the black piece of tape and remove it to uncover the RAM sticks underneath.
-
-
이 단계는 번역되지 않았습니다. 번역을 도와주십시오
-
Using your fingers, push the two clips securing the RAM away from each other to release the RAM.
-
Remove the RAM stick from the device.
-
-
이 단계는 번역되지 않았습니다. 번역을 도와주십시오
-
Using the JIS #00 screwdriver, unscrew the four screws securing the fan and heatsink assembly to the motherboard.
-
-
이 단계는 번역되지 않았습니다. 번역을 도와주십시오
-
Disconnect the fan and heatsink assembly from the motherboard using the plastic opening tool.
-
-
-
이 단계는 번역되지 않았습니다. 번역을 도와주십시오
-
Using the plastic opening tool, disconnect the two cables from the Wi-Fi card.
-
-
이 단계는 번역되지 않았습니다. 번역을 도와주십시오
-
Use the plastic opening tool to remove the black piece of tape holding the cables together.
-
-
이 단계는 번역되지 않았습니다. 번역을 도와주십시오
-
Use the JIS #00 screwdriver to remove the single 2.8 mm screw from the motherboard.
-
Remove the black plastic covering the motherboard.
-
-
이 단계는 번역되지 않았습니다. 번역을 도와주십시오
-
Using the plastic opening tool, disconnect the CMOS battery from the motherboard.
-
-
이 단계는 번역되지 않았습니다. 번역을 도와주십시오
-
Insert the plastic opening tool underneath the CMOS battery and pry it up and away from the motherboard.
-
-
이 단계는 번역되지 않았습니다. 번역을 도와주십시오
-
Use the JIS #00 screwdriver to remove two 2.8 mm screws securing the display cable bracket to the motherboard.
-
Remove the display cable bracket from the device.
-
-
이 단계는 번역되지 않았습니다. 번역을 도와주십시오
-
Disconnect the daughterboard cable and the display cable using the plastic opening tool.
-
-
이 단계는 번역되지 않았습니다. 번역을 도와주십시오
-
Using the JIS #00 screwdriver, remove the single 5 mm screw securing the bracket to the motherboard.
-
Remove the metal bracket from the device.
-
-
이 단계는 번역되지 않았습니다. 번역을 도와주십시오
-
Disconnect the speaker cable from the motherboard using the plastic opening tool.
-
-
이 단계는 번역되지 않았습니다. 번역을 도와주십시오
-
Using the plastic opening tool, flip up the locking tab on the zero insertion force (ZIF) connector and disconnect the cable from the motherboard.
-
-
이 단계는 번역되지 않았습니다. 번역을 도와주십시오
-
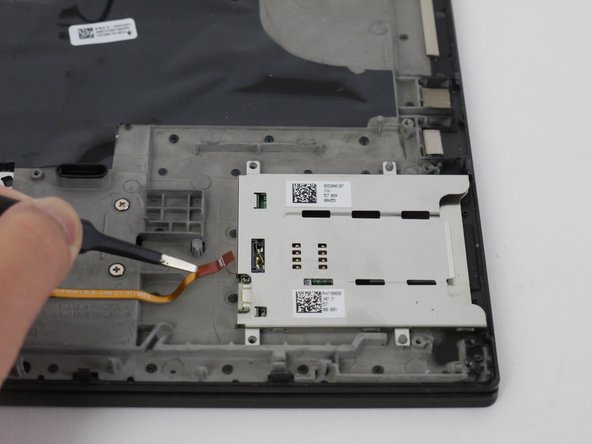
Using a plastic opening tool, disconnect the smartcard reader cable from the motherboard.
-
Using the same plastic opening tool, flip up the locking tab and disconnect the trackpad cable from the motherboard.
-
-
이 단계는 번역되지 않았습니다. 번역을 도와주십시오
-
Using the JIS #00 screwdriver, remove six 2.8 mm screws securing the motherboard to the device.
-
-
이 단계는 번역되지 않았습니다. 번역을 도와주십시오
-
Carefully grab the motherboard and lift it up slightly off of the device.
-
Disconnect the ZIF connector and remove the motherboard from the device.
-
-
이 단계는 번역되지 않았습니다. 번역을 도와주십시오
-
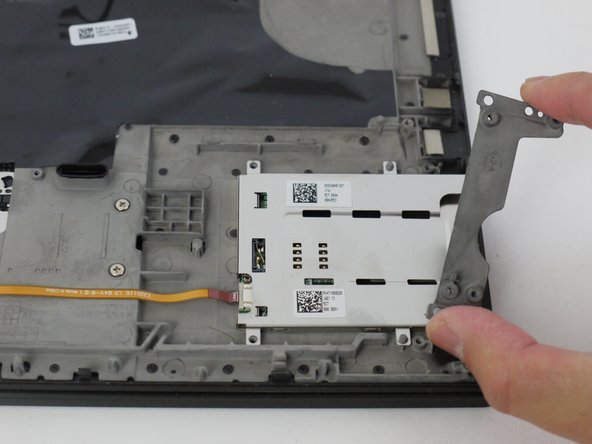
Using the JIS #00 screwdriver, remove the four 2.8 mm screws securing the smartcard reader and bracket to the device.
-


다른 한 분이 해당 안내서를 완성하였습니다.

