소개
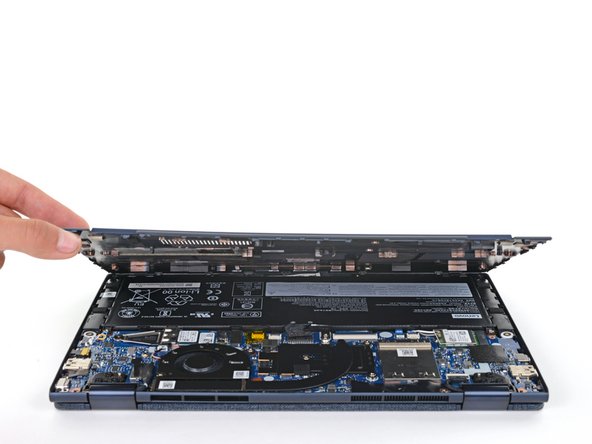
Use this guide to replace the SSD on your Lenovo Yoga 6 13ALC6.
Before you perform this repair, if at all possible, back up your existing SSD. If you are replacing the SSD where your operating system is installed, familiarize yourself with a disk cloning utility so you’ll be ready to migrate your data to the new SSD.
Be sure to completely power off and unplug your laptop. Make sure the laptop is not in standby, sleep, or hibernation mode.
필요한 것
-
-
Use a T5 Torx screwdriver to remove the six 7.2 mm screws securing the lower case.
-
-
-
Insert an opening pick between the lower case and the chassis at a hinge corner.
-
Pry up with the pick to release the clips securing the lower case.
-
Repeat the process on the other hinge corner.
-
-
-
Slide the pick along the right edge to release the clips securing the lower case.
-
-
-
Continue sliding the opening pick along the front and left edges to release the remaining clips.
-
-
-
-
Use the pointed end of a spudger to push each side of the battery connector until it comes out of the socket.
-
-
-
Pull the SSD out of its socket and remove it. Keep the SSD as parallel to the motherboard as possible when pulling on it.
-
-
-
For more information on how to install an M.2 SSD, check out this guide.
-
To reassemble your device, follow these instructions in reverse order.
Take your e-waste to an R2 or e-stewards certified recycler.
Repair didn't go as planned? Try some basic troubleshooting, or ask our Lenovo Yoga answers community for help.
To reassemble your device, follow these instructions in reverse order.
Take your e-waste to an R2 or e-stewards certified recycler.
Repair didn't go as planned? Try some basic troubleshooting, or ask our Lenovo Yoga answers community for help.
다른 한 분이 해당 안내서를 완성하였습니다.
댓글 한 개
Love how everyone says a 2280 won’t fit but the bracket all it does it converts the 2242 to fit in a 2280 slot lol. 2280 works just fine. Stuck an 8TB in mine.


