주요 콘텐츠로 건너뛰기

Logic Board Connectors

단지 전제 조건
이 가이드는 전제 조건 전용 가이드입니다! 이 가이드는 다른 절차의 일부이며 단독으로 사용할 수 없습니다.

필요한 것

  1. Logic Board Connectors, Disconnect the logic board: 1 단계, 이미지 2개 중 1개 Logic Board Connectors, Disconnect the logic board: 1 단계, 이미지 2개 중 2개
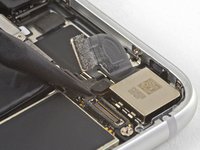
    • Use the flat end of a spudger to disconnect the camera cable connector by prying it straight up from its socket.

  2. Logic Board Connectors: 2 단계, 이미지 1개 중 1개
    이 단계에 사용된 도구:
    Standoff Screwdriver for iPhones
    $5.49
    • Remove the two screws securing the rear-facing camera bracket:

    • One 3.0 mm standoff screw

    • One 3.1 mm Phillips screw

    • Standoff screws are best removed using a standoff screwdriver or bit.

    • In a pinch, a small flathead screwdriver will do the job—but use extra caution to ensure it doesn't slip and damage surrounding components.

  3. Logic Board Connectors: 3 단계, 이미지 1개 중 1개
    • Remove the rear-facing camera bracket.

  4. Logic Board Connectors: 4 단계, 이미지 2개 중 1개 Logic Board Connectors: 4 단계, 이미지 2개 중 2개
    • Use the point of a spudger to disconnect the flash connector from its socket by prying it straight up.

  5. Logic Board Connectors: 5 단계, 이미지 1개 중 1개
    • Remove the two screws securing the upper cable bracket:

    • One 2.9 mm Phillips screw

    • One 1.3 mm Phillips screw

  6. Logic Board Connectors: 6 단계, 이미지 1개 중 1개
    • Remove the upper cable bracket.

  7. Logic Board Connectors: 7 단계, 이미지 2개 중 1개 Logic Board Connectors: 7 단계, 이미지 2개 중 2개
    • Use the flat end of a spudger to pry the upper cable connector up from its socket.

  8. Logic Board Connectors, Remove the top left antenna component: 8 단계, 이미지 1개 중 1개
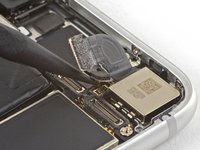
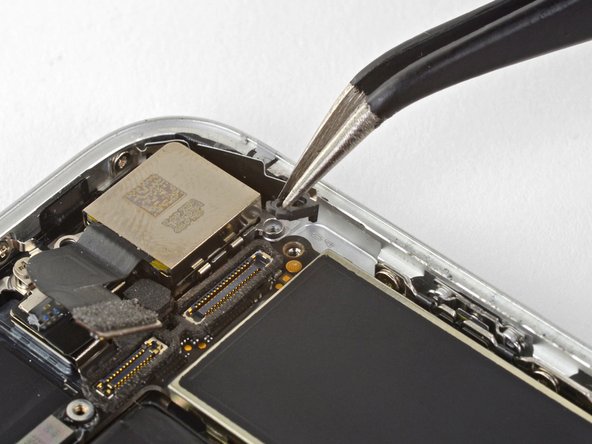
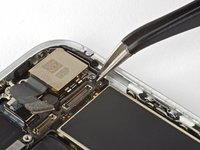
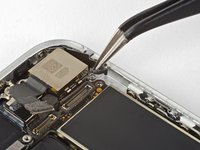
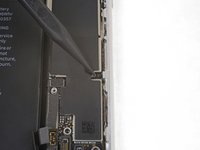
    • Remove the three Phillips 1.3 mm screws securing the top left antenna component.

  9. Logic Board Connectors: 9 단계, 이미지 1개 중 1개
    • Remove the 1.4 mm Phillips screw securing the antenna component to the top of edge of the case.

  10. Logic Board Connectors: 10 단계, 이미지 1개 중 1개
    • Remove the antenna component.

  11. Logic Board Connectors, Remove the top left grounding clip: 11 단계, 이미지 1개 중 1개
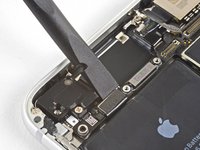
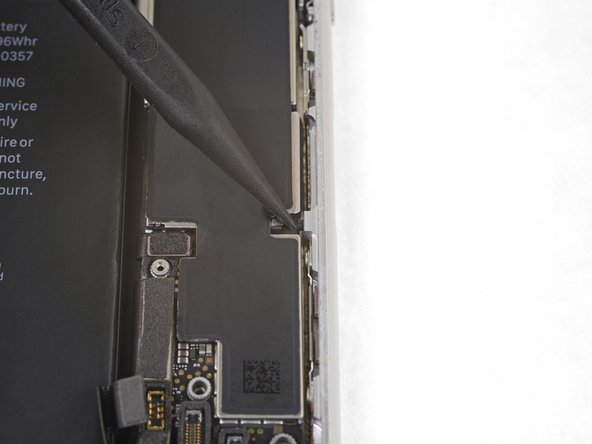
    • Remove the two Phillips screws securing the grounding clip at the top left edge of the logic board:

    • One 1.5 mm Phillips screw

    • One 2.6 mm Phillips screw

  12. Logic Board Connectors: 12 단계, 이미지 1개 중 1개
    • Remove the grounding clip.

  13. Logic Board Connectors, Unscrew the logic board: 13 단계, 이미지 1개 중 1개
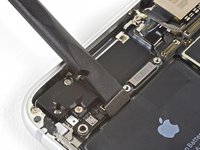
    • Remove the three screws securing the motherboard:

    • One 1.8 mm Phillips screw

    • One 2.5 mm standoff screw

    • One 2.2 mm standoff screw

  14. Logic Board Connectors: 14 단계, 이미지 2개 중 1개 Logic Board Connectors: 14 단계, 이미지 2개 중 2개
    이 단계에 사용된 도구:
    Tweezers
    $4.99
    • Use tweezers to gently bend the logic board grounding bracket out of the way.

  15. Logic Board Connectors: 15 단계, 이미지 2개 중 1개 Logic Board Connectors: 15 단계, 이미지 2개 중 2개
    • Use the point of a spudger to move the SIM card eject plunger out of the logic board's way.

결론

To reassemble your device, follow the above steps in reverse order.

Take your e-waste to an R2 or e-Stewards certified recycler.

Repair didn’t go as planned? Check out our Answers community for troubleshooting help.

작성자

4다른 기여자 명과 함께

Arthur Shi

회원 가입일: 01/03/18

313,701 평판

안내서 729개를 작성함

iFixit iFixit 회원

Staff

123 회원들

안내서 23,758개를 작성함

0가이드 댓글

댓글 쓰기

조회 통계:

지난 24시간: 2

지난 7일: 3

지난 30일: 8

전체 시간: 314