소개
Use this guide to remove and replace a keyswitch on the Logitech G915 TKL keyboard. A keyswitch may need to be replaced if the key is no longer registering inputs, and you've confirmed that the issue isn't the keycap.
Before using this guide, ensure that the issue with your key isn't due to a broken keycap or a buildup of dust or debris in the area around the key.
Steps 7 and 8 require you to desolder the broken keyswitch and solder a new one in place.
A Phillips #00 Screwdriver is required to complete this guide, as well as a soldering iron, solder, and a desoldering braid.
필요한 것
-
-
Remove all of the keycaps on the keyboard.
-
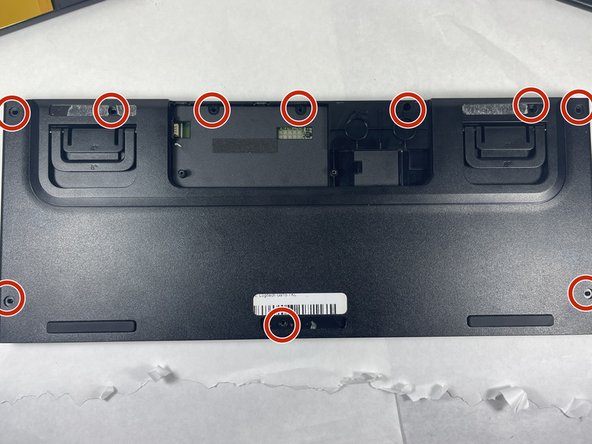
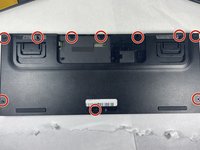
Unscrew the 2mm #00 Phillips screws circled in the picture provided.
-
-


To reassemble your device, follow these instructions in reverse order.
To reassemble your device, follow these instructions in reverse order.
다른 2명이 해당 안내서를 완성하였습니다.

팀

UMass Dartmouth, Team 3-6, Petersen Spring 2023 UMass Dartmouth, Team 3-6, Petersen Spring 2023 회원
UMASSD-PETERSEN-S23S3G6
4 회원들
안내서 15개를 작성함