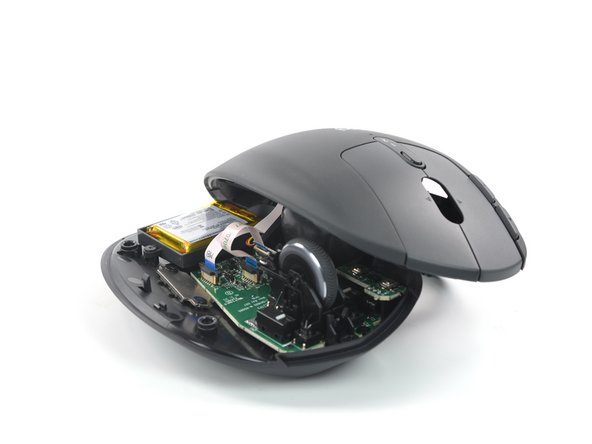
주요 콘텐츠로 건너뛰기

Logitech MX Ergo Battery Replacement

필요한 것

  1. Logitech MX Ergo Battery Replacement, Power off your mouse: 1 단계, 이미지 3개 중 1개 Logitech MX Ergo Battery Replacement, Power off your mouse: 1 단계, 이미지 3개 중 2개 Logitech MX Ergo Battery Replacement, Power off your mouse: 1 단계, 이미지 3개 중 3개
    • Before you begin, flip the mouse's power switch into the OFF position.

    • A red indicator should be visible beneath the switch.

    • Unplug all cables from your mouse.

    • Throughout your repair, it may be helpful to lay your mouse on a soft cloth to stabilize it and prevent damage while you work.

  2. Logitech MX Ergo Battery Replacement, Remove the cover: 2 단계, 이미지 2개 중 1개 Logitech MX Ergo Battery Replacement, Remove the cover: 2 단계, 이미지 2개 중 2개
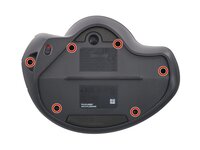
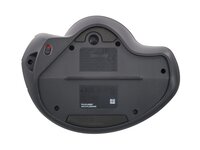
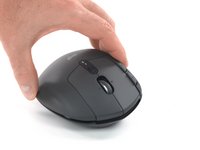
    • Remove the magnetic cover by pulling it away from the bottom of your mouse.

  3. Logitech MX Ergo Battery Replacement, Remove the case screws: 3 단계, 이미지 2개 중 1개 Logitech MX Ergo Battery Replacement, Remove the case screws: 3 단계, 이미지 2개 중 2개
    • Use a Torx T6 screwdriver to remove the six 5.7 mm-long screws securing the two halves of the mouse together.

  4. Logitech MX Ergo Battery Replacement, Remove the trackball: 4 단계, 이미지 3개 중 1개 Logitech MX Ergo Battery Replacement, Remove the trackball: 4 단계, 이미지 3개 중 2개 Logitech MX Ergo Battery Replacement, Remove the trackball: 4 단계, 이미지 3개 중 3개
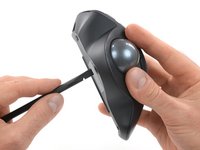
    • Insert a spudger into the hole on the bottom of the mouse, beneath the trackball.

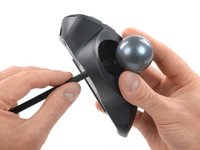
    • Use the spudger to push the trackball out of its recess.

    • Remove the trackball.

  5. Logitech MX Ergo Battery Replacement, Release the plastic clips: 5 단계, 이미지 3개 중 1개 Logitech MX Ergo Battery Replacement, Release the plastic clips: 5 단계, 이미지 3개 중 2개 Logitech MX Ergo Battery Replacement, Release the plastic clips: 5 단계, 이미지 3개 중 3개
    • Clips around the perimeter of the mouse case hold the two halves together.

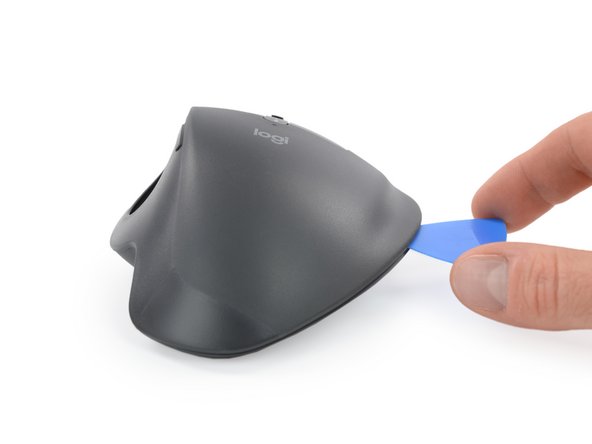
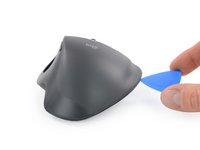
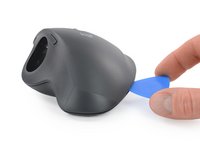
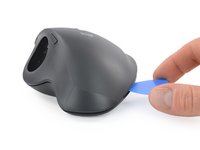
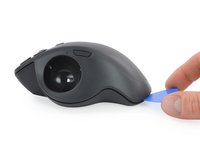
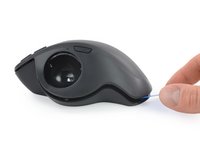
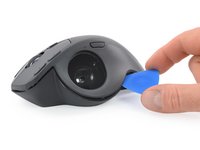
    • Insert the tip of an opening pick into the seam between the two halves, near the middle of the right edge.

    • Twist the opening pick to release the plastic clip.

  6. Logitech MX Ergo Battery Replacement: 6 단계, 이미지 2개 중 1개 Logitech MX Ergo Battery Replacement: 6 단계, 이미지 2개 중 2개
    • Slide the opening pick along the seam until it's about half way to the rear of the mouse.

    • Twist the pick to release the plastic clip.

  7. Logitech MX Ergo Battery Replacement: 7 단계, 이미지 2개 중 1개 Logitech MX Ergo Battery Replacement: 7 단계, 이미지 2개 중 2개
    • Slide the opening pick all the way to the rear the mouse.

    • Twist the pick to release the plastic clip.

  8. Logitech MX Ergo Battery Replacement: 8 단계, 이미지 2개 중 1개 Logitech MX Ergo Battery Replacement: 8 단계, 이미지 2개 중 2개
    • Slide the opening pick to the middle of the left edge, next to the trackball recess.

    • Twist the pick to release the plastic clip.

  9. Logitech MX Ergo Battery Replacement, Reposition the top half: 9 단계, 이미지 3개 중 1개 Logitech MX Ergo Battery Replacement, Reposition the top half: 9 단계, 이미지 3개 중 2개 Logitech MX Ergo Battery Replacement, Reposition the top half: 9 단계, 이미지 3개 중 3개
    • Don't completely separate the two halves yet—they're still connected by a delicate cable.

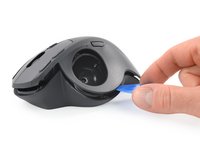
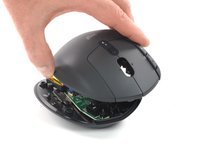
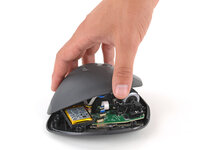
    • Gently lift the top half and place it to the left of the mouse so you can access the internals.

    • Be careful not to strain any of the cables inside the mouse.

  10. Logitech MX Ergo Battery Replacement, Disconnect the interconnect cable: 10 단계, 이미지 3개 중 1개 Logitech MX Ergo Battery Replacement, Disconnect the interconnect cable: 10 단계, 이미지 3개 중 2개 Logitech MX Ergo Battery Replacement, Disconnect the interconnect cable: 10 단계, 이미지 3개 중 3개
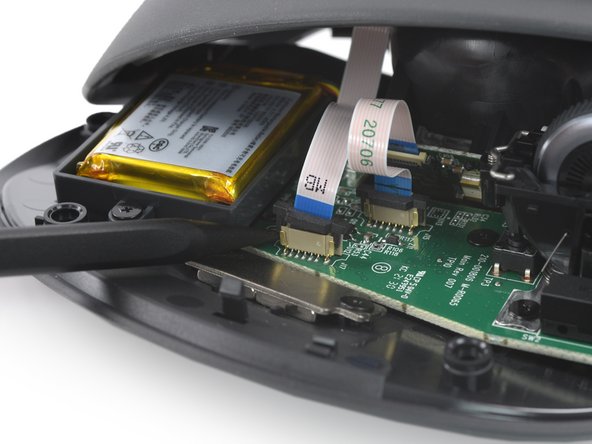
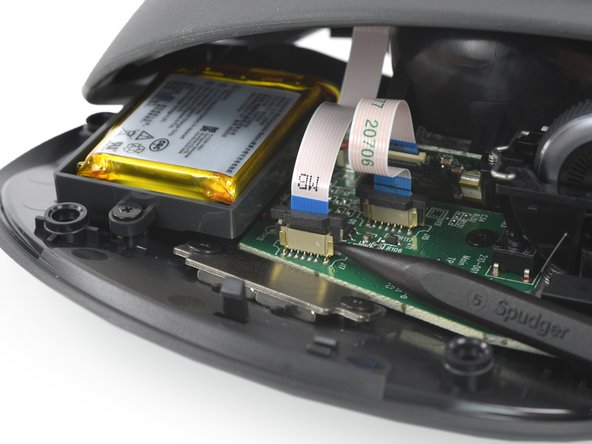
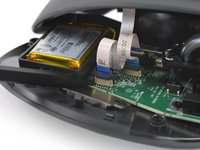
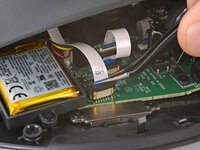
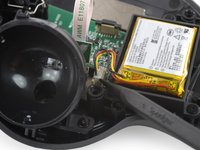
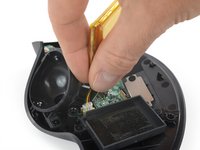
    • Use the point of a spudger to gently lift alternating sides of the black sliding latch on the interconnect cable socket.

    • You should feel the latch pop into the unlocked position. Don't push too far, or the latch may come completely off the connector.

  11. Logitech MX Ergo Battery Replacement: 11 단계, 이미지 2개 중 1개 Logitech MX Ergo Battery Replacement: 11 단계, 이미지 2개 중 2개
    • Use tweezers or your fingers to pull the interconnect cable straight up and out of its socket.

  12. Logitech MX Ergo Battery Replacement, Remove the top half of the mouse: 12 단계, 이미지 2개 중 1개 Logitech MX Ergo Battery Replacement, Remove the top half of the mouse: 12 단계, 이미지 2개 중 2개
    • Lift the top half of the mouse straight up and remove it.

  13. Logitech MX Ergo Battery Replacement, Disconnect the battery: 13 단계, 이미지 2개 중 1개 Logitech MX Ergo Battery Replacement, Disconnect the battery: 13 단계, 이미지 2개 중 2개
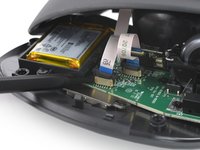
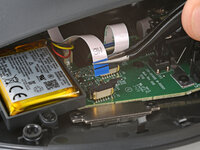
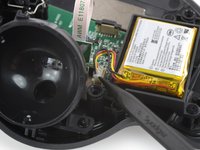
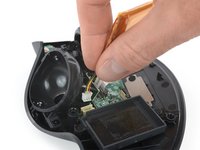
    • Use the pointed end of a spudger to push up and the battery connector, loosening it in its socket.

    • You don't need to push the connector completely out of its socket yet—you'll do so in a few steps.

  14. Logitech MX Ergo Battery Replacement, Pry out the battery: 14 단계, 이미지 3개 중 1개 Logitech MX Ergo Battery Replacement, Pry out the battery: 14 단계, 이미지 3개 중 2개 Logitech MX Ergo Battery Replacement, Pry out the battery: 14 단계, 이미지 3개 중 3개
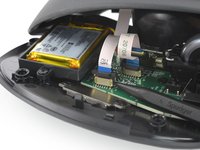
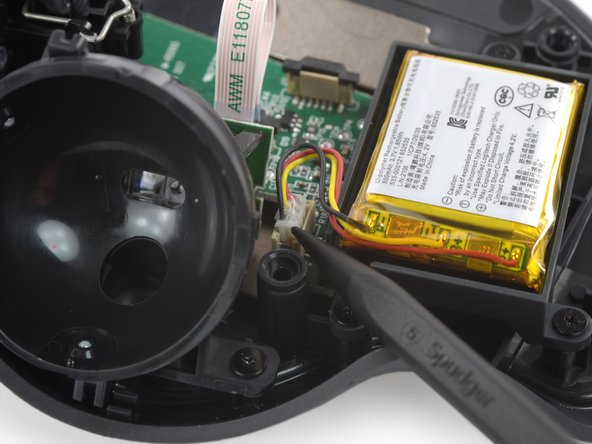
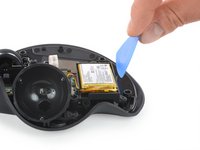
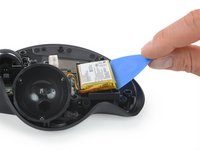
    • Insert the long edge of an opening pick between the long edge of the battery and its housing, at the side opposite the battery cable.

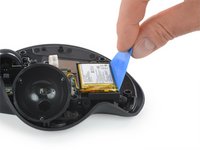
    • Use your opening pick to pry up the battery and separate its adhesive. Apply steady, constant force and slide the pick farther under the battery as necessary.

    • Make sure you push the pick underneath the battery and not into it. Don't bend or deform the battery.

  15. Logitech MX Ergo Battery Replacement: 15 단계, 이미지 2개 중 1개 Logitech MX Ergo Battery Replacement: 15 단계, 이미지 2개 중 2개
    • Use your fingers to lift the battery out of its housing.

  16. Logitech MX Ergo Battery Replacement, Remove the battery: 16 단계, 이미지 3개 중 1개 Logitech MX Ergo Battery Replacement, Remove the battery: 16 단계, 이미지 3개 중 2개 Logitech MX Ergo Battery Replacement, Remove the battery: 16 단계, 이미지 3개 중 3개
    이 단계에 사용된 도구:
    Tesa 61395 Tape
    $2.99
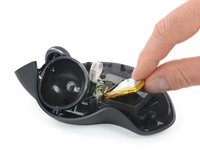
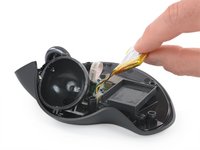
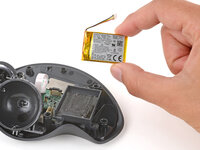
    • Use your fingers to grip the battery cables as close to the connector as possible and pull the connector straight up and out of its socket.
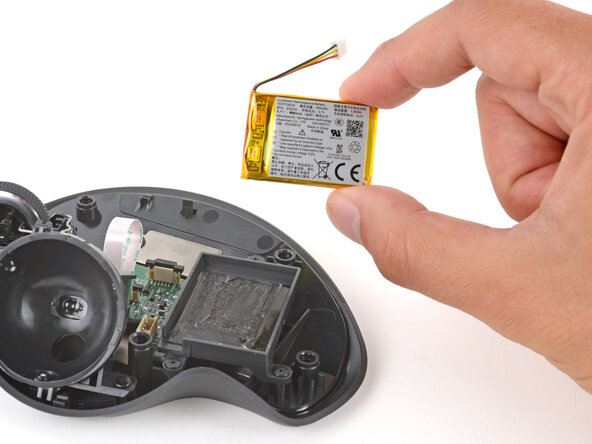
    • Remove the battery.

    • During reassembly:

    • Never install a deformed or damaged battery, as doing so is a potential safety hazard. Replace it with a new battery.

    • If the battery adhesive is still sticky, you can reuse it. Otherwise, remove all the old battery adhesive.

    • If your new battery has adhesive pre-installed, remove the plastic liner to expose the adhesive. Otherwise, apply strips of thin, double-sided tape to the battery well (not directly to the battery) where the old adhesive was.

    • Firmly press the battery into place, making sure the cables are on the side closest to their socket.

결론

Compare your new replacement part to the original part—you may need to transfer remaining components or remove adhesive backings from the new part before you install it.

To reassemble your device, follow these instructions in reverse order.

Repair didn’t go as planned? Try some basic troubleshooting, or ask our Answers community for help.

Reuse or Recycle—Never put discarded electronic parts in household waste. Visit Logitech Recycling to find your nearest recycling points, including the option to mail back old devices to Logitech for free if there’s no convenient solution in your area. You can also take your e-waste to any R2 or e-Stewards certified recycler. And don’t let good working parts or repaired devices die a slow death in your sock drawer—pass them along to someone who can use them.

Share your experience—Leave a comment here or send your feedback directly to Logitech at repair@logitech.com to help shape future repair guides and product design.

다른 17명이 해당 안내서를 완성하였습니다.

작성자

5다른 기여자 명과 함께

Adriana Zwink

회원 가입일: 12/18/19

62,471 평판

안내서 167개를 작성함

iFixit iFixit 회원

Staff

123 회원들

안내서 23,746개를 작성함

7가이드 댓글

This guide is fantastic! It was super easy to fix! Thanks!

Corey Trueman - 답글

Thank you for this !! Visited this site before for other tutorials you guys are great. This was easy to follow worked good for me.

DJSan - 답글

Its a very thorough explinations and guide except the most important point.

Where to buy the new replacement battery.

Jacob Bornman - 답글

Those are very well-done instructions. The new battery installation went very well. Thanks for the help.

Lyle Ellingson - 답글

hi where did you buy the battery?

Yanna -

댓글 쓰기

조회 통계:

지난 24시간: 13

지난 7일: 95

지난 30일: 326

전체 시간: 18,001