소개
Use this guide to replace a failed AirPort/Bluetooth card. Note that the the airport antenna cables in the Macbook Air 11.6 inch 2011 model are longer than that of the 2010 model. If you're thinking of an easy swap of screen assembly between these two models, it will not work.
필요한 것
-
이 단계에 사용된 도구:P5 Pentalobe Screwdriver Retina MacBook Pro and Air$5.99
-
Remove the following ten screws:
-
Two 8 mm 5-point Pentalobe screws
-
Eight 2.5 mm 5-point Pentalobe screws
-
-
-
-
Use the flat end of a spudger to pry both short sides of the battery connector upward to disconnect it from its socket on the logic board.
-
Bend the battery cable slightly away from the logic board so the connector will not accidentally contact its socket.
-
-
-
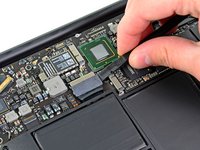
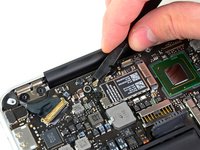
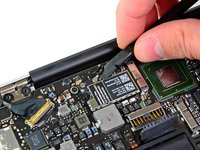
Use the flat end of a spudger to pry both antenna connectors up from their sockets on the AirPort/Bluetooth card.
-


To reassemble your device, follow these instructions in reverse order.
다른 17명이 해당 안내서를 완성하였습니다.

1가이드 댓글
HI, I am an ex mac genius who was a genius at apple for 5 years. Please add the following tip to the above and any mac where the battery has no hard casing. The first thing we had to do was to add a plastic shield over the battery as it is not shielded at all. Any puncture of that battery by a screw or screw driver will cause and explosion of the battery. So please take care to install a plastic shield before working on the mac. Take the back off, install the shield. At apple we had specific shields that fit the batteries exactly. Try to get these or at the very least tape a protective plastic sheild that covers the entire battery before working. If it does explode we had a safe with a bag and some sort of solution in it. Be careful with all macs that have an exposed style battery. They did this to make the computers thinner, but the shield that was removed to make this happen, must be replaced when working on the machines. Thank you.